

Provisioning K3s clusters using custom cluster layouts in HPE Private Cloud Enterprise
September 26, 2025This blog post outlines the steps to create a custom cluster layout for provisioning a Kubernetes (K8s) cluster using K3s, a lightweight K8s distribution, within the HPE Private Cloud Enterprise environment. By utilizing a list of key Morpheus components, such as Node Type, File Template, Option List, Input, Task, Workflow, and Cluster Layout, a custom cluster layout that incorporates the K3s install script can be created. Once configured, this custom cluster layout enables provisioning and management of K3s clusters directly from the the Morpheus Clusters page.
Like the Morpheus Kubernetes Service (MKS), K3s clusters benefit from a curated set of built-in operations, including kubeconfig download, cluster scaling, K3s version upgrade, and cluster cleanup. These integrated capabilities simplify and streamline cluster management tasks, making K8s administration more efficient and user-friendly in HPE Private Cloud Enterprise.
Overview
HPE Private Cloud Enterprise is a fully managed Infrastructure as a Service (IaaS) offering that brings a modern, cloud-like experience to on-premises environments. It combines the flexibility of hybrid cloud with the enterprise-grade control and security required by enterprise IT.
Through the integration with HPE Morpheus Enterprise, which serves as the cloud management and orchestration layer, HPE Private Cloud Enterprise offers a unified self-service interface for provisioning virtual machines (VMs), creating containers, and deploying applications, all governed by role-based access control (RBAC). This integration now supports the Morpheus Kubernetes Service (MKS), enabling users to provision and manage MKS clusters using a set of prebuilt MKS cluster layouts based on the native K8s distribution. To learn more about provisioning MKS clusters in HPE Private Cloud Enterprise, refer to the blog post Provisioning MKS clusters in HPE Private Cloud Enterprise. Additionally, users can define custom cluster layouts to provision K8s clusters using third-party K8s distributions such as Amazon EKS Anywhere or K3s.
The following sections will guide you through the process of creating a custom cluster layout and using it to provision a K3s cluster within HPE Private Cloud Enterprise. Once the cluster is provisioned, a curated list of built-in operations becomes available from the cluster's Actions menu. Among these, you will learn how to upgrade K3s version using one of the supported actions. These integrated features streamline key cluster management tasks, making cluster administration easier, faster, and more consistent.
Prerequisites
Ensure that the following prerequisites are fulfilled:
- Access to an HPE Private Cloud Enterprise workspace with the 'Private Cloud Tenant Owner' role, allowing administrative actions in the Virtual Machines service.
- The group named 'Department B Group' and the network 'Green_network' have already been created.
- HPE Morpheus Enterprise running version 8.0.5 or higher.
- The MKS feature is enabled in HPE Private Cloud Enterprise. You can confirm the presence of the Clusters menu from the Infrastructure tab.
Create custom cluster layout
To create a custom cluster layout, you need to log in to HPE GreenLake Cloud and launch the HPE Morpheus Enterprise Dashboard. For a detailed walkthrough of this process, refer to the blog post Provisioning MKS clusters in HPE Private Cloud Enterprise.
1. Create node types
From the HPE Morpheus Enterprise Dashboard, perform the following steps to create node types for both the K3s master and worker nodes.
Create a K3s primary master node type
- Navigate to Library > Blueprints > Node Types tab. Click +Add.
- Enter NAME as k3s-primary-master, choose Virtual Image option and select VM IMAGE as Morpheus Ubuntu 20.04 20250218 (vmdk) - 1178. Click Save changes.

Create a K3s secondary master node type
- Navigate to Library > Blueprints > Node Types tab. Click +Add.
- Enter NAME as k3s-secondary-master, choose Virtual Image option and select VM IMAGE as Morpheus Ubuntu 20.04 20250218 (vmdk) - 1178. Click Save changes.

Create a K3s worker node type
- Navigate to Library > Blueprints > Node Types tab. Click +Add.
- Enter NAME as k3s worker, choose Virtual Image option and select VM IMAGE as Morpheus Ubuntu 20.04 20250218 (vmdk) - 1178. Click Save changes.

2. Create file template
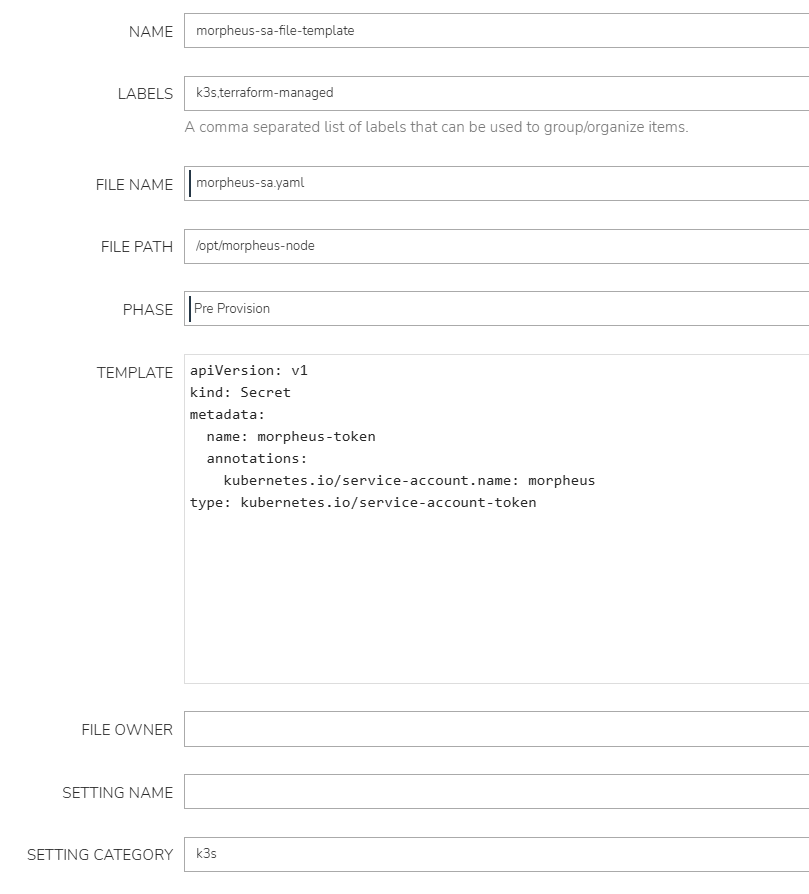
Create a file template with K8s Secret YAML
- Navigate to Library > Templates > File Templates tab. Click +Add.
- Enter NAME and FILE NAME, specify FILE PATH, select PHASE and provide TEMPLATE. Click Save changes.
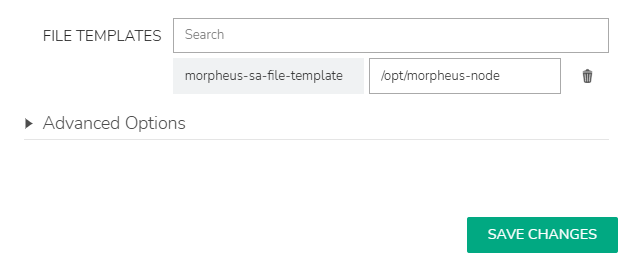
Configure the K3s primary master node
- Navigate to Library > Blueprints > Node Types tab. Click Edit to k3s-primary-master.
- Under VMware VM Options, search and add morpheus-sa-file-template to FILE TEMPLATES. Click Save changes.
3. Create option lists
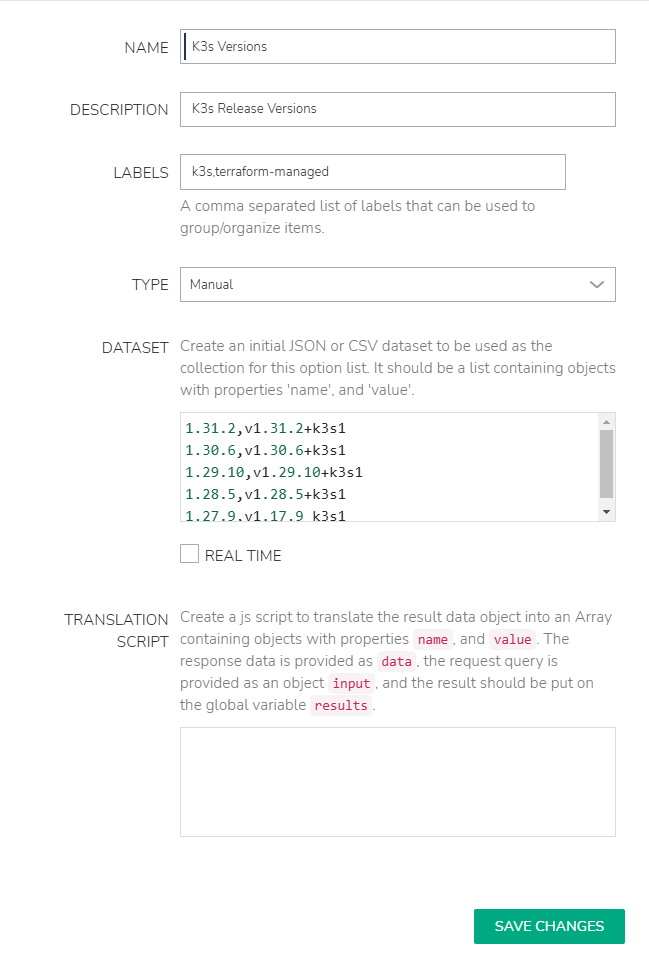
Create an option list for K3s versions
- Navigate to Library > Options > Option Lists tab. Click +Add.
- Enter NAME as K3s Versions, select TYPE as Manual and provide DATASET. Click Save changes.
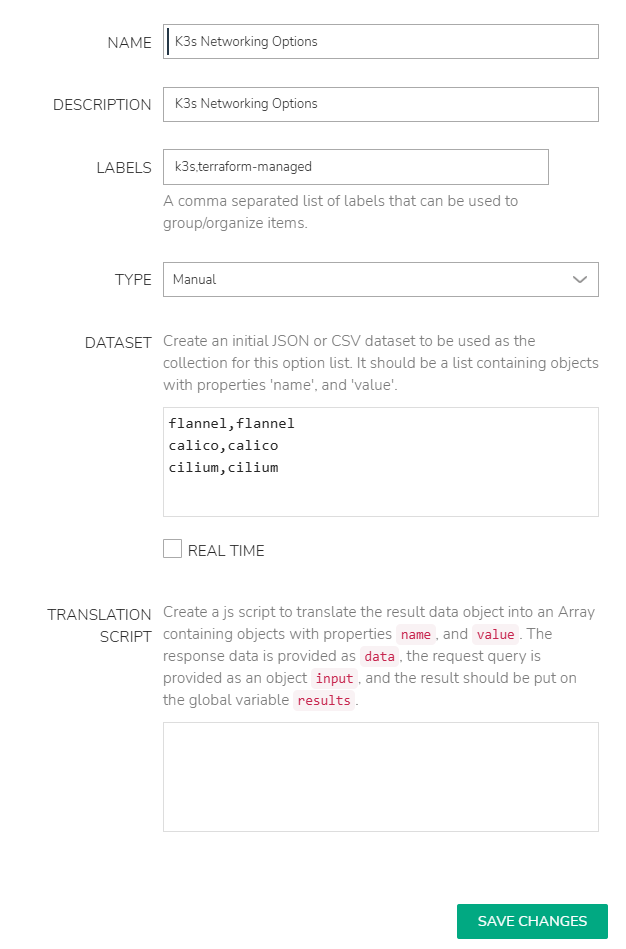
Create an option list for K3s networking
- Navigate to Library > Options > Option Lists tab. Click +Add.
- Enter NAME as K3s Networking Options, select TYPE as Manual and provide DATASET. Click Save changes.
4. Create inputs
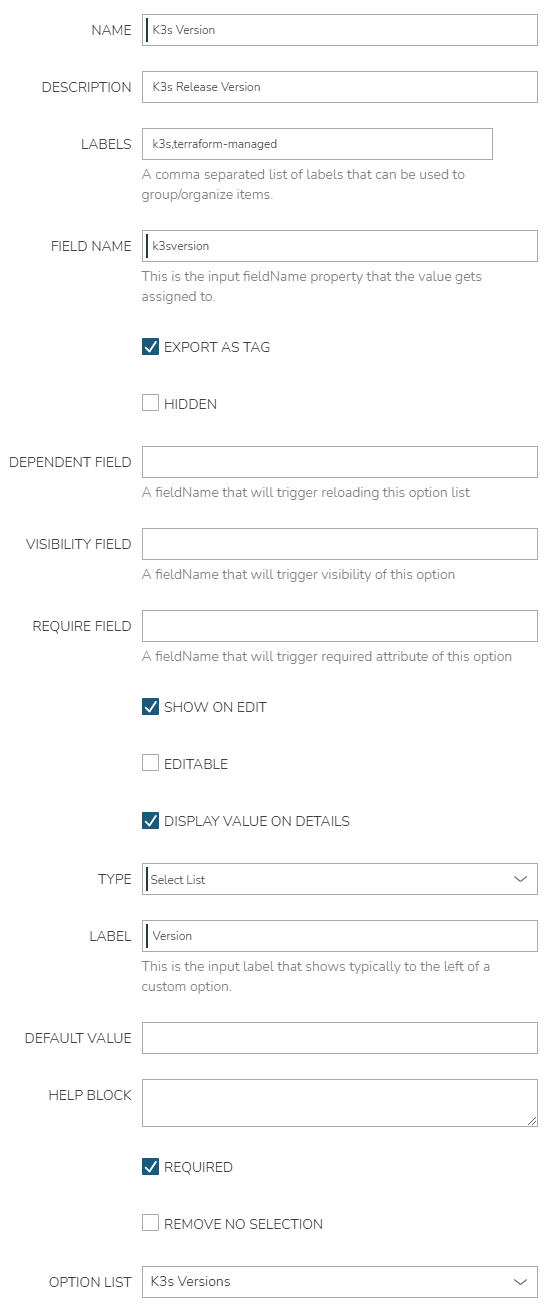
Create an input for K3s version
- Navigate to Library > Options > Inputs tab. Click +Add.
- Enter NAME as K3s Version and FIELD NAME as k3sversion, set REQUIRE FIELD and HELP BLOCK, select TYPE as Select List with LABEL as Version and choose OPTION LIST as K3s Versions. Click Save changes.
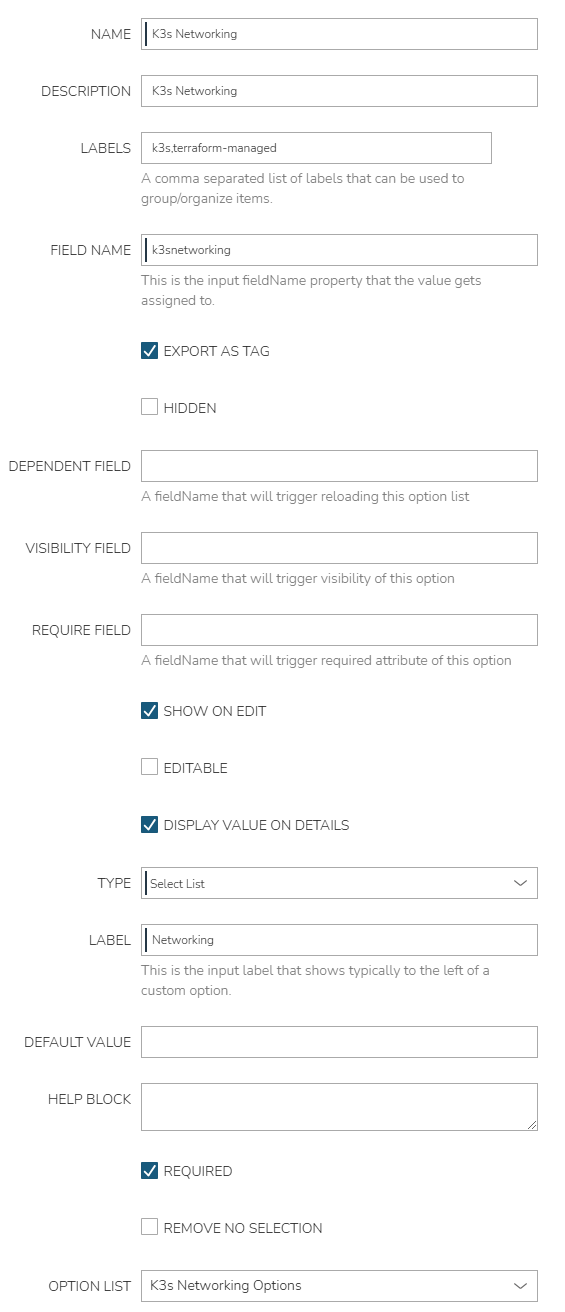
Create an input for K3s networking
- Navigate to Library > Options > Inputs tab. Click +Add.
- Enter NAME as K3s Networking and FIELD NAME as k3snetworking, set REQUIRE FIELD and HELP BLOCK, select TYPE as Select List with LABEL as Networking and choose OPTION LIST as K3s Networking Options. Click Save changes.
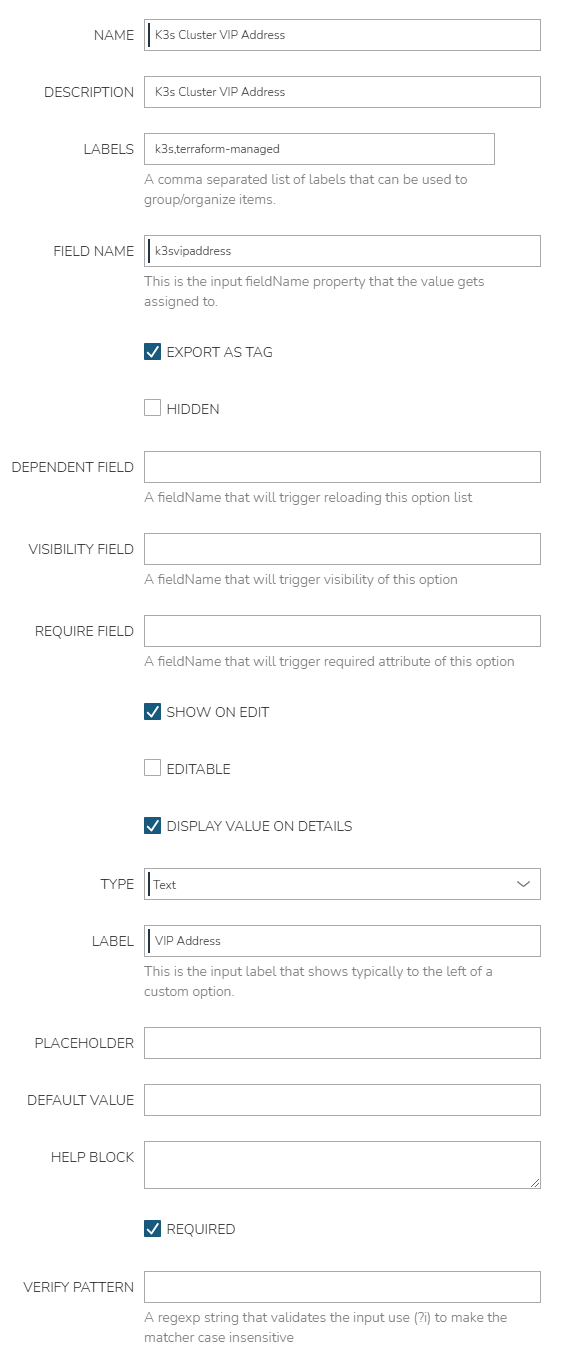
Create an input for K3s cluster VIP address
- Navigate to Library > Options > Inputs tab. Click +Add.
- Enter NAME as K3s Cluster VIP Address and FIELD NAME as k3svipaddress, set REQUIRE FIELD and HELP BLOCK, and select TYPE as Text with LABEL as VIP Address. Click Save changes.
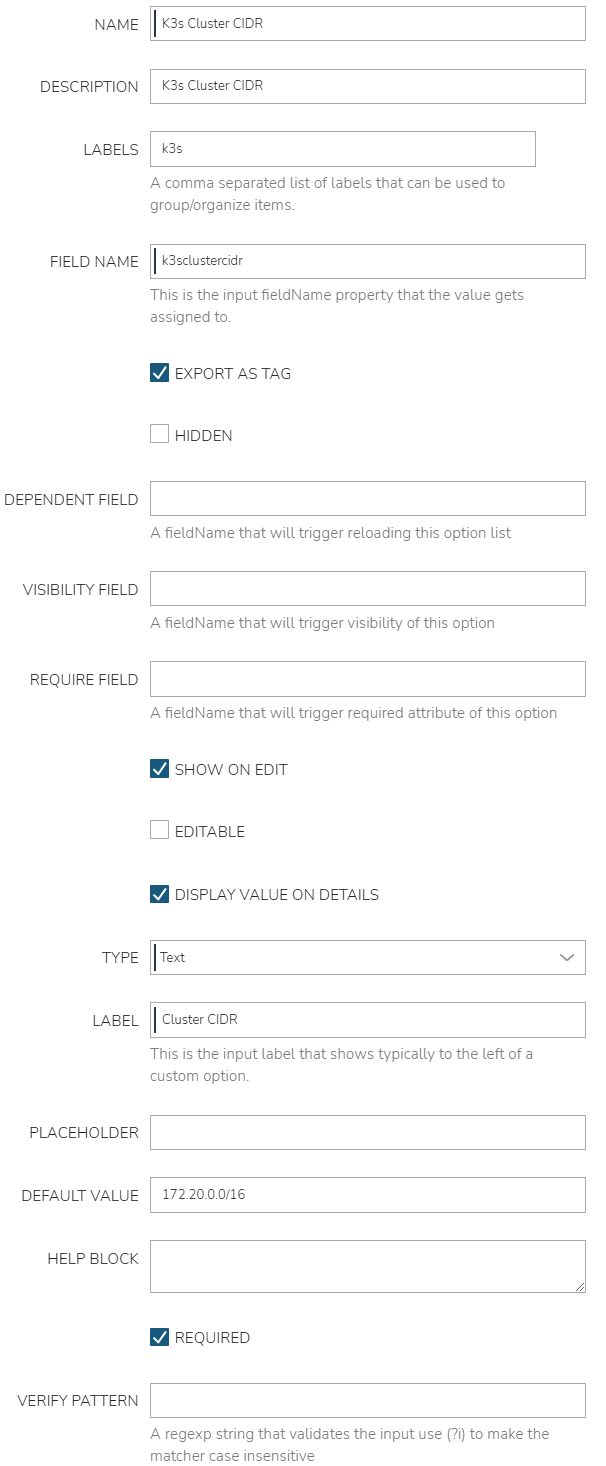
Create an input for K3s cluster Classless Inter-Domain Routing (CIDR)
- Navigate to Library > Options > Inputs tab. Click +Add.
- Enter NAME as K3s Cluster CIDR and FIELD NAME as k3sclustercidr, set REQUIRE FIELD and HELP BLOCK, and select TYPE as Text with LABEL as Cluster CIDR. Click Save changes.
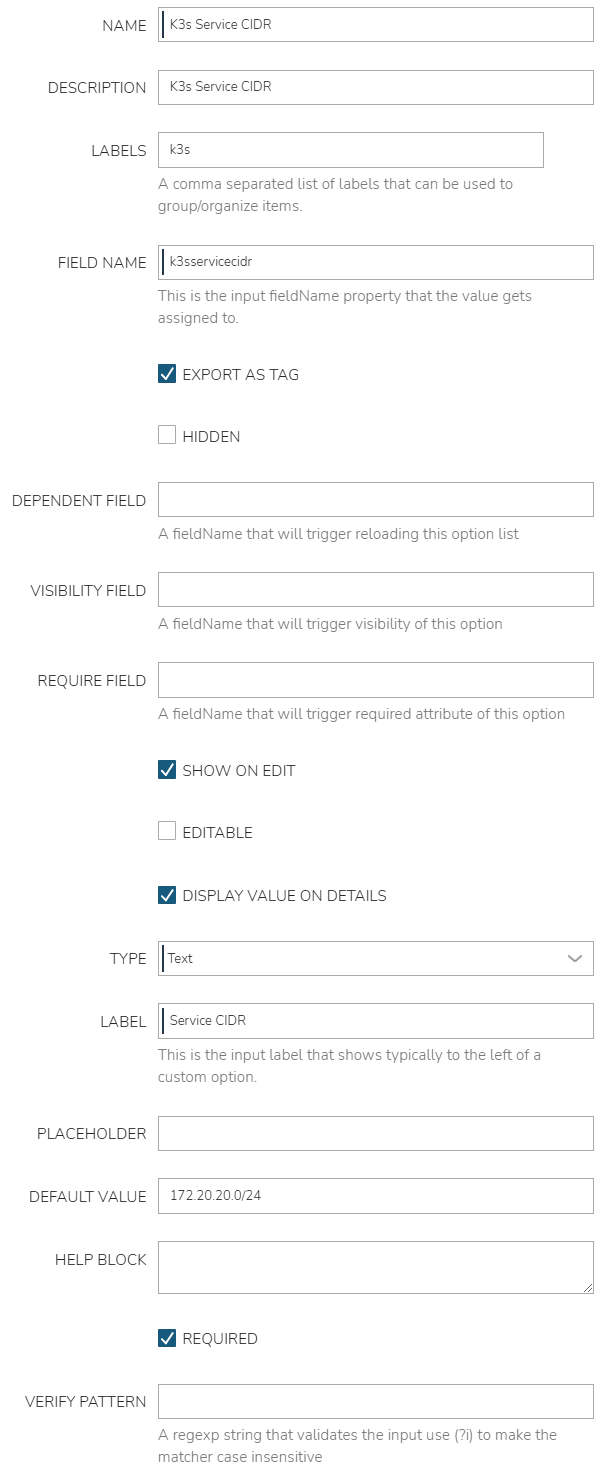
Create an input for K3s service CIDR
- Navigate to Library > Options > Inputs tab. Click +Add.
- Enter NAME as K3s Service CIDR and FIELD NAME as k3sservicecidr, set REQUIRE FIELD and HELP BLOCK, and select TYPE as Text with LABEL as Service CIDR. Click Save changes.
5. Create automation task and workflow
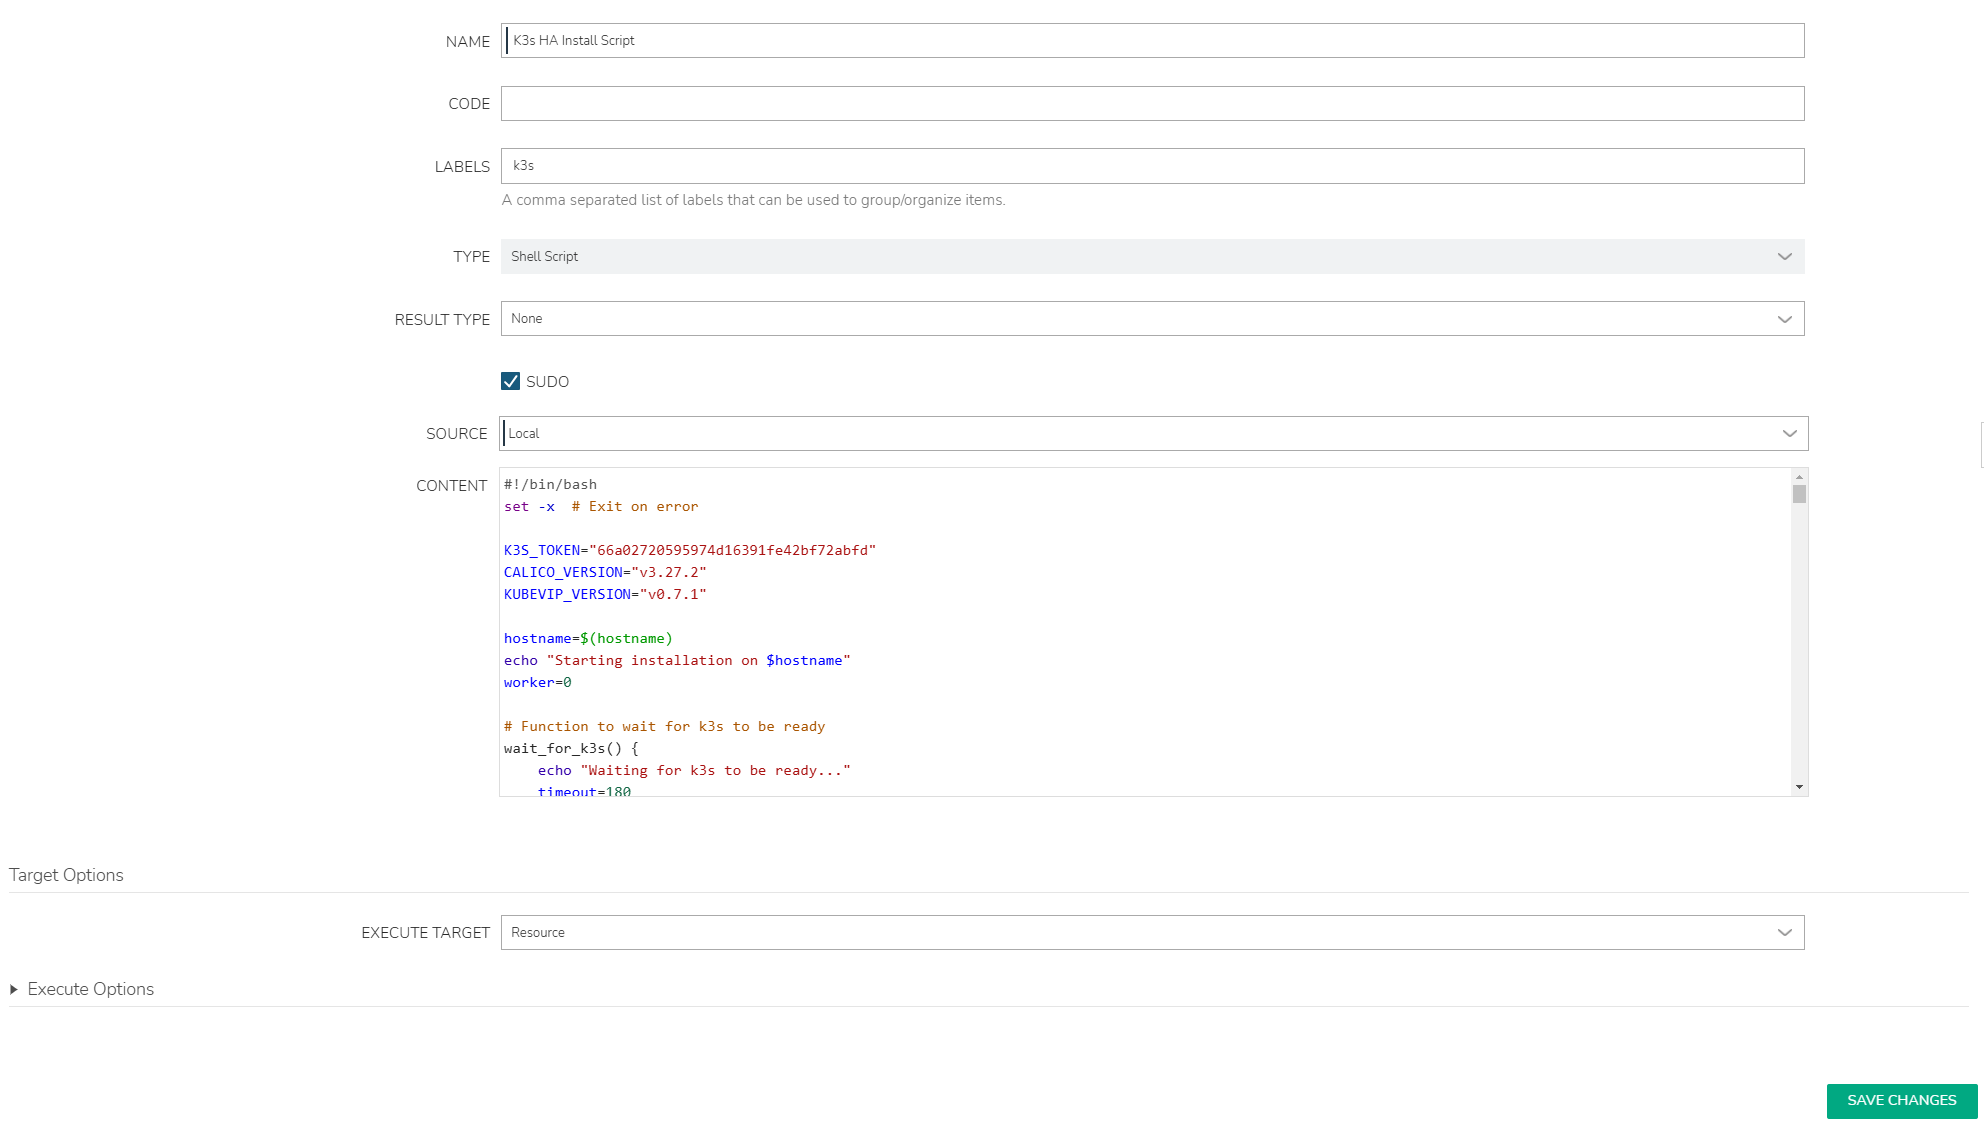
Create an automation task using K3s install script
- Navigate to Library > Automation > Tasks tab. Click +Add.
- Enter NAME as K3s HA Install Script, select TYPE as Shell Script, choose SUDO option, select SOURCE as Local, and provide CONTENT. Click Save changes.
Note: The sample K3s HA install script is available from the GitHub repository.
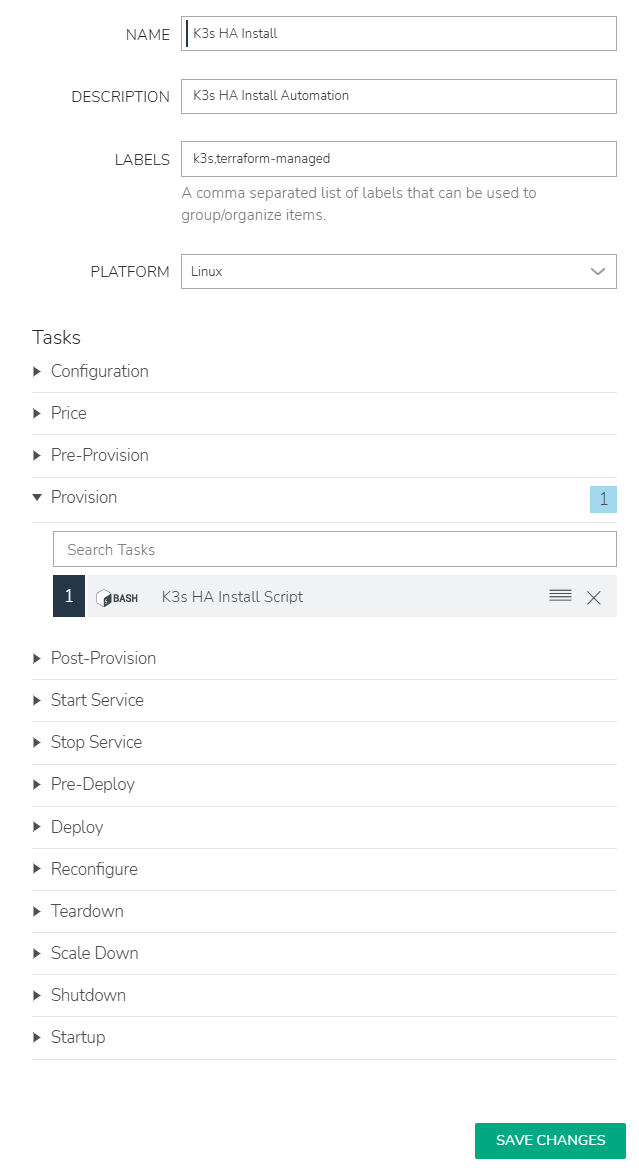
Create an automation workflow
- Navigate to Library > Automation > Workflows tab. Click +Add.
- Enter NAME as K3s HA Install, select PLATFORM as Linux, search and add K3s HA Install Script under Provision. Click Save changes.
6. Create K3s custom cluster layouts
The following section outlines the creation of two custom cluster layouts: one for a K3s high-availability (HA) setup and another for a single-master K3s configuration.
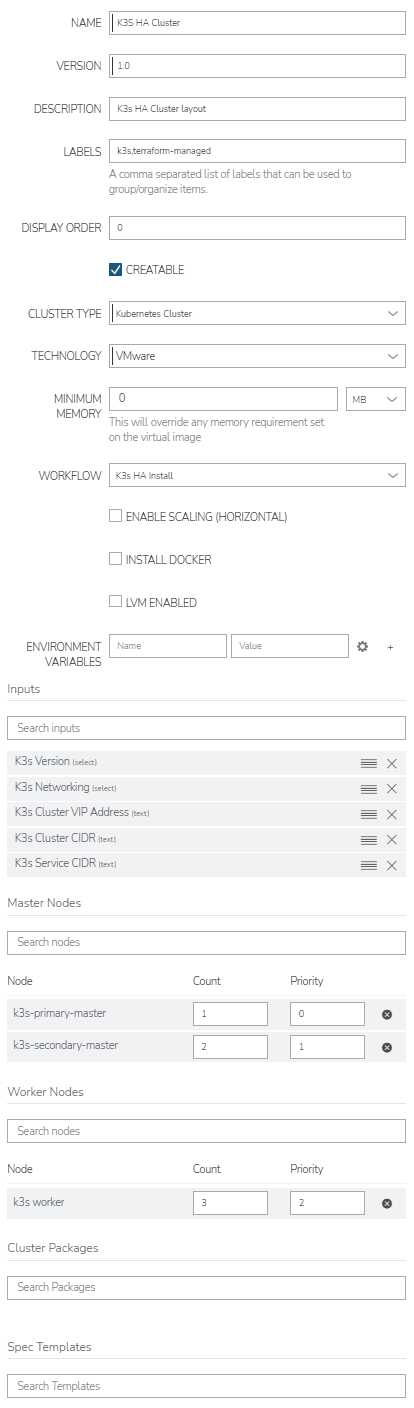
Create a K3s HA cluster layout
- Navigate to Library > Blueprints > Cluster Layouts tab. Click +Add.
- Enter NAME as K3S HA Cluster, select CLUSTER TYPE as Kubernetes Cluster and TECHNOLOGY as VMware, search and add Inputs, Master Nodes and Worker Nodes. Click Save changes.
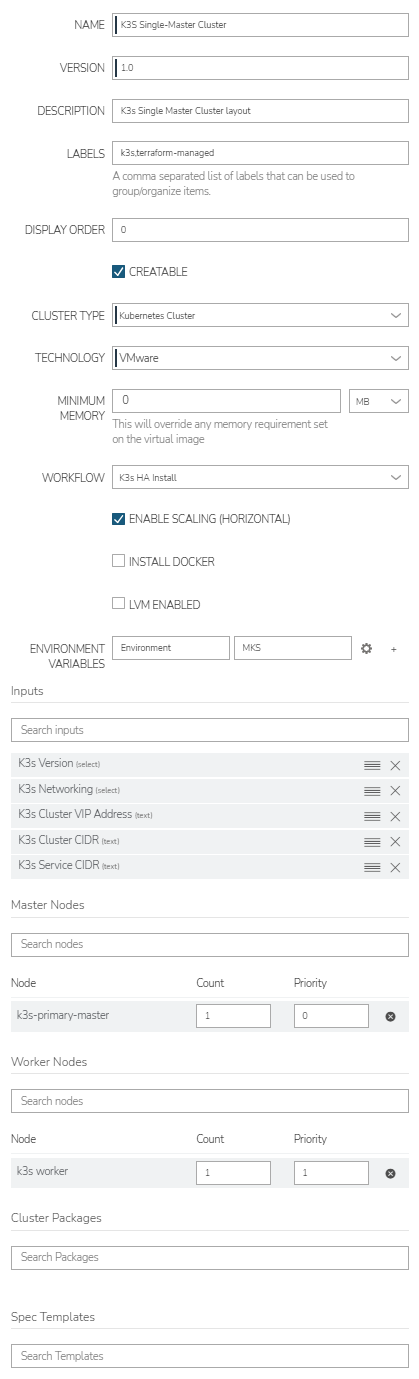
Create a single-master K3s cluster layout
- Navigate to Library > Blueprints > Cluster Layouts tab. Click +Add.
- Enter NAME as K3S Single-Master Cluster, select CLUSTER TYPE as Kubernetes Cluster and TECHNOLOGY as VMware, search and add Inputs, Master Nodes and Worker Nodes. Click Save changes.
Provision a K3s cluster
The following section outlines the process to provision a K3s cluster using the custom cluster layout K3S HA Cluster.
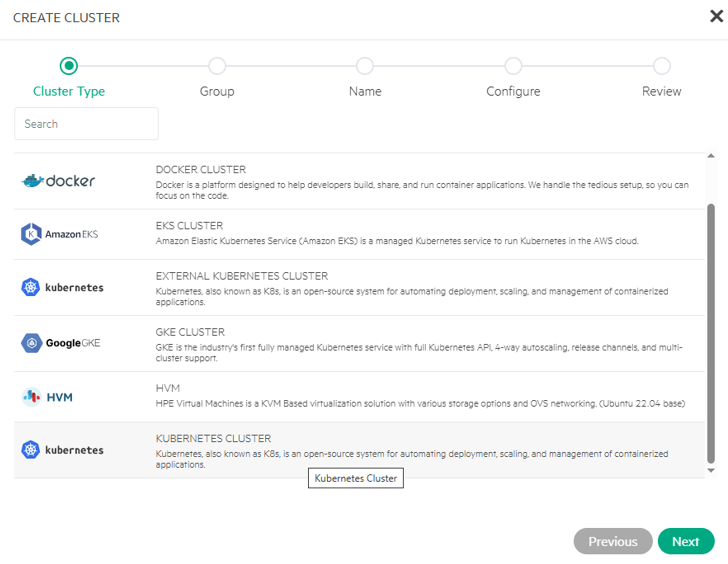
- Navigate to Infrastructure > Clusters. Click +Add Cluster.
- Select Cluster Type as KUBERNETES CLUSTER. Click Next.
- Select Group as Department B Group. Click Next.

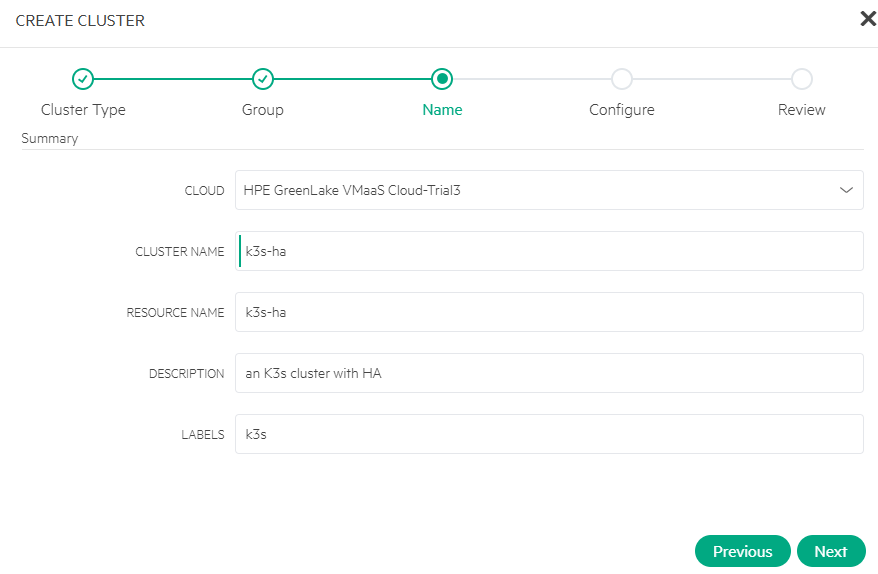
- Select CLOUD, enter CLUSTER NAME as k3s-ha, and configure optional DESCRIPTION, RESOURCE NAME and LABELS. Click Next.
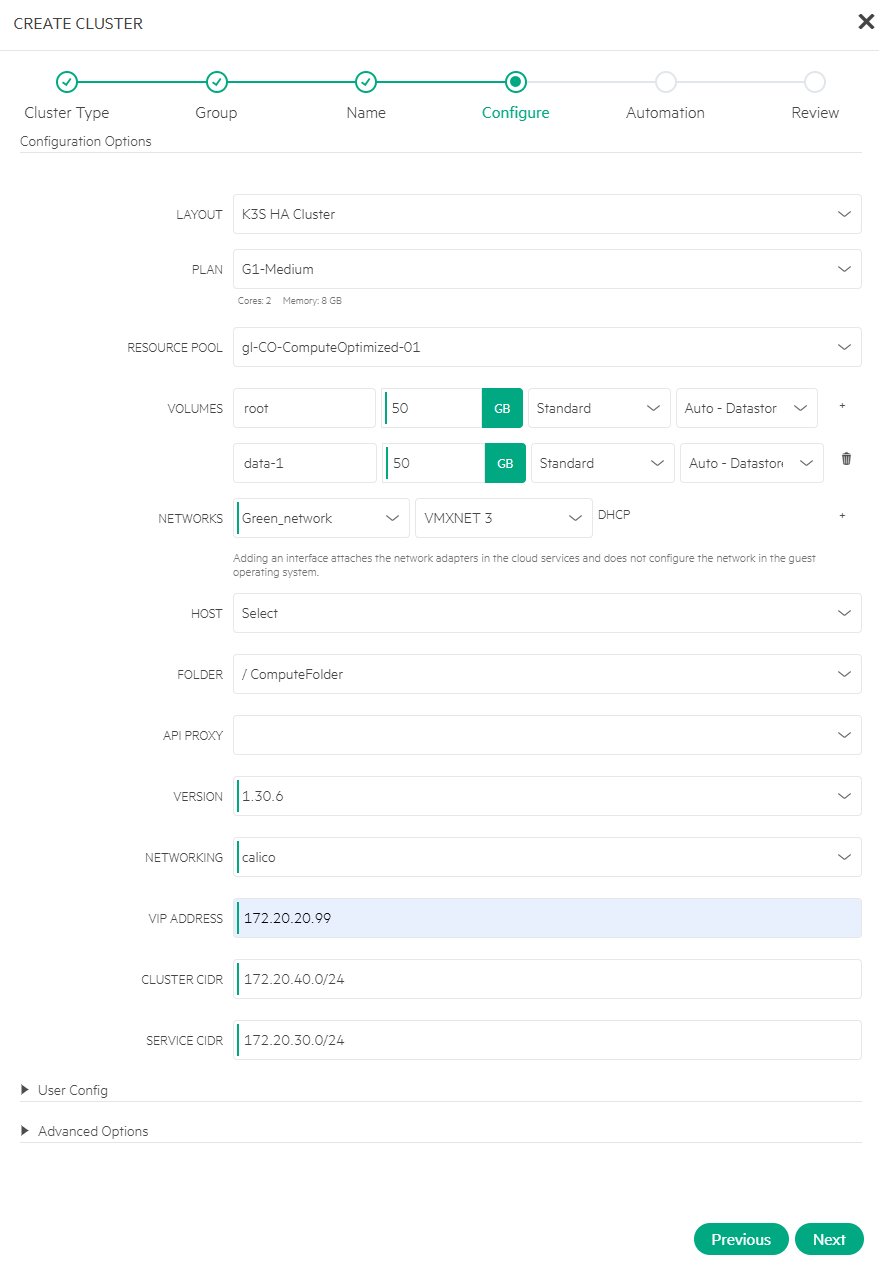
- Select LAYOUT as K3S HA Cluster and PLAN, configure VOLUMES, select NETWORKS, VERSION and NETWORKING, and configure VIP ADDRESS, CLUSTER CIDR and SERVICE CIDR. Click Next.
- Specify NUMBER OF WORKERS, along with PLAN, VOLUMES, and NETWORKS. You may retain the default settings or reuse the values previously configured. Click Next.

- Skip this step for Automation settings. The cluster review screen displays. Click Complete.
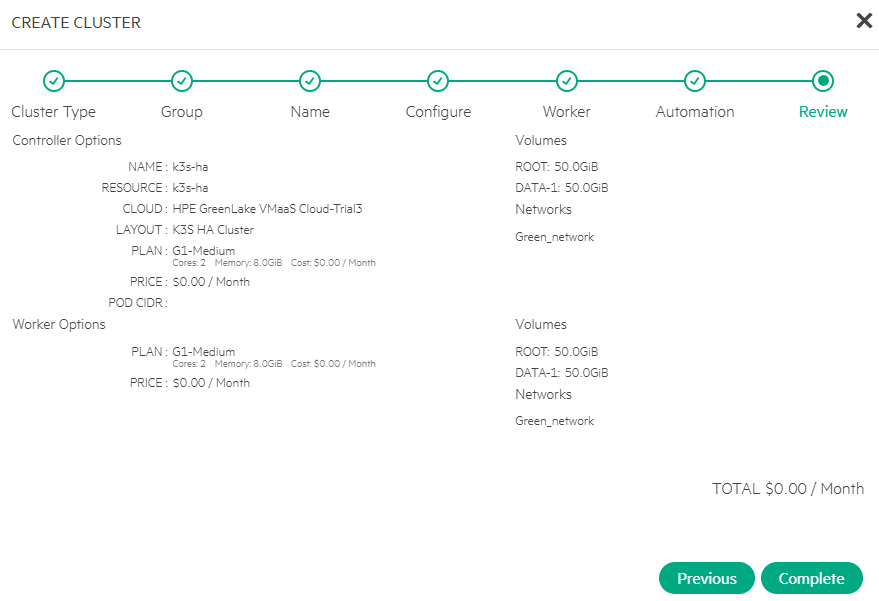
After a few minutes, the K3s cluster k3s-ha is created using the specified custom cluster layout: K3S HA Cluster.
Verify K3s cluster
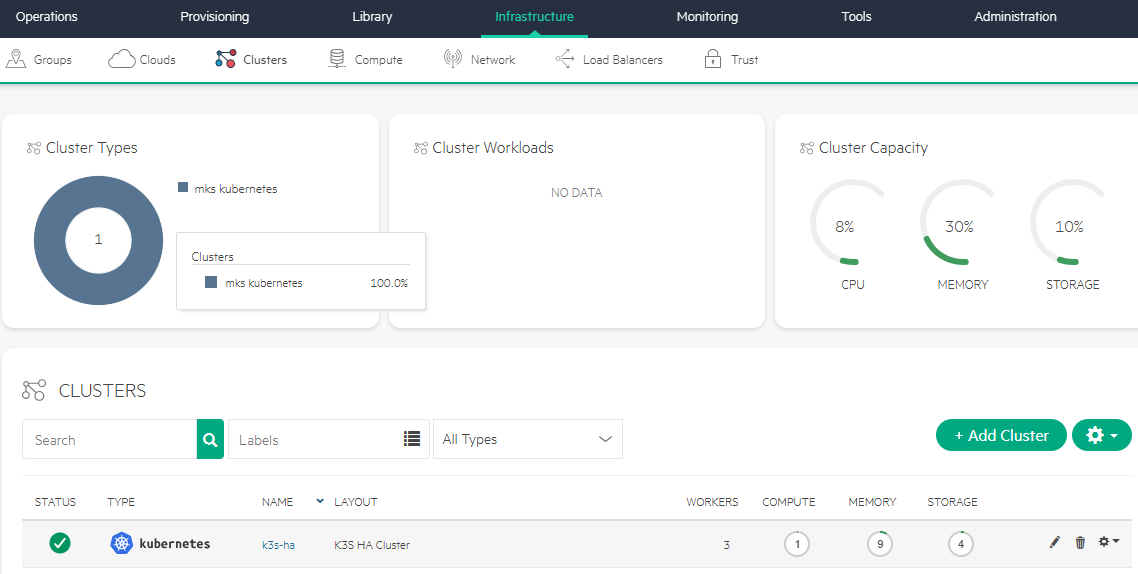
- Navigate to Infrastructure > Clusters.
- Click the K3s cluster k3s-ha.

The K3s cluster page displays the count of controller and worker nodes, all showing an Ok status.
- Click the History tab.
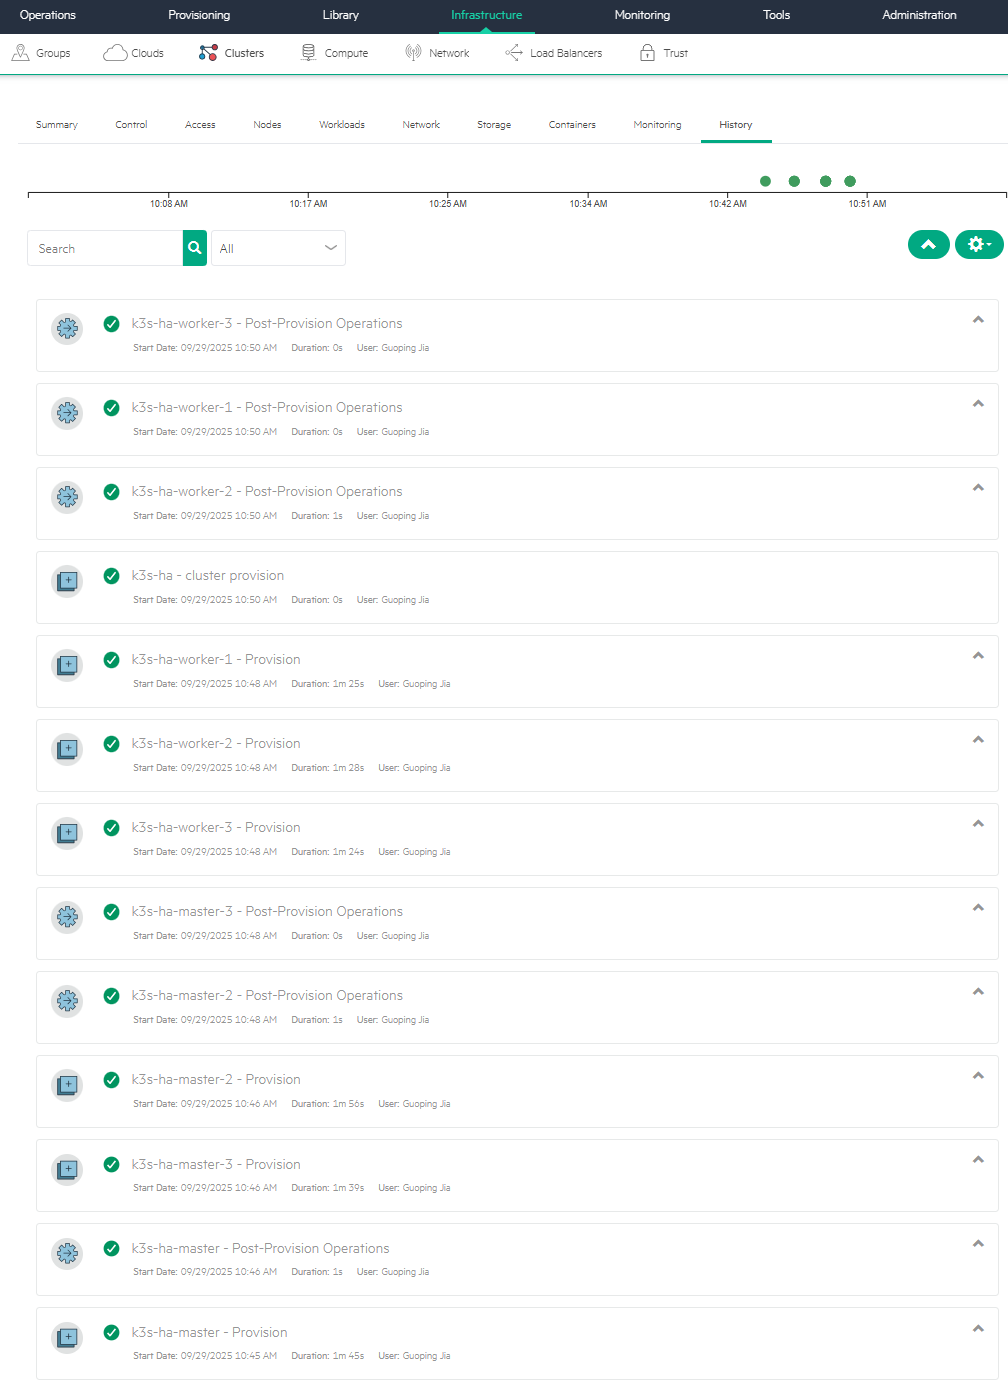
It contains all the details of the K3s cluster provisioning process, starting from the master nodes to the worker nodes.
Access K3s cluster
- Navigate to Infrastructure > Clusters.
- Click the K3s cluster k3s-ha.
- From Control tab, type command, e.g., get nodes.
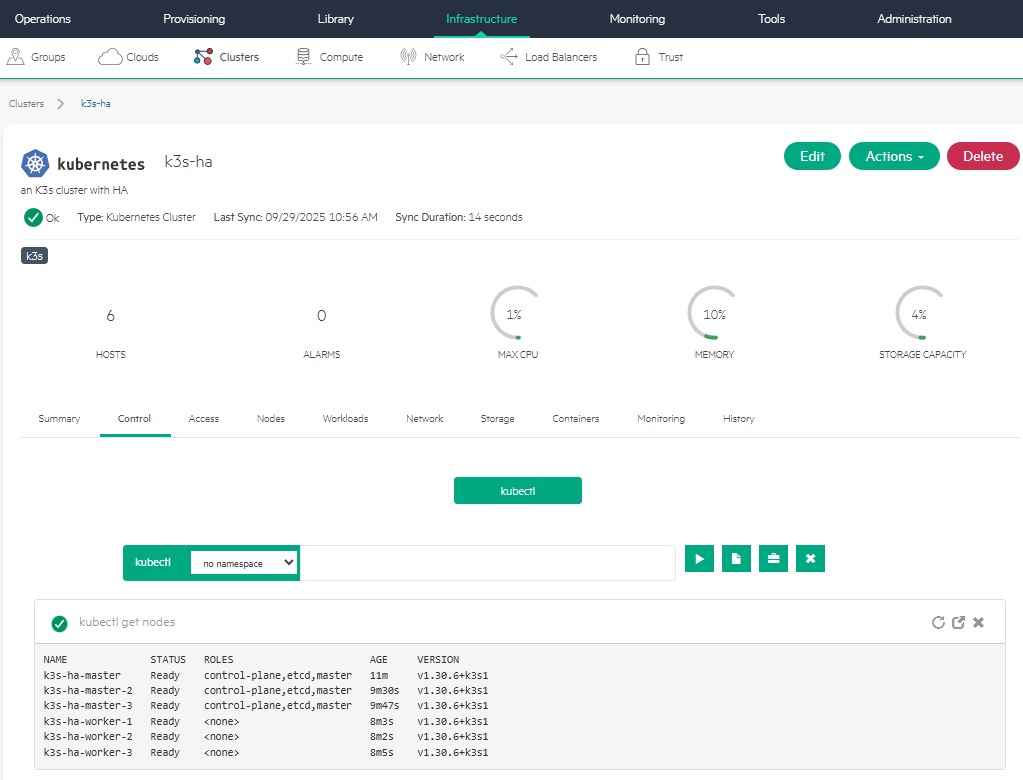
It shows both master and worker nodes in the cluster, together with their K8s versions and status.
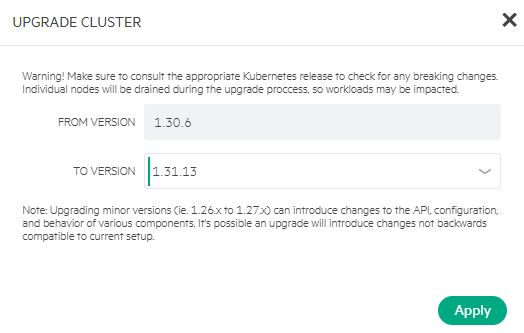
From the cluster's Actions menu, you can click Upgrade Cluster to upgrade the K3s cluster to its new version, e.g., 1.31.13.
Conclusion
This blog post walked through the process of creating custom cluster layouts and using them to provision K3s clusters within HPE Private Cloud Enterprise. Supporting both native and third-party K8s distributions, along with preconfigred MKS cluster layouts and user-defined custom cluster layouts, HPE Private Cloud Enterprise offers flexible provisioning options to suit diverse deployment needs. Once a cluster is operational, administrators can simplify day-to-day management using the built-in Actions menu, enabling downloading kubeconfig files, scaling worker nodes, upgrading cluster version, and decommissioning unused clusters. These integrated capabilities make K8s administration more streamlined, reliable, and intuitive across the enterprise.
Please keep coming back to the HPE Developer Community blog to learn more about HPE Private Cloud Enterprise and get more ideas on how you can use it in your everyday operations.
Tags
Related

Accessing HPE Ezmeral Data Fabric Object Storage from Spring Boot S3 Micro Service deployed in K3s cluster
Sep 13, 2021Automating application deployments to MKS clusters using GitOps with Argo CD
Jan 13, 2026
Deep Learning Model Training – A First-Time User’s Experience with Determined - Part 1
Apr 14, 2022Deep Learning Model Training – A First-Time User’s Experience with Determined – Part 2
May 3, 2022Provisioning Kubernetes clusters using app blueprint with Ansible integration in HPE Private Cloud Enterprise
Oct 3, 2025Exposing applications using Ingress and TLS termination on Kubernetes in HPE GreenLake for Private Cloud Enterprise
Mar 20, 2024Exposing Grafana service using Tailscale for MKS monitoring in HPE Private Cloud Enterprise
Oct 3, 2025