
HPE Private Cloud Enterprise now includes the Morpheus Kubernetes Service (MKS) feature, allowing users to deploy and manage Kubernetes (K8s) clusters directly through HPE Morpheus Enterprise software. With HPE Private Cloud Enterprise, now in its Beta phase with MKS feature, customers can take advantage of streamlined MKS cluster provisioning using predefined cluster layouts, making it easier to launch and manage their containerized workloads.
In this blog post, I will guide you through the process of provisioning an MKS cluster in HPE Private Cloud Enterprise, followed by key post-deployment tasks. These include downloading the kubeconfig file, scaling the cluster by adding worker nodes, upgrading the K8s cluster version, deploying applications via running workflows, and finally, deleting the MKS cluster when it's no longer needed.
Overview
HPE Private Cloud Enterprise is a fully managed Infrastructure as a Service (IaaS) offering that brings a modern, cloud-like experience to on-premises environments. It combines the flexibility of hybrid cloud with the enterprise-grade control and security required by enterprise IT.
Through the integration with HPE Morpheus Enterprise, which serves as the cloud management and orchestration layer, HPE Private Cloud Enterprise delivers a unified self-service interface for provisioning virtual machines (VMs), creating containers, and deploying applications, all governed by role-based access control (RBAC). This integration now enables support for the Morpheus Kubernetes Service (MKS) feature, allowing users to deploy and manage K8s clusters with built-in automation and observability capabilities.
HPE Morpheus Enterprise provides a set of prebuilt MKS cluster layouts that support a variety of K8s versions and cluster types. These cluster layouts provision MKS clusters using the native K8s distribution, streamlining and accelerating deployment. This blog post walks through the process of creating an MKS cluster using one of these preconfigured cluster layouts.
Prerequisites
Ensure that the following prerequisites are fulfilled:
- Access to an HPE Private Cloud Enterprise workspace with the 'Private Cloud Tenant Owner' role, allowing administrative actions in the Virtual Machines service.
- The group named 'Customer Department B' and the network 'Green-Segment' have already been created.
- HPE Morpheus Enterprise running version 8.0.5 or higher.
- The MKS feature is enabled in HPE Private Cloud Enterprise. You can confirm the presence of the Clusters menu from Infrastructure tab.
Provisioning an MKS cluster
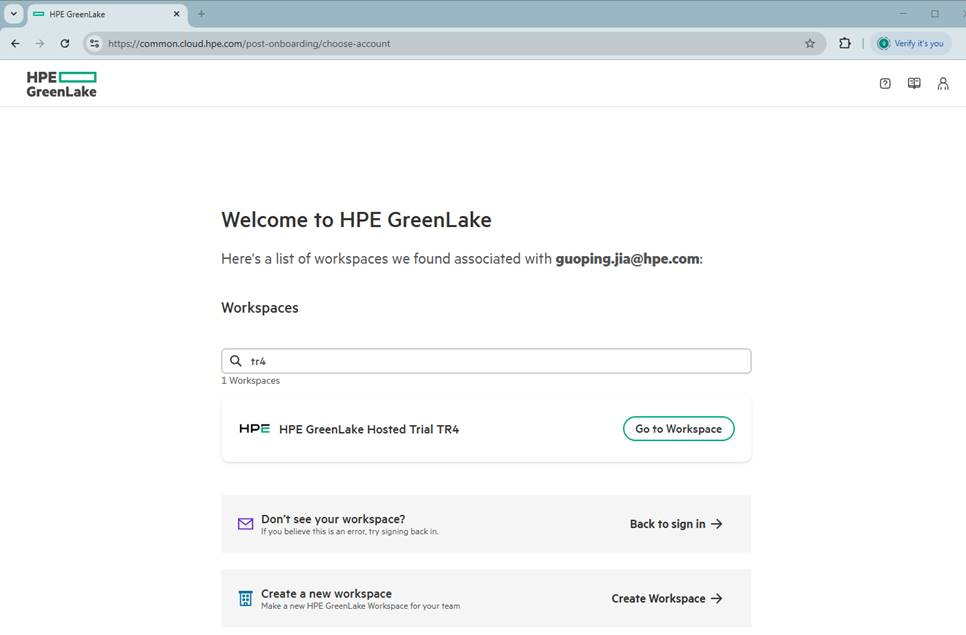
- Log in to HPE GreenLake Cloud at https://common.cloud.hpe.com/.
- Locate an HPE Private Cloud Enterprise workspace and click Go to Workspace.
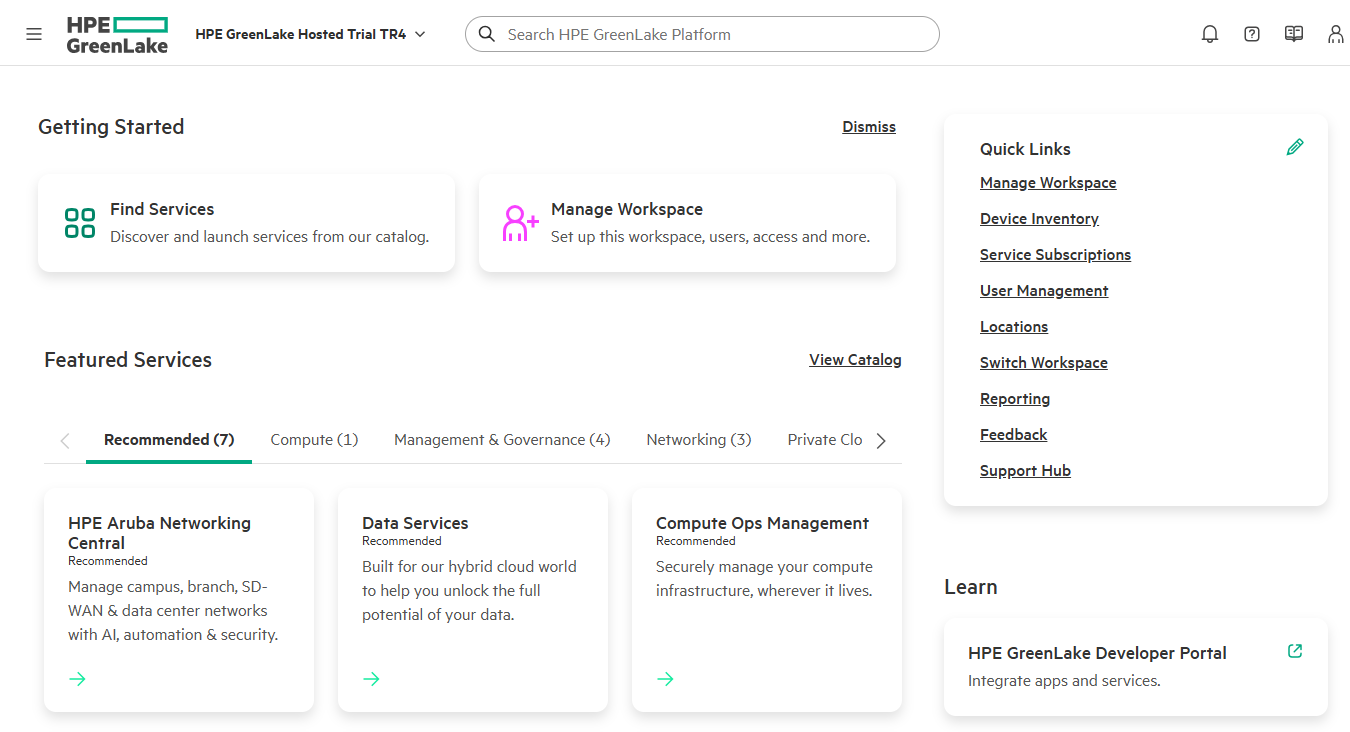
- From the Getting Started screen, click Find Services. (If you've already launched HPE GreenLake Flex Solutions, the service will appear under Recent Services, from which you can click Launch, then skip to the step 6 below.)
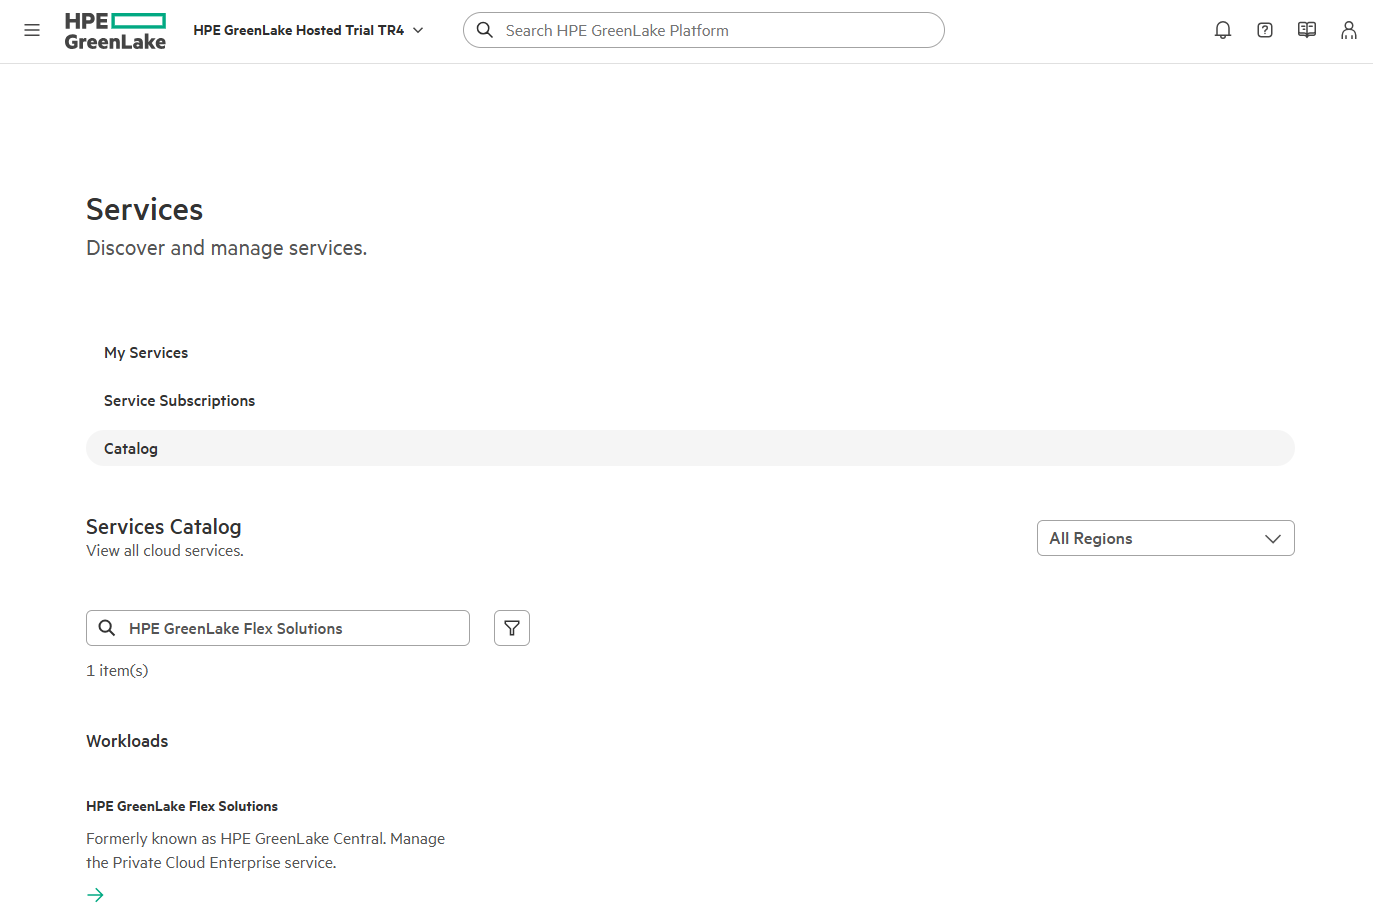
- From the Services Catalog, enter 'HPE GreenLake Flex Solutions'. Click the HPE GreenLake Flex Solutions Workloads result.
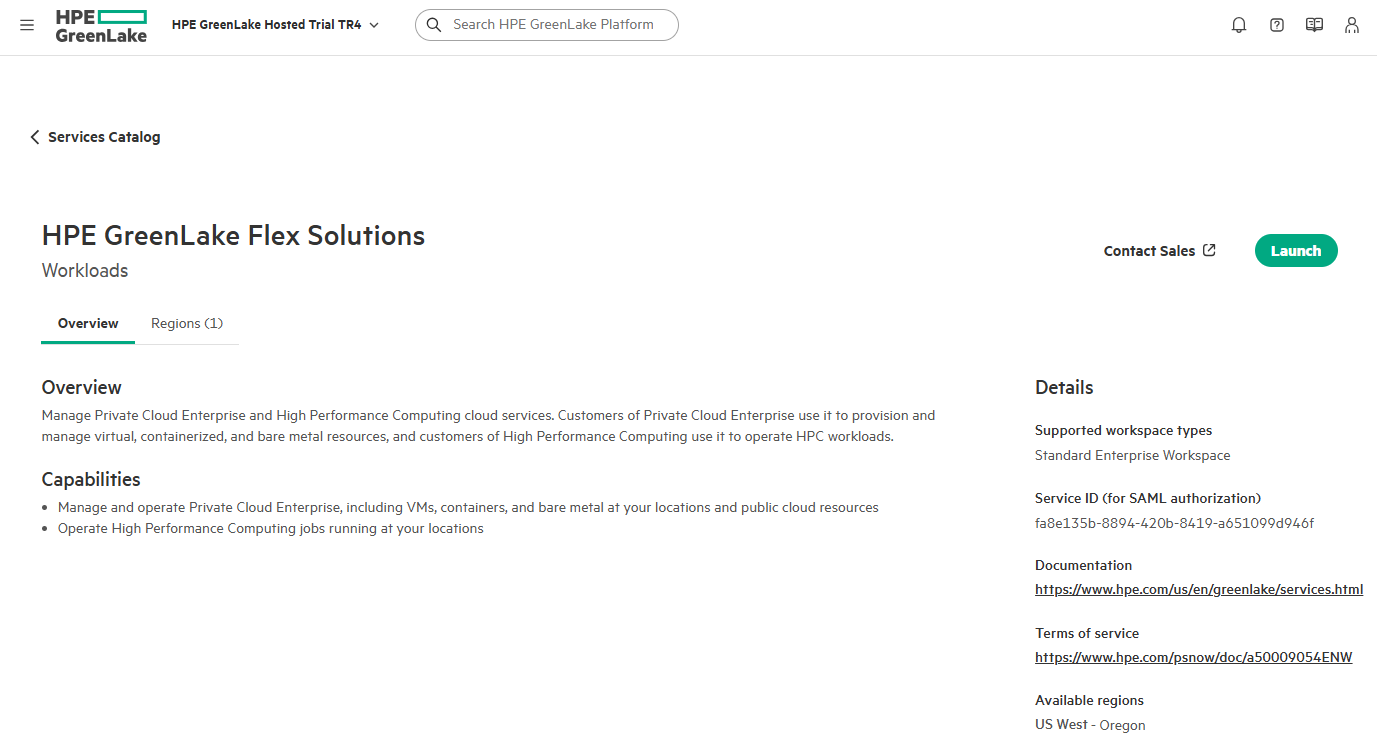
- From the Workloads Overview tab, click Launch to open the HPE GreenLake Flex Solutions.
- From the Cloud Services Dashboard, locate the Private Cloud Services card and ensure that the correct location is selected from the drop-down list.
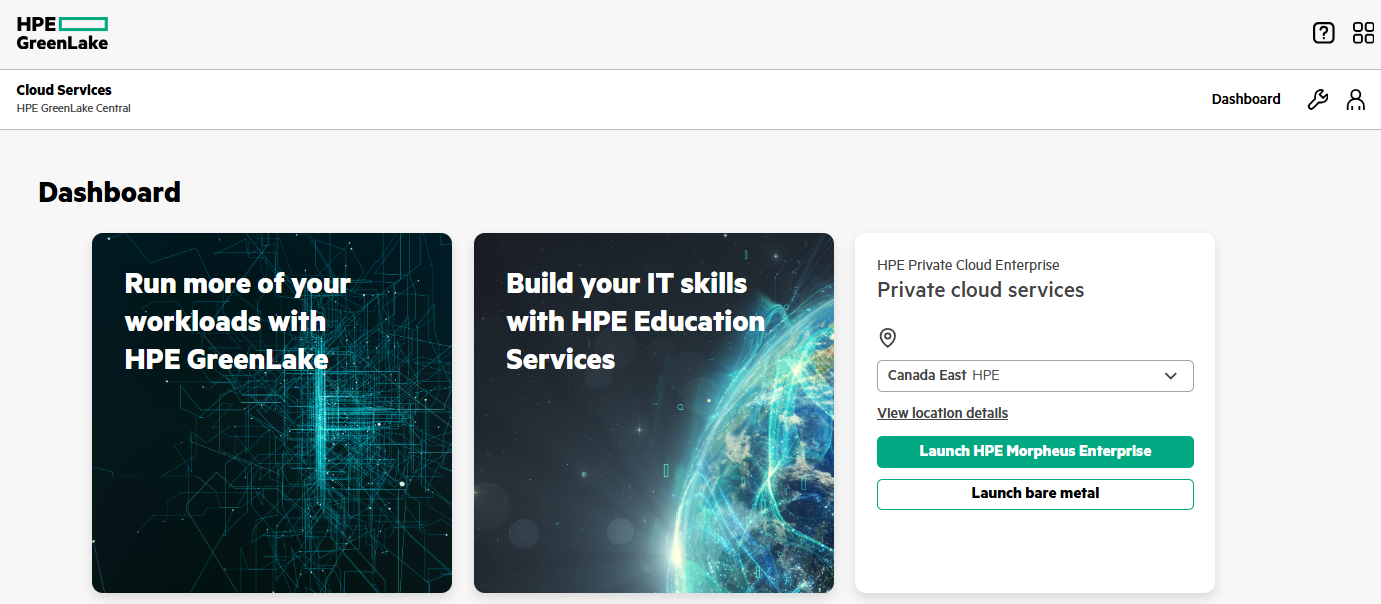
- Click Launch HPE Morpheus Enterprise. The Morpheus Dashboard screen (Operations > Dashboard) displays.

- In the Service Console, click Infrastructure and select Clusters.
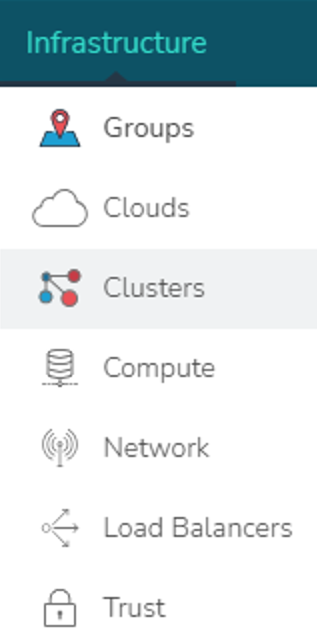
- From the clusters screen, click +Add Cluster to initiate MKS cluster provisioning.

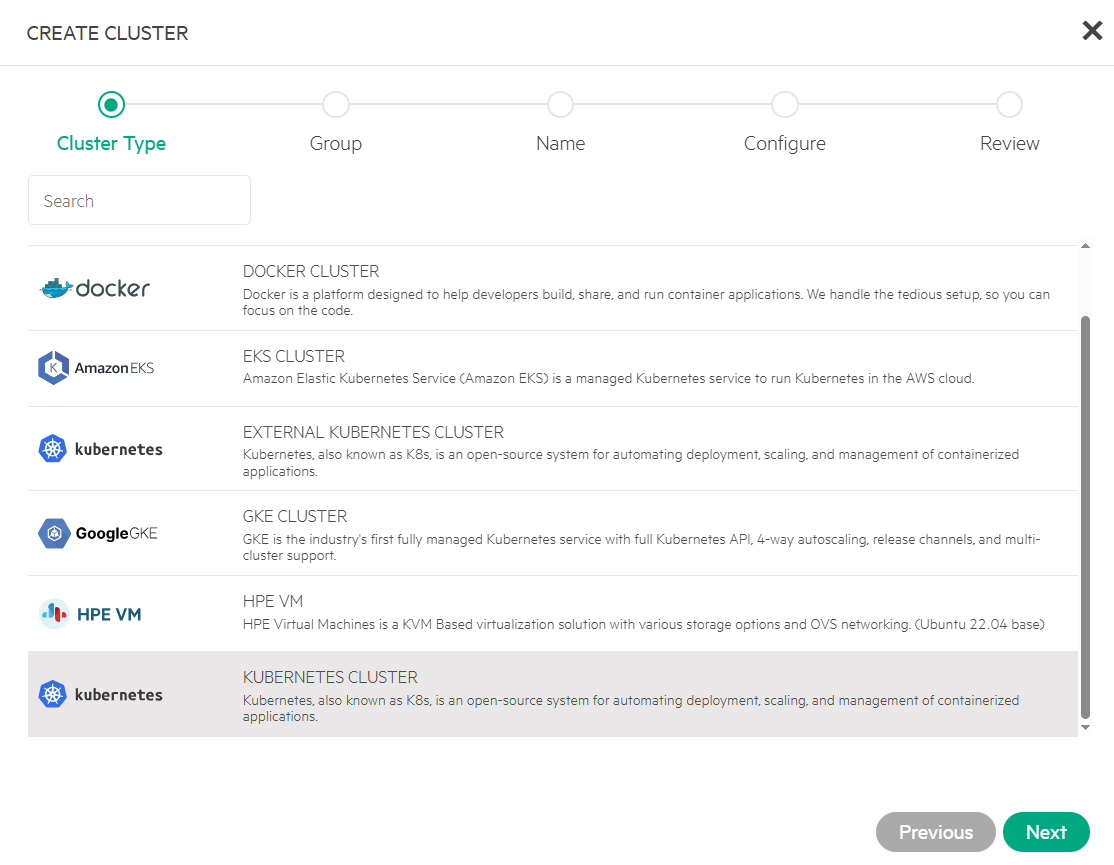
9.1 Choose cluster type
In the CREATE CLUSTER panel, select 'KUBERNETES CLUSTER' as the Cluster Type and click Next.
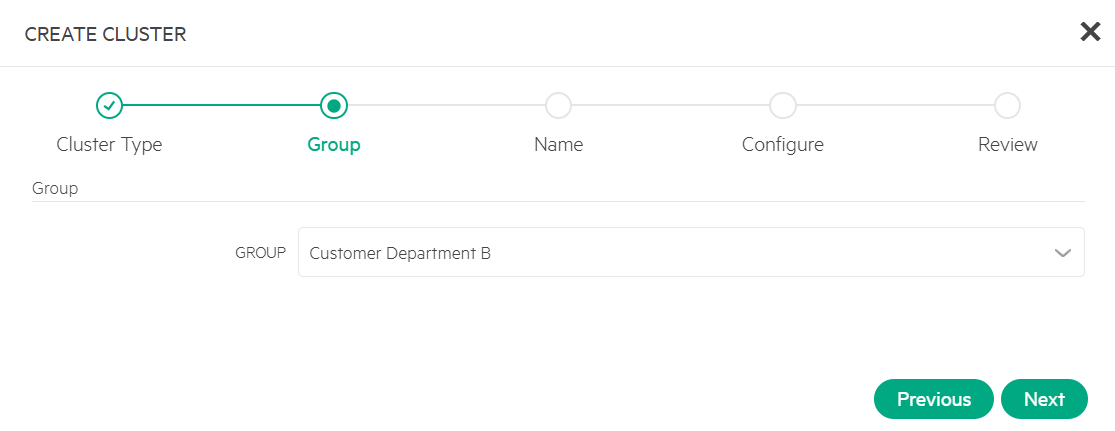
9.2 Select a group
Select a group, for example, 'Customer Department B' and click Next.
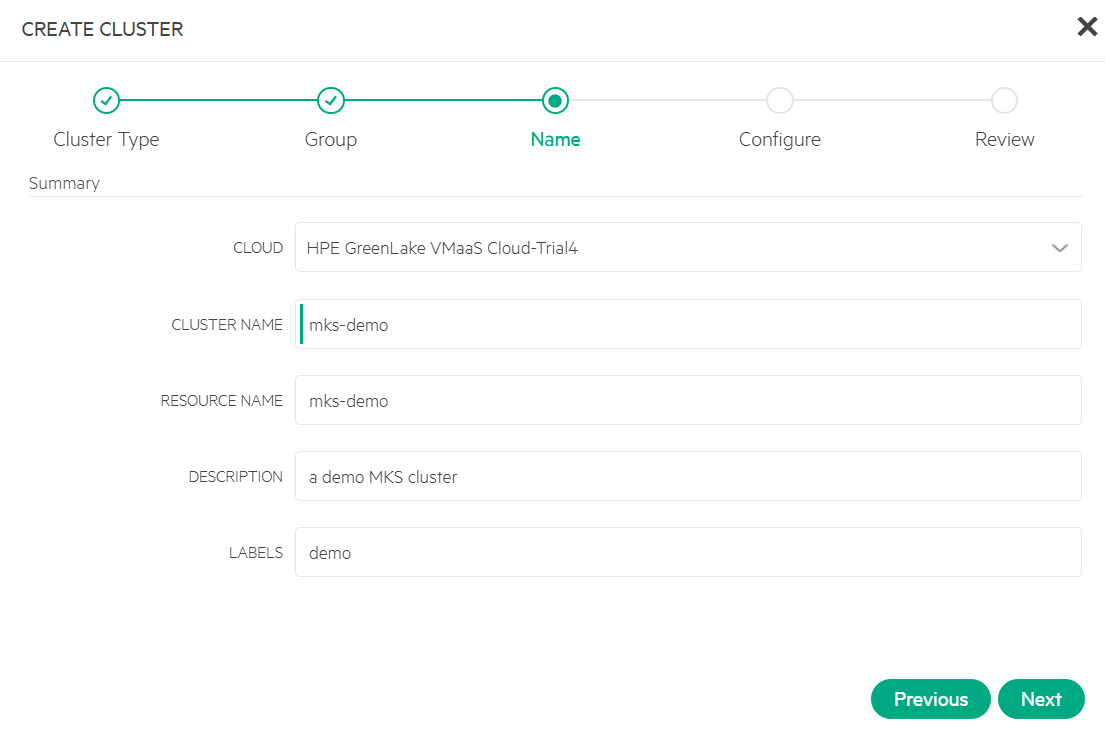
9.3 Specify the cluster name
Enter CLUSTER NAME as 'mks-demo', and optionally specify RESOURCE NAME, DESCRIPTION, and LABELS. Click Next.
9.4 Select cluster layout & configure master
Select LAYOUT and PLAN, configure VOLUMES, and select the NETWORKS, such as 'Green-Segment'. Click Next.
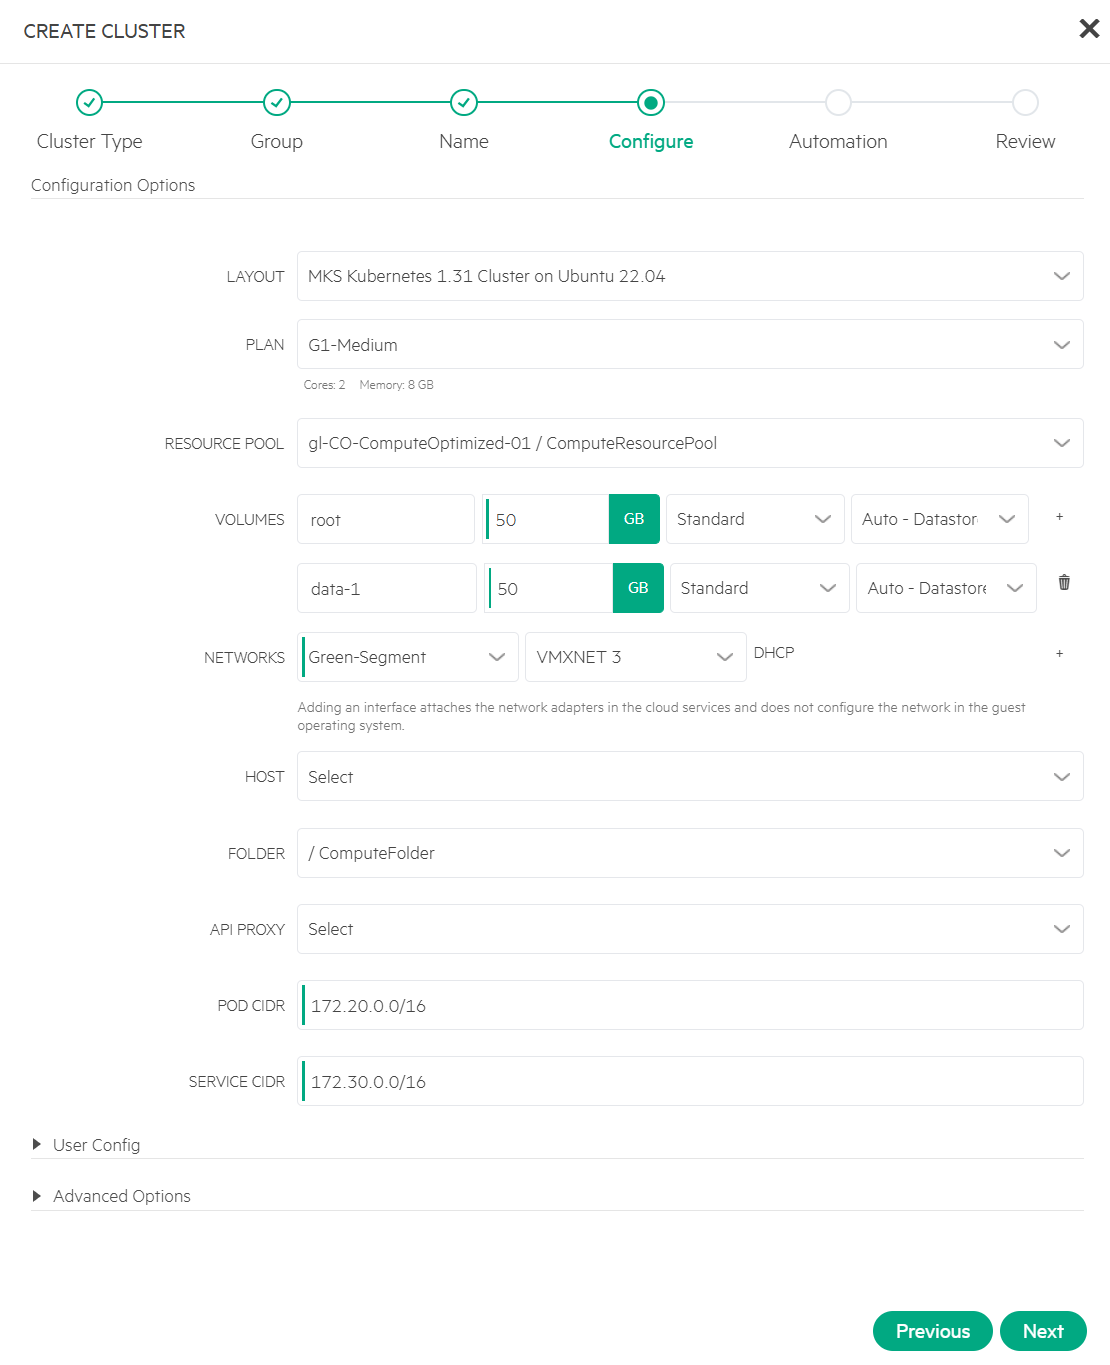
NOTE: For demonstration purpose, the 'MKS Kubernetes 1.31 Cluster on Ubuntu 22.04' is selected. This cluster layout provisons an MKS cluster using a single master with K8s version 1.31.
Important: The Classless Inter-Domain Routing (CIDR) for the POD and SERVICE define the internal IP ranges by routers to K8s Pods and Services. To prevent conflicts, ensure these CIDRs are distinct from the network settings.
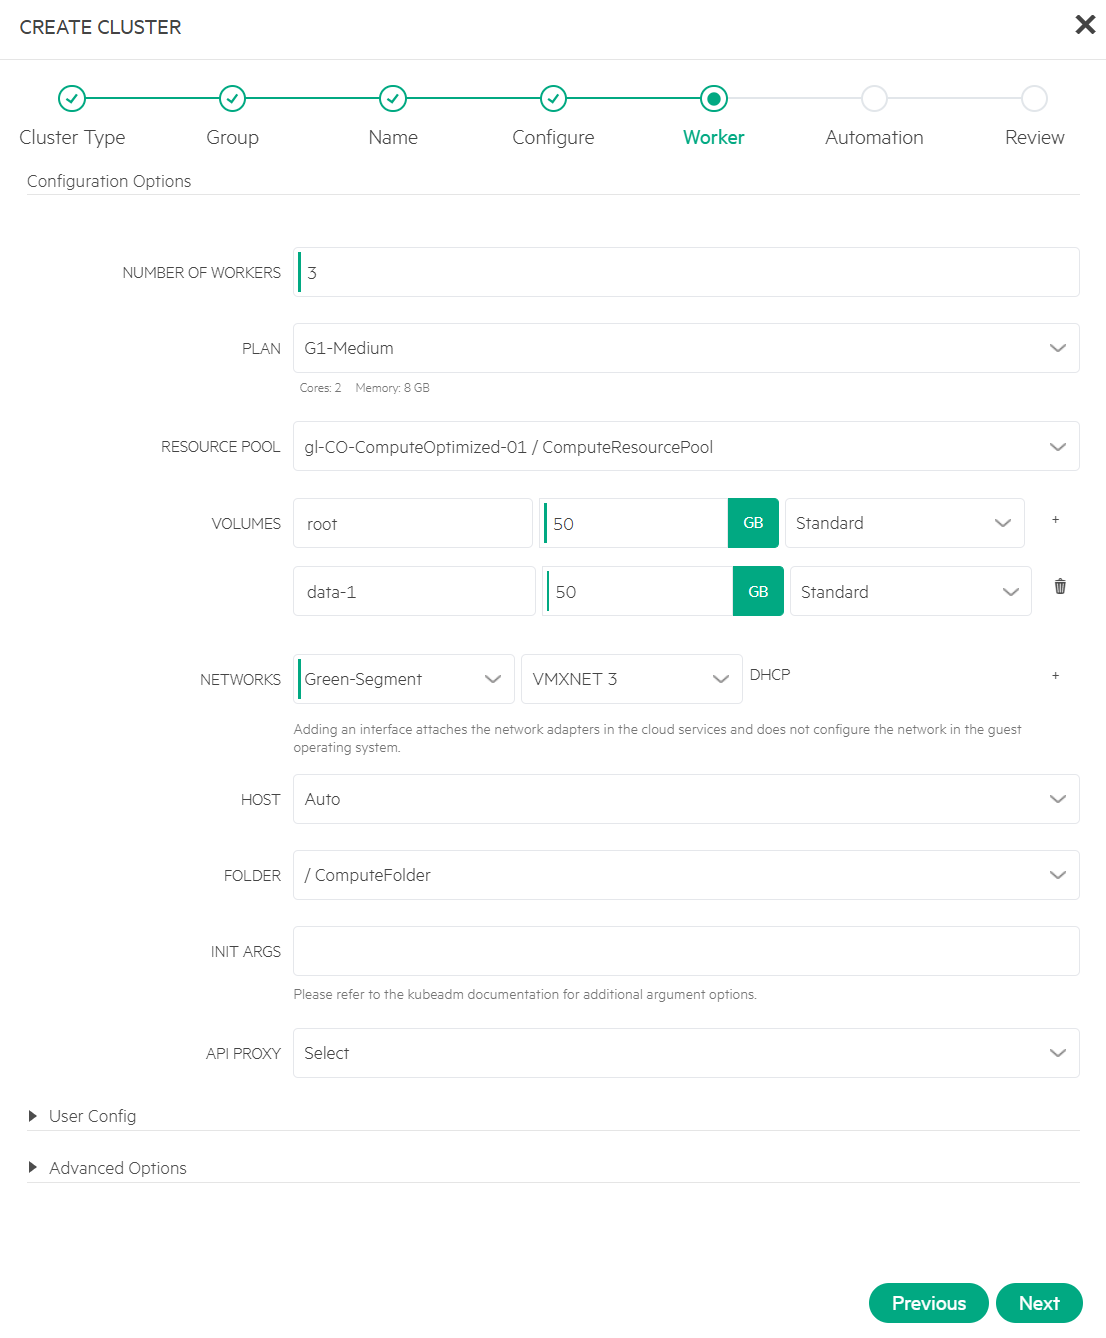
9.5 Configure worker
Specify NUMBER OF WORKERS, along with PLAN, VOLUMES, and NETWORKS. You may retain the default settings or reuse the values previously configured for the master. Click Next.
9.6 Review cluster details
Skip this step for Automation settings. The cluster review screen displays.
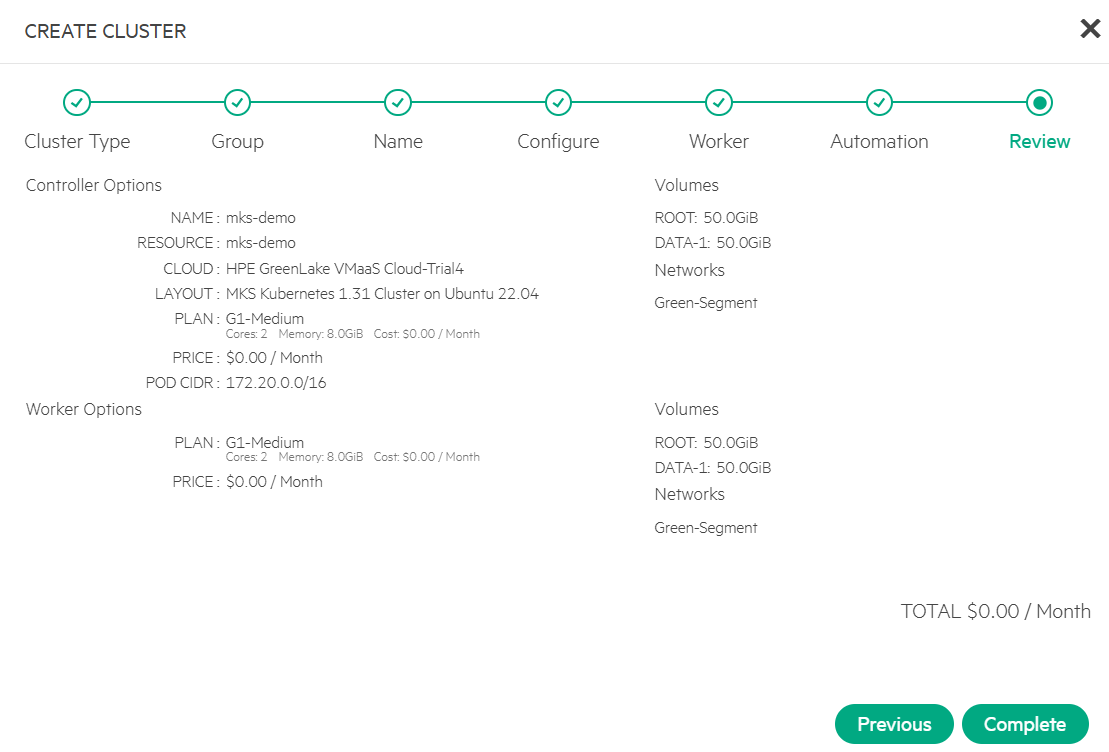
Click Complete. The MKS cluster provisioning process initiates.
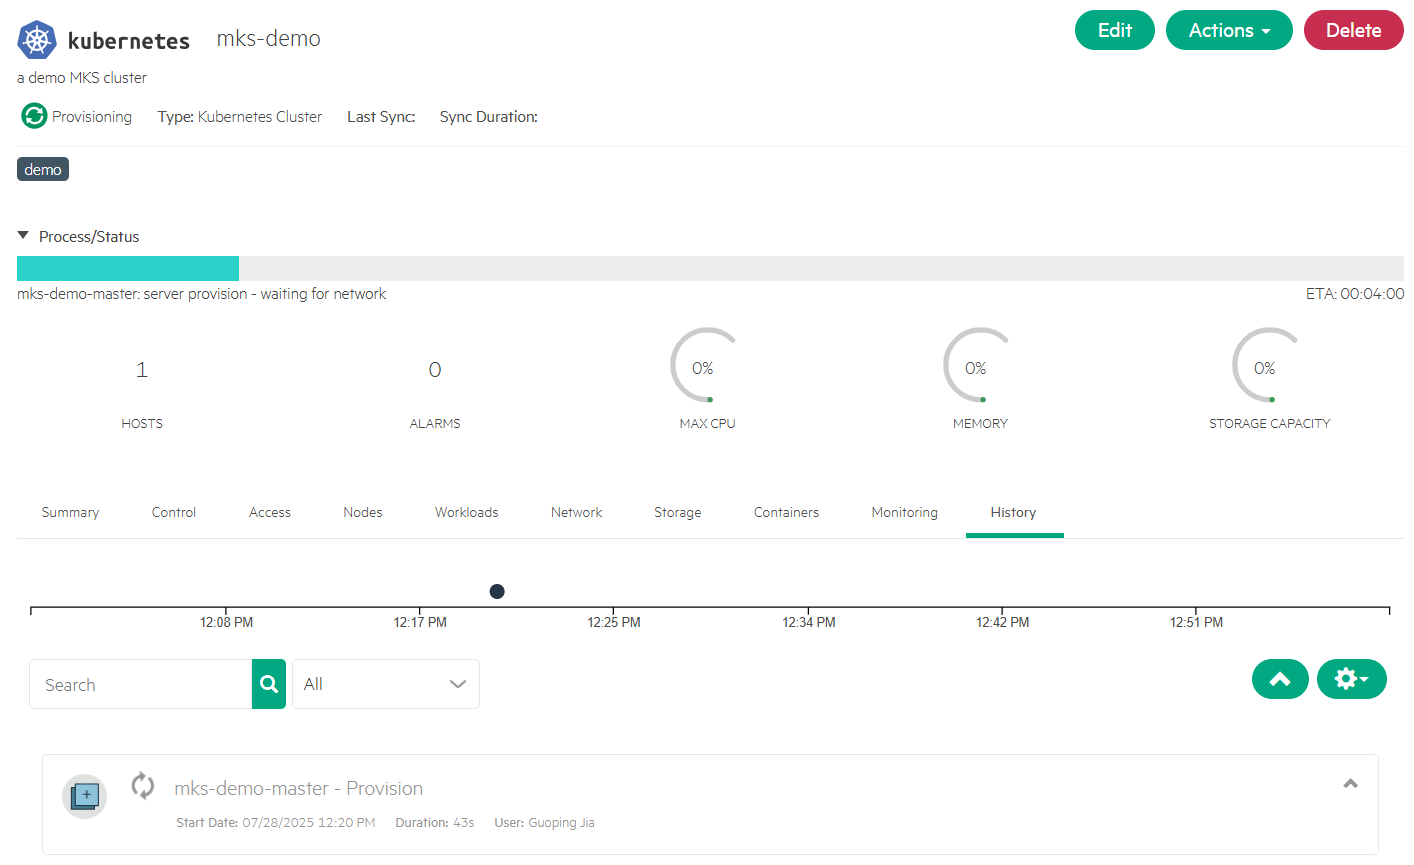
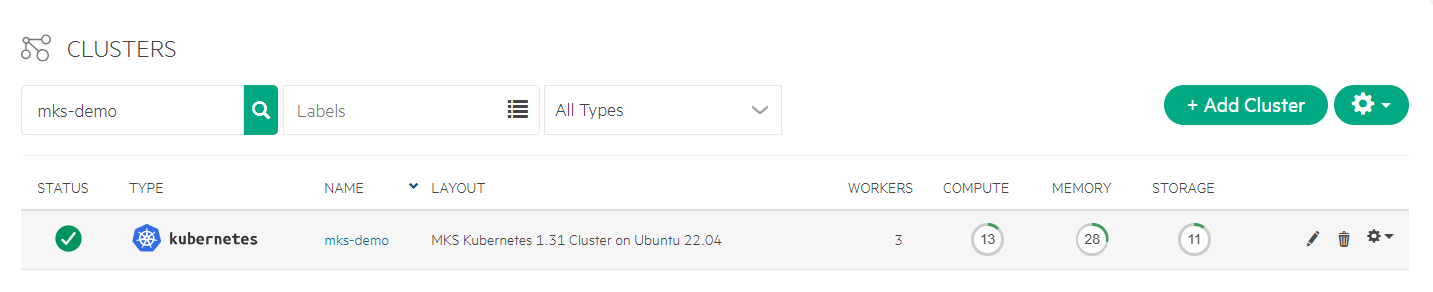
Verify MKS cluster
Approximately after a few minutes, the cluster 'mks-demo' is created using the specified cluster layout: MKS Kubernetes 1.31 Cluster on Ubuntu 22.04.
Access MKS cluster
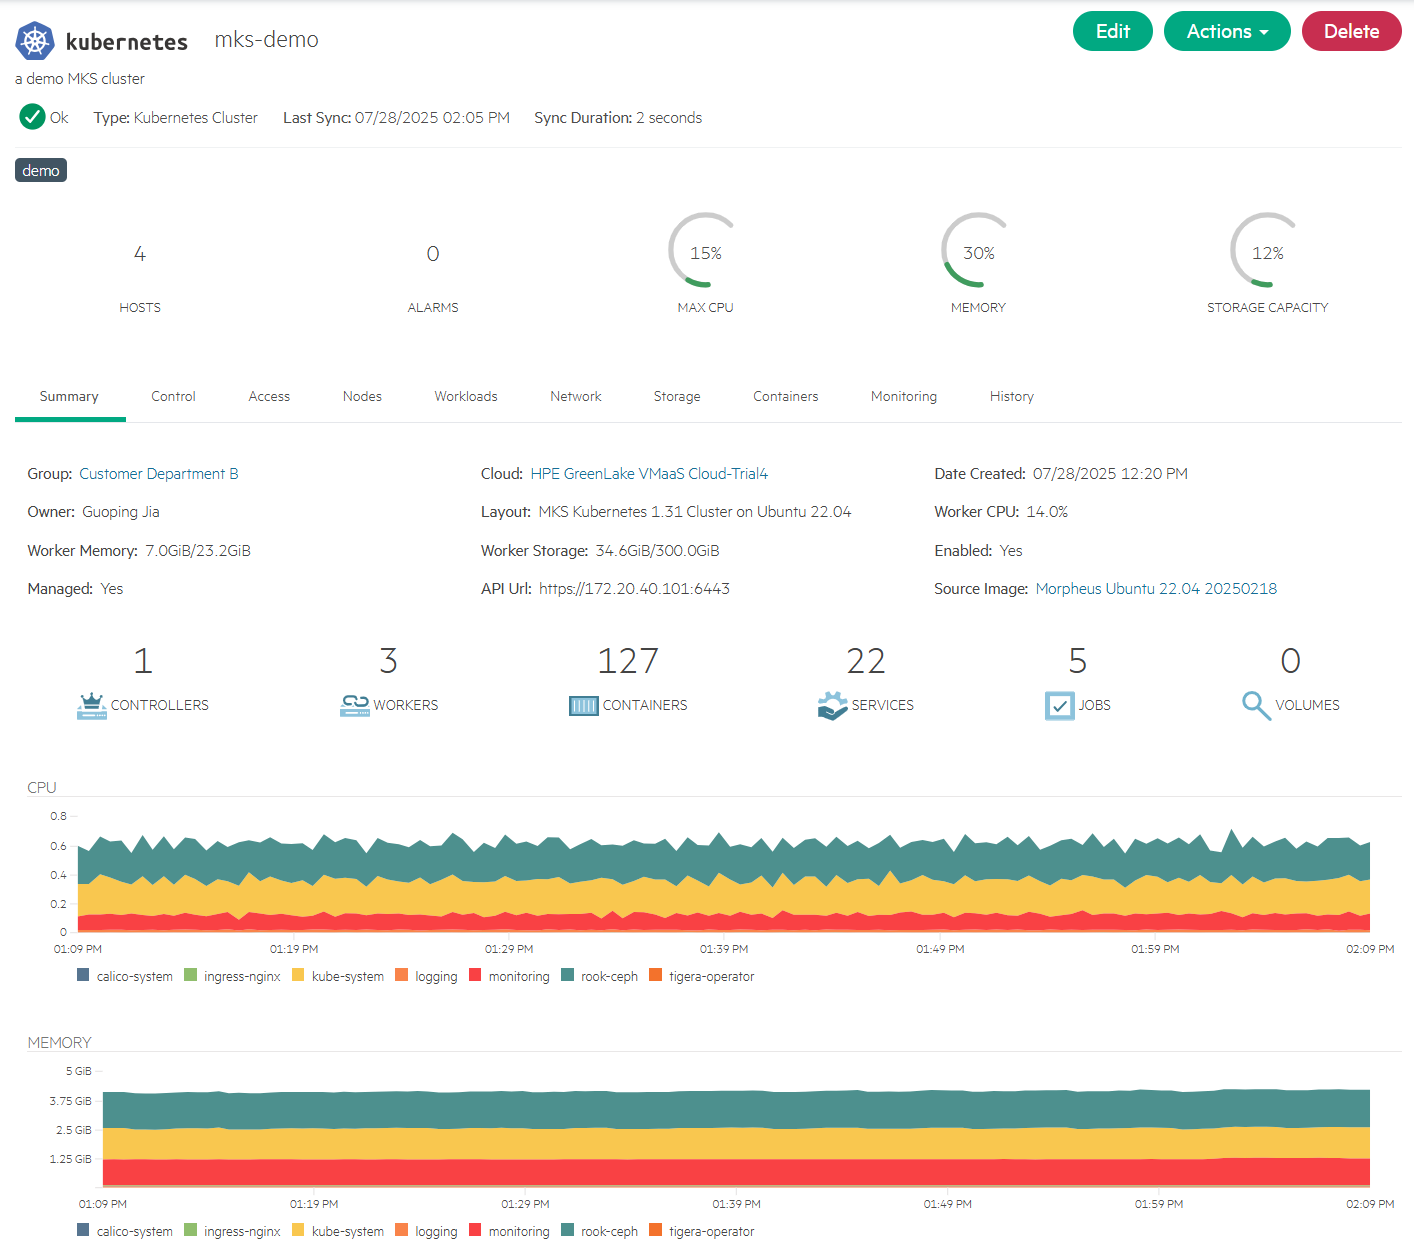
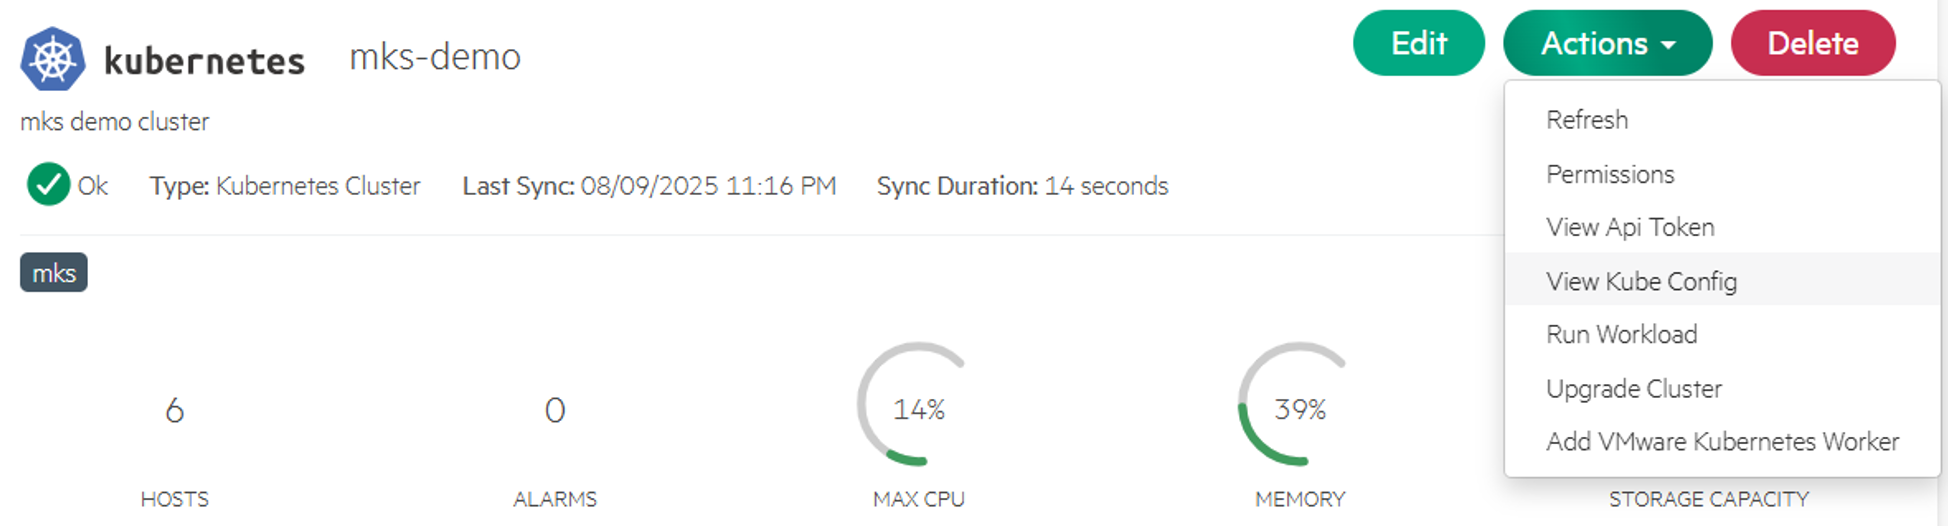
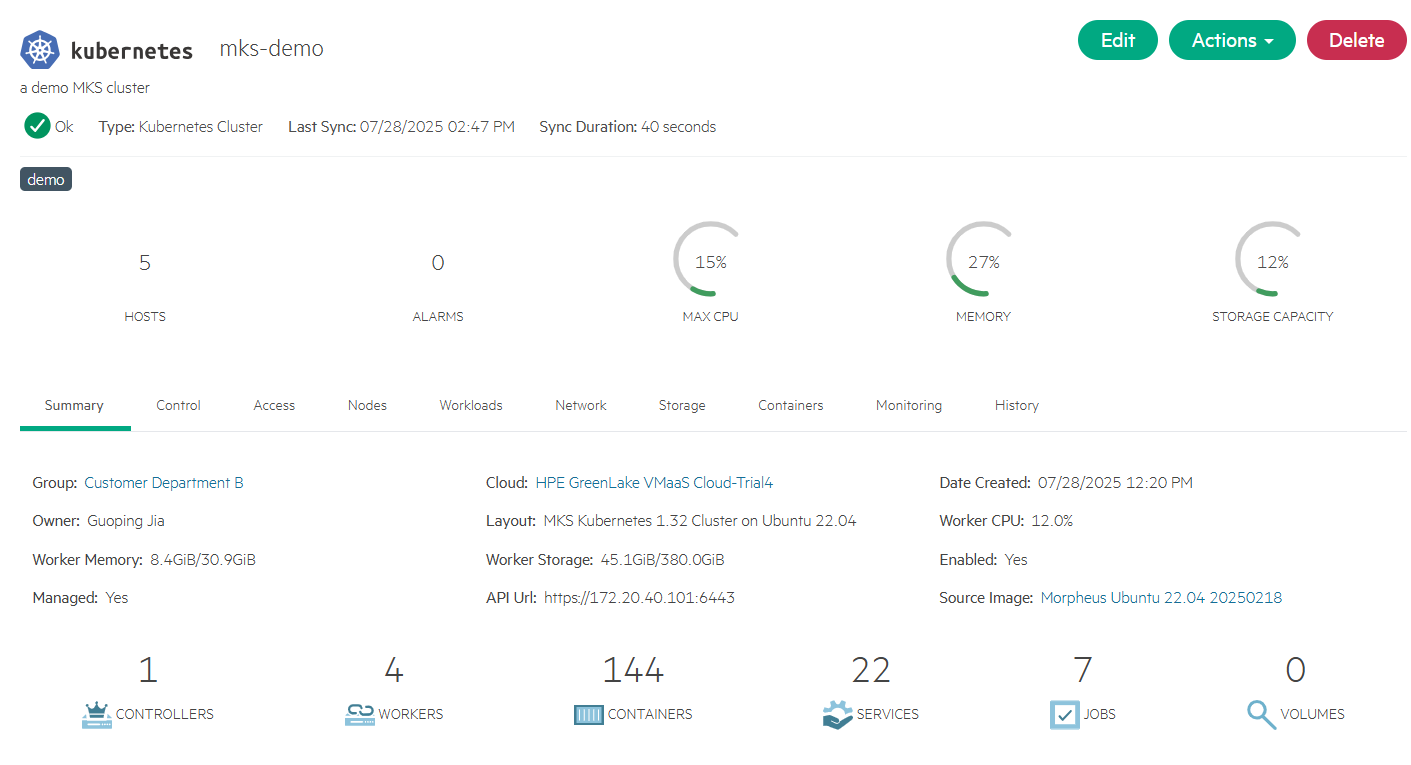
Click the 'mks-demo' cluster to view its details from the Summary tab.
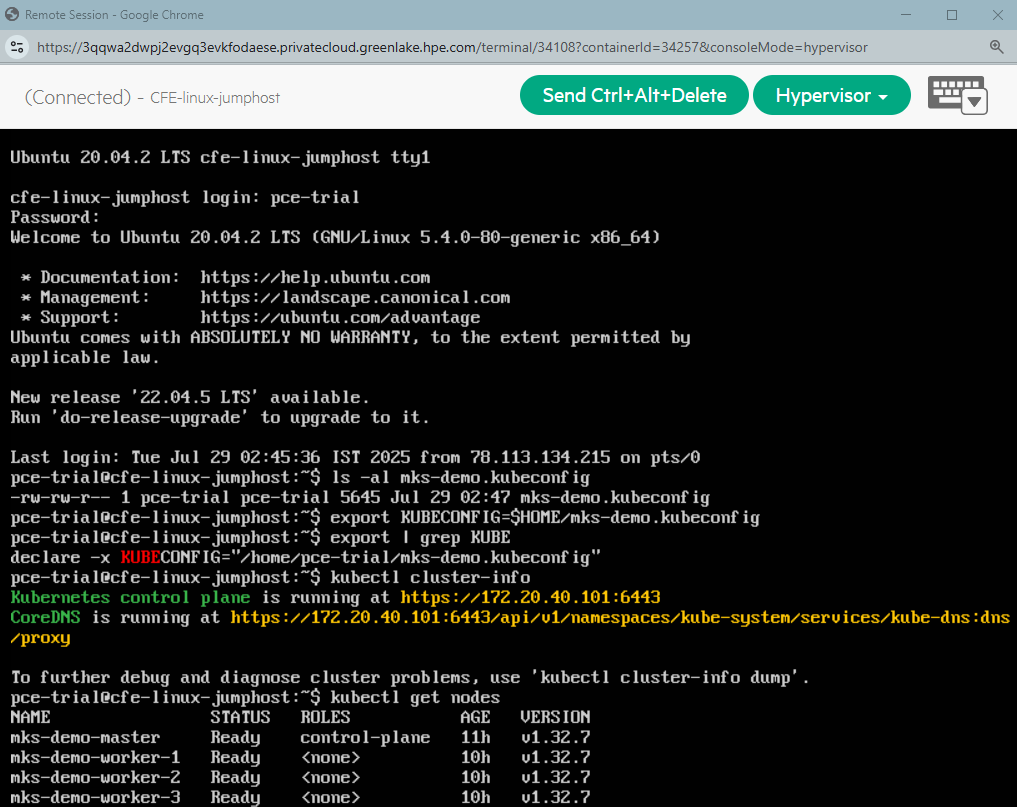
Navigate to the Control tab and run the command 'kubectl get nodes' to view the cluster's node information.
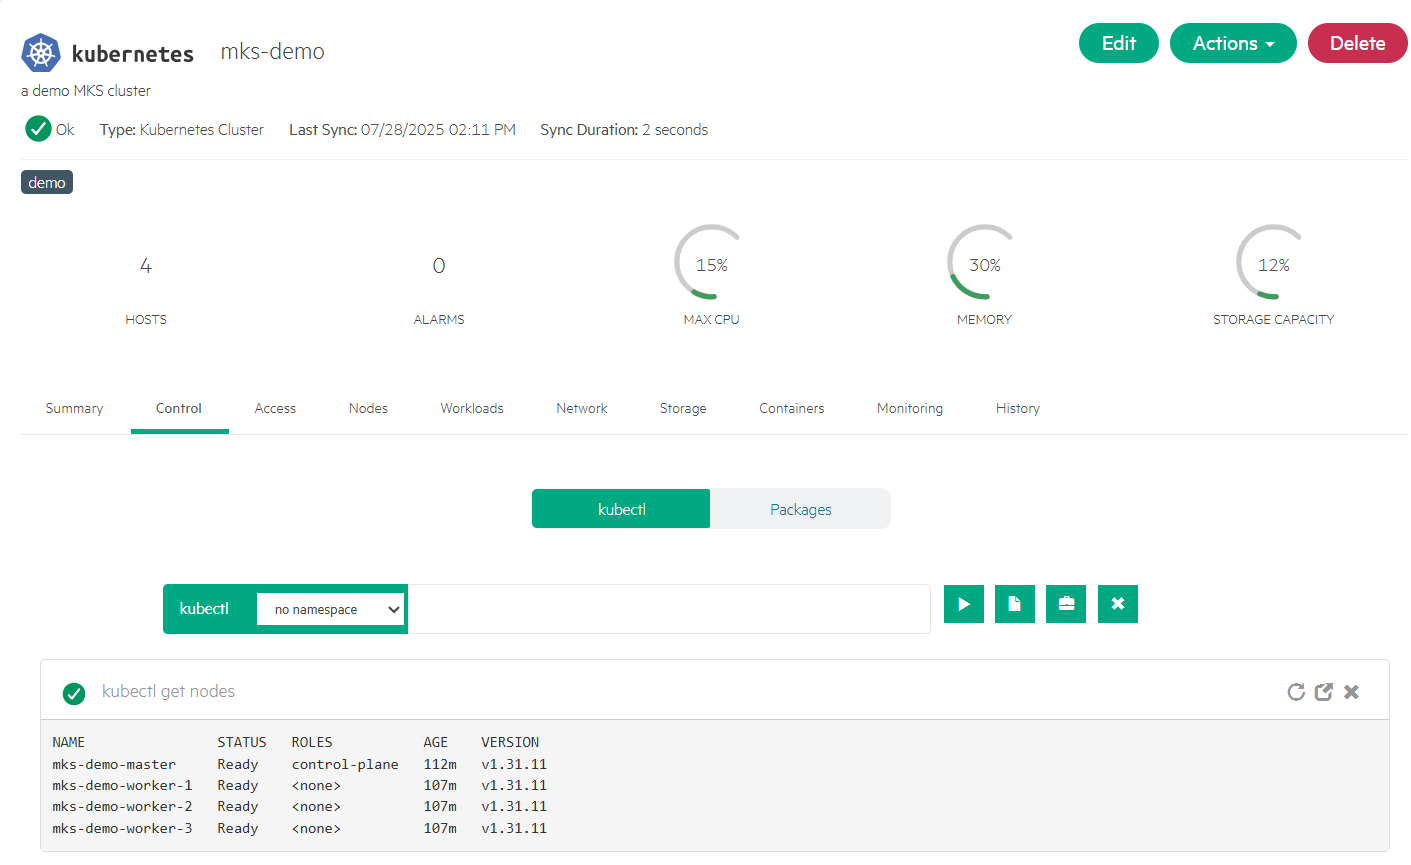
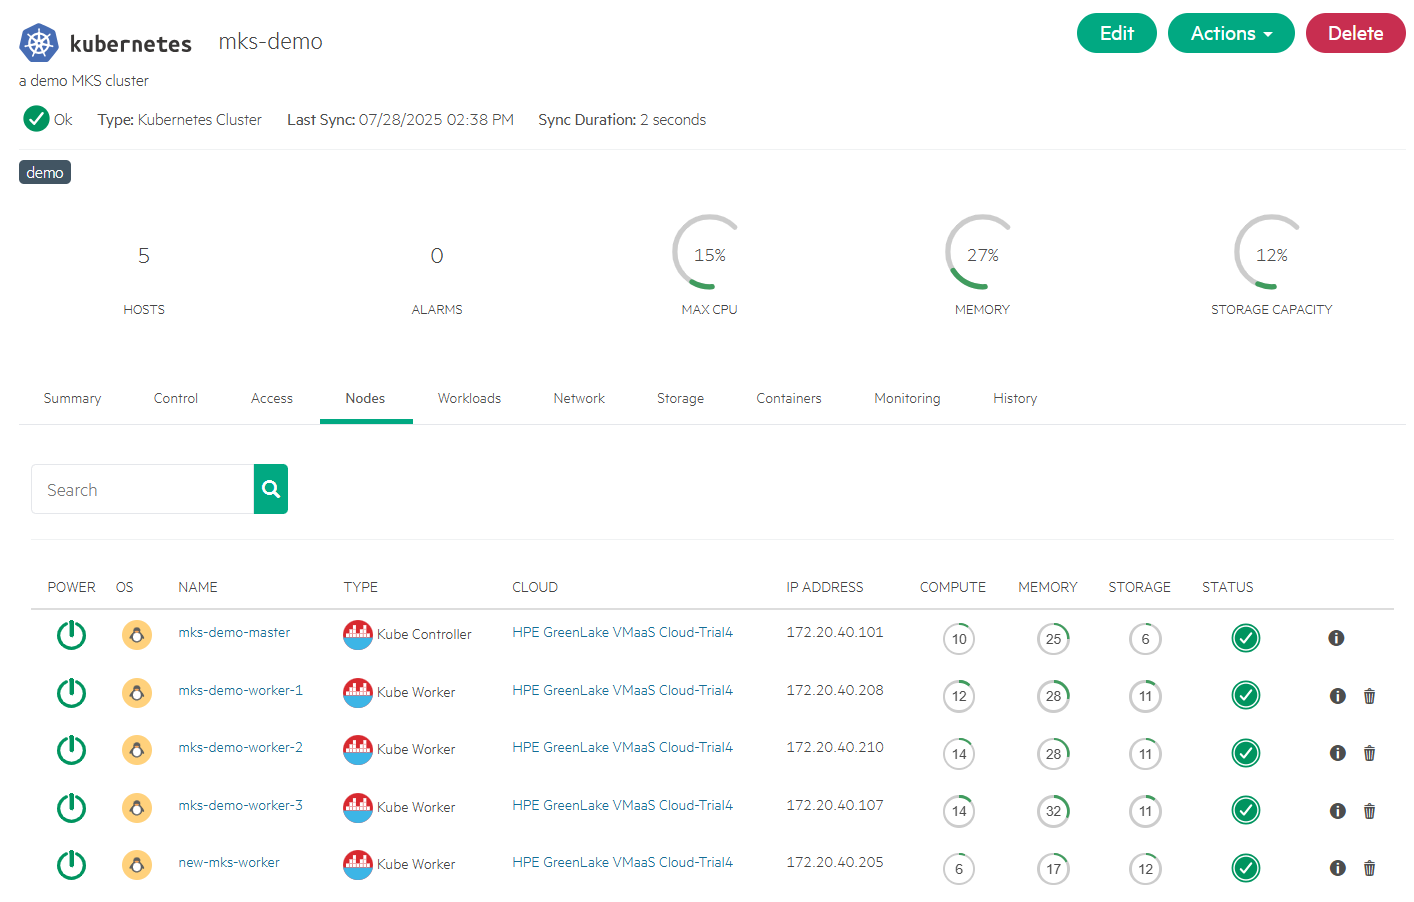
In line with the cluster type, MKS Kubernetes 1.31 Cluster on Ubuntu 22.04, the 'mks-demo' cluster consists of one master and three workers.
Run daily cluster operations
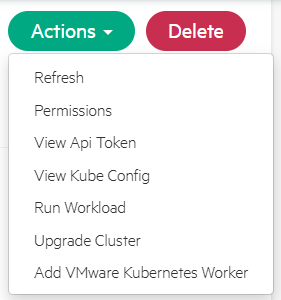
From the provisioned MKS cluster, the Actions menu provides a curated set of supported operations that simplify and streamline day-to-day cluster management. From downloading kubeconfig to scaling the cluster and performing upgrade, these built-in actions help automate key cluster operations, making cluster administration faster, easier, and more consistent.
The following sections explore how to perform these day-to-day cluster operations.
- View and download kube config
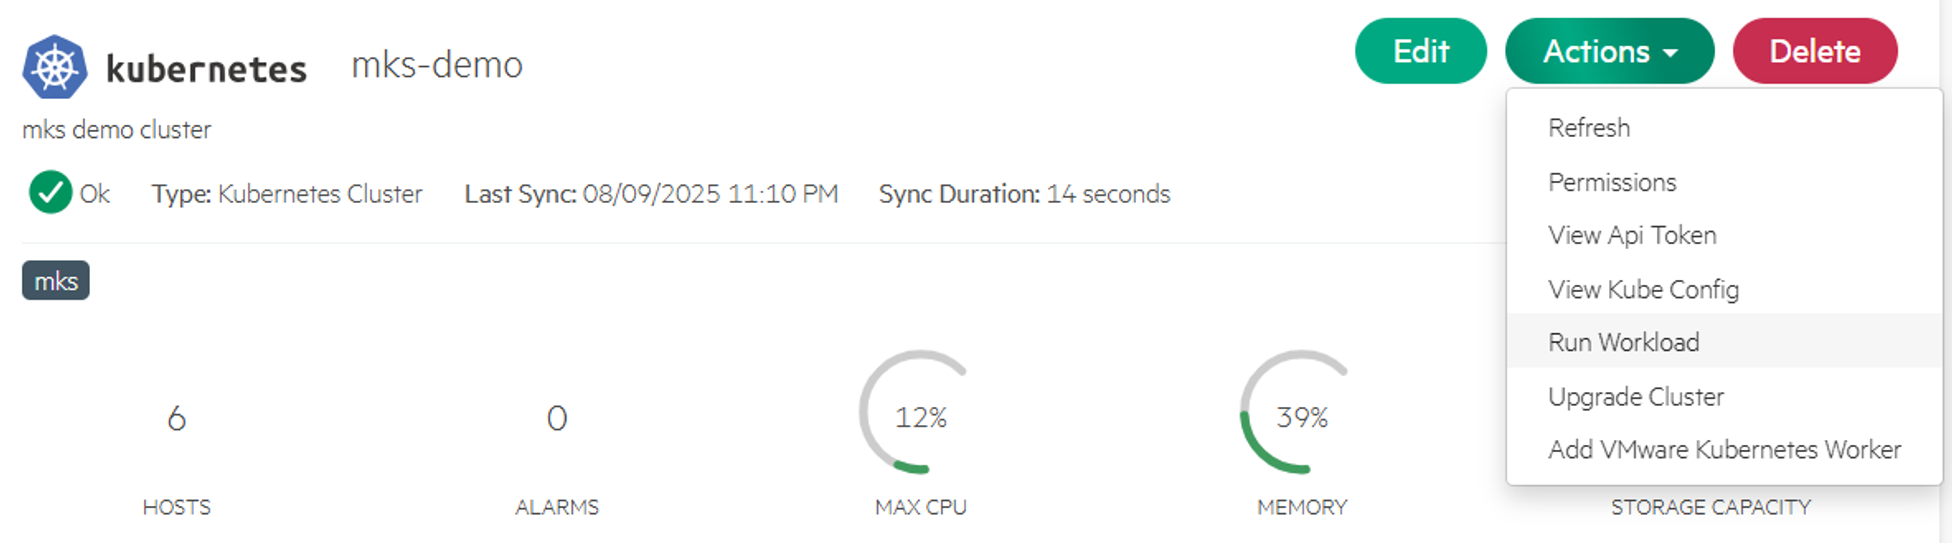
From the 'mks-demo' cluster, click Actions.
Click View Kube Config to view the Kube config of the cluster.
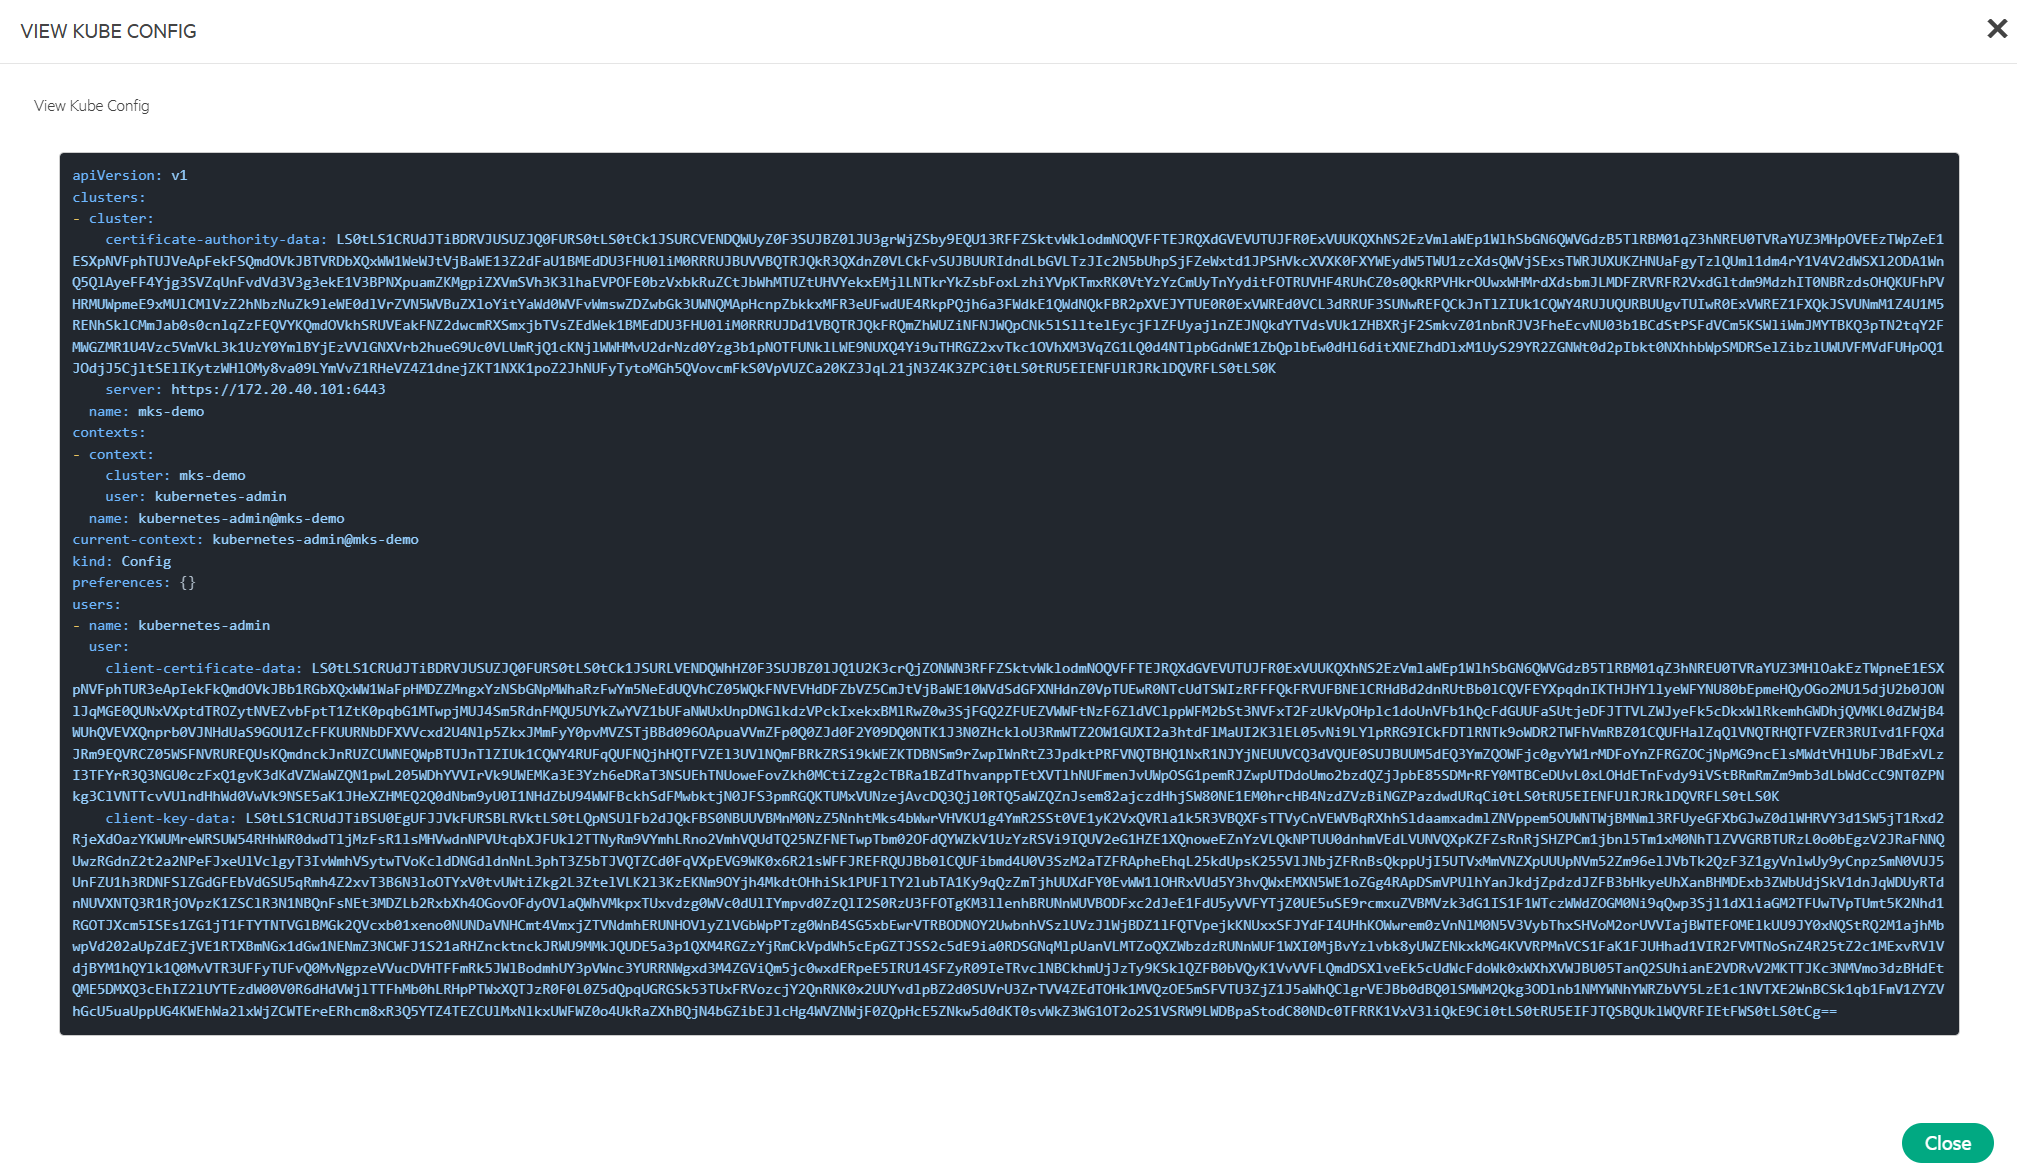
Save the Kube config content to a file. For example, 'mks-demo.kubeconfig' on a Linux client as shown in the following output. This file can then be used with the kubectl CLI or the Helm tool to access the MKS cluster and deploy applications using either YAML manifests or Helm charts.
- Add addtional worker
In K8s, adding new workers to an existing cluster involves setting up self-registration, provisioning VM instances, and integrating them into the cluster. This process can be time-consuming and often demands custom automation scripts to streamline the workflow.
From the MKS screen, navigate to a cluster and click Actions.
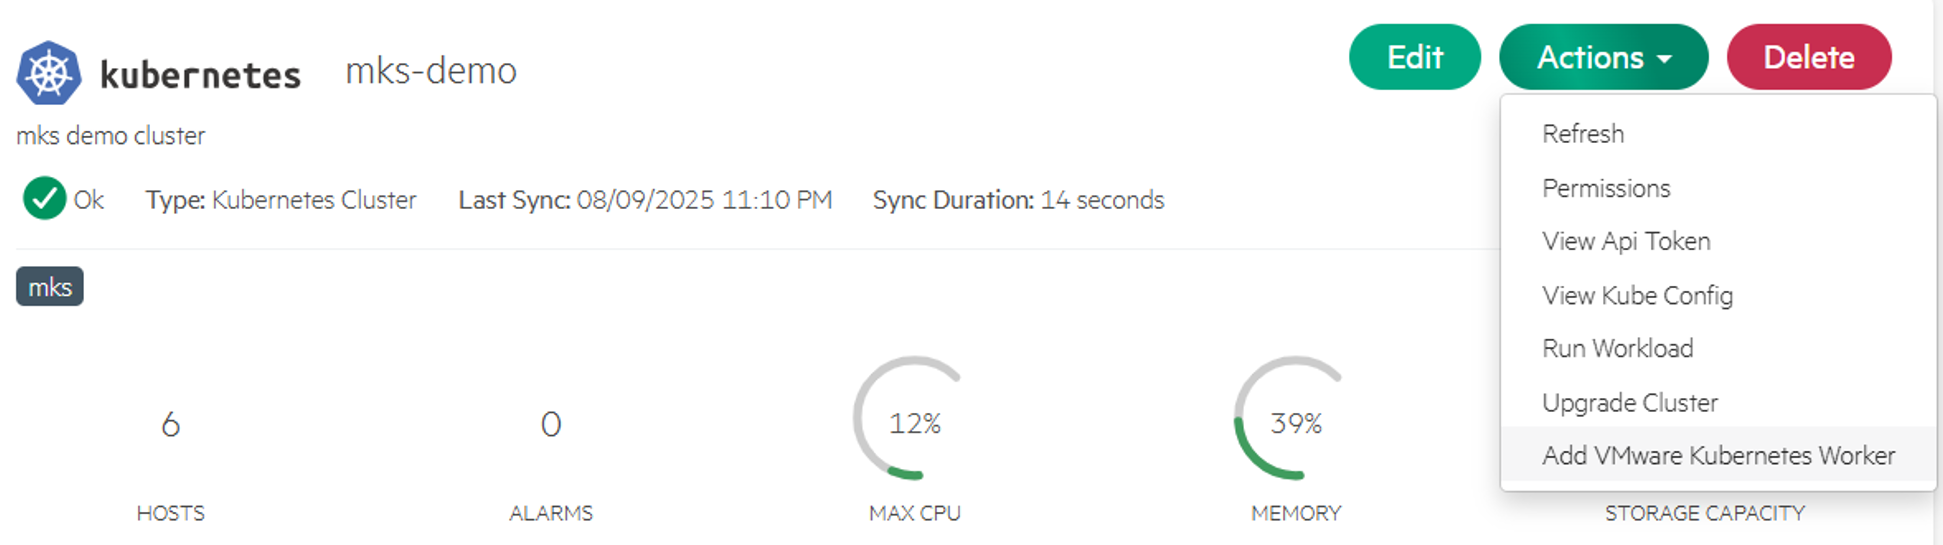
Click Add VMware Kubernetes Worker to initiate adding new worker to the cluster.
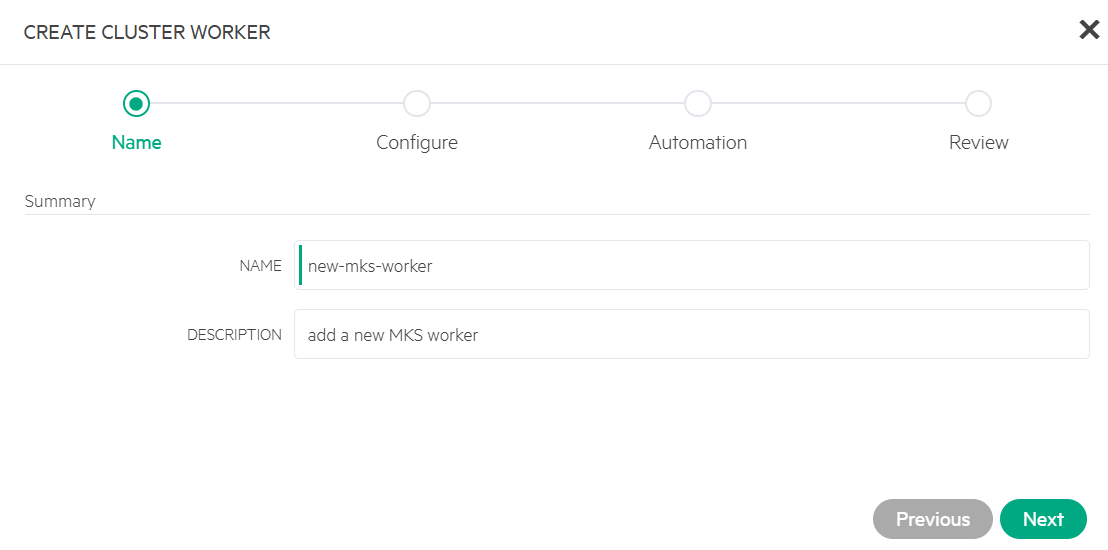
- Enter NAME and an optional brief DESCRIPTION.
- Select PLAN and configure VOLUMES and NETWORKS.
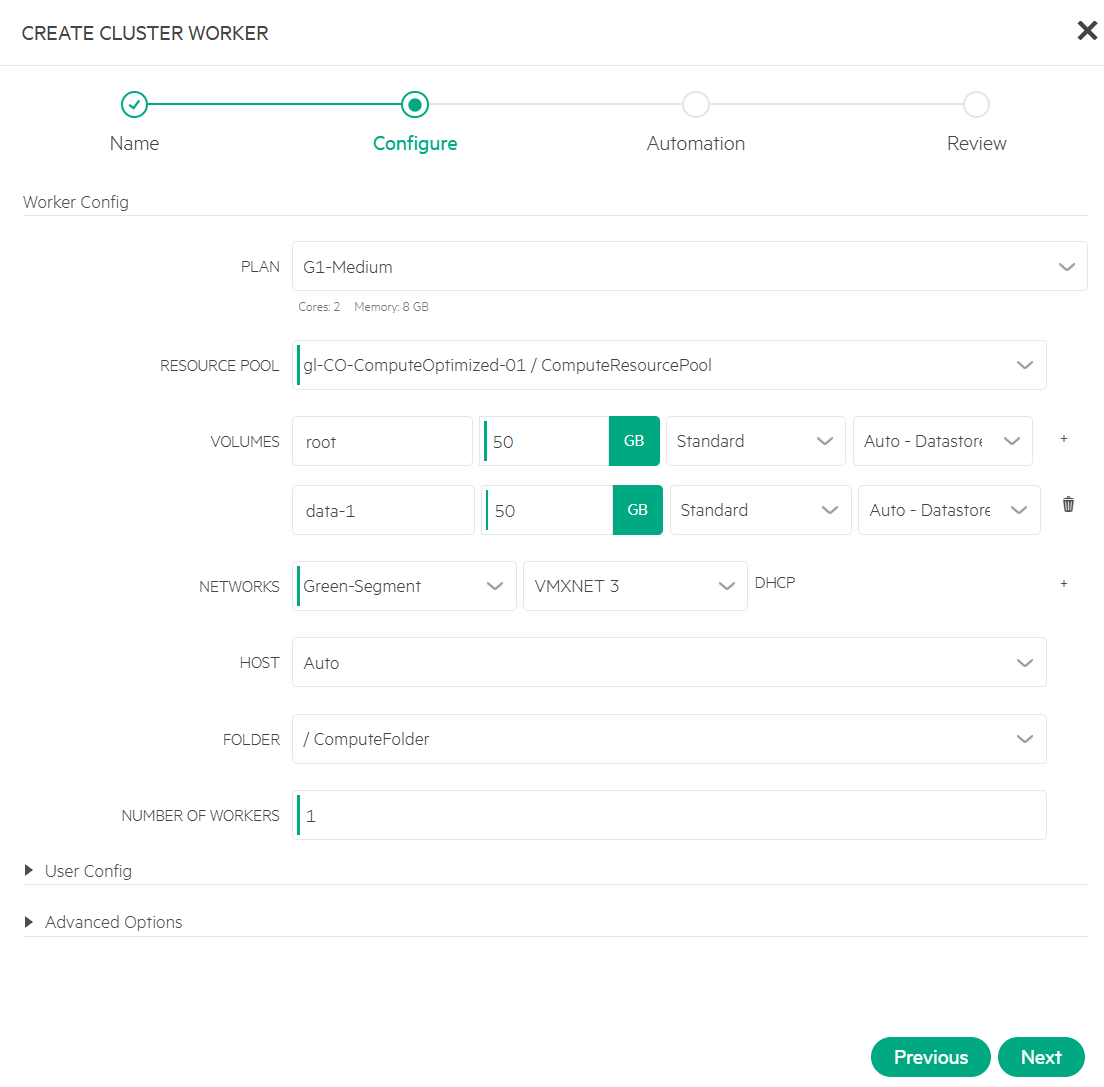
To add multiple workers at once, set the desired value in the NUMBER OF WORKERS field.
- Review worker details.
Skip this step for Automation settings. The worker review screen displays.
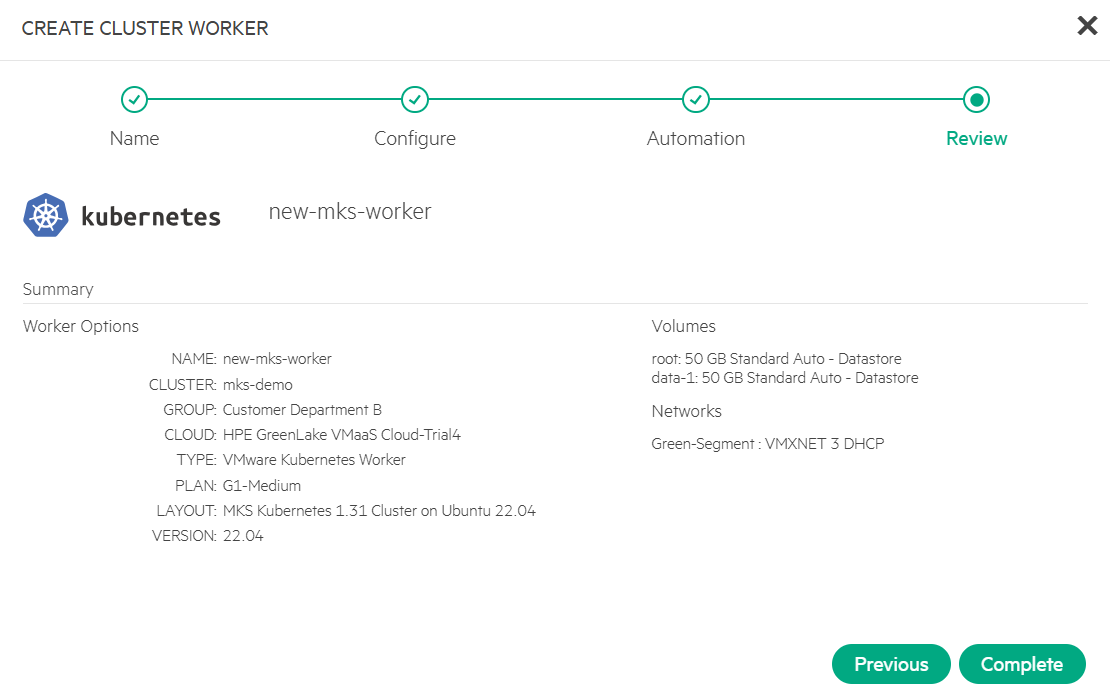
Click Complete to initiate provisioning new VM instances and adding them to the cluster as new workers.
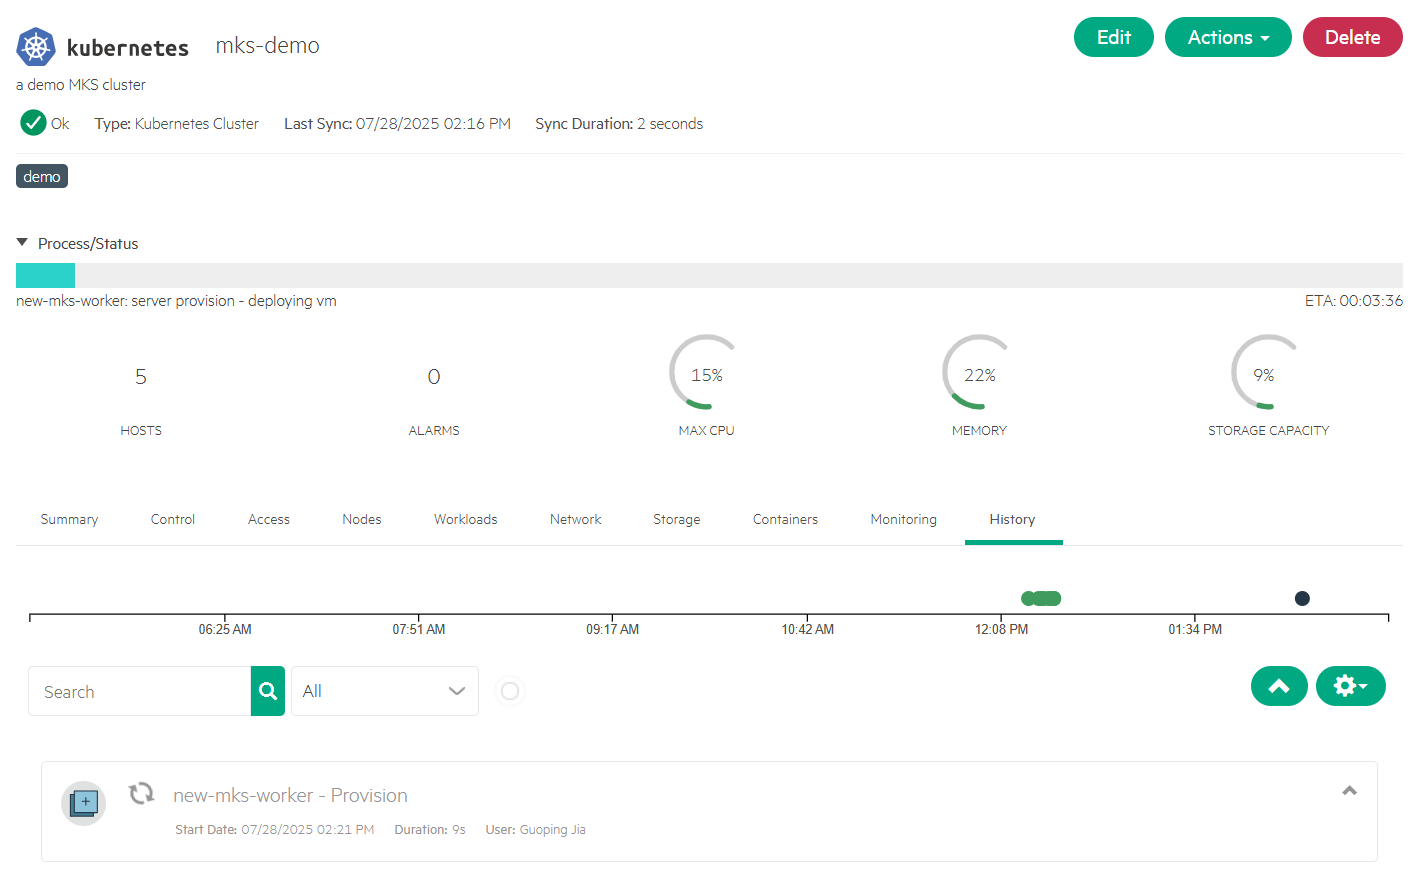
- Verify new worker.
Navigate to the Nodes tab to check the new worker 'new-mks-worker' is listed in the node list.
- Upgrade MKS cluster
K8s follows a frequent release cycle, every 4 months on average, to ensure stability, innovation, and timely security updates. While upgrading a K8s cluster is crucial for maintaining security, performance, and access to the latest features, it remains a complex and demanding task. The upgrade process presents significant challenges, including managing scale and complexity, minimizing downtime risks, and handling substantial operational overhead that can span weeks and require coordination across multiple teams.
From the MKS screen, navigate to a cluster and click Actions.
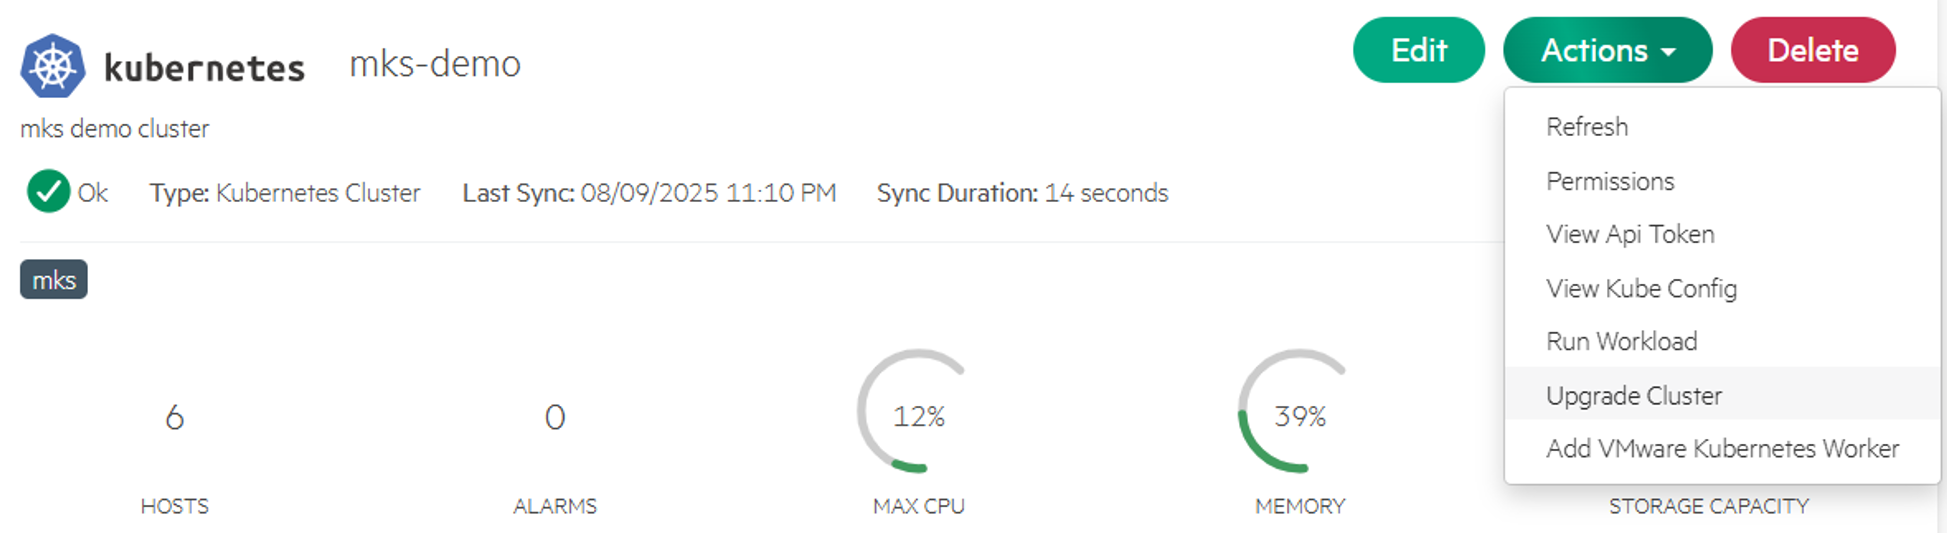
Click Upgrade Cluster. The UPGRADE CLUSTER screen displays the list of supported versions available for upgrade.
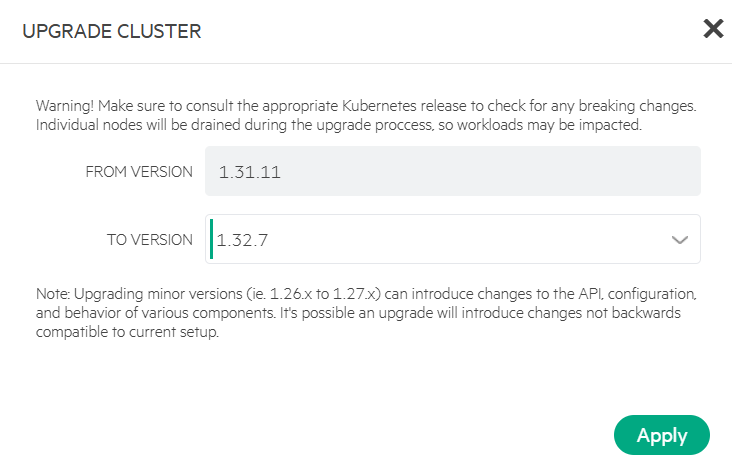
Select version 1.32.7 and click Apply to initiate upgrading the cluster.
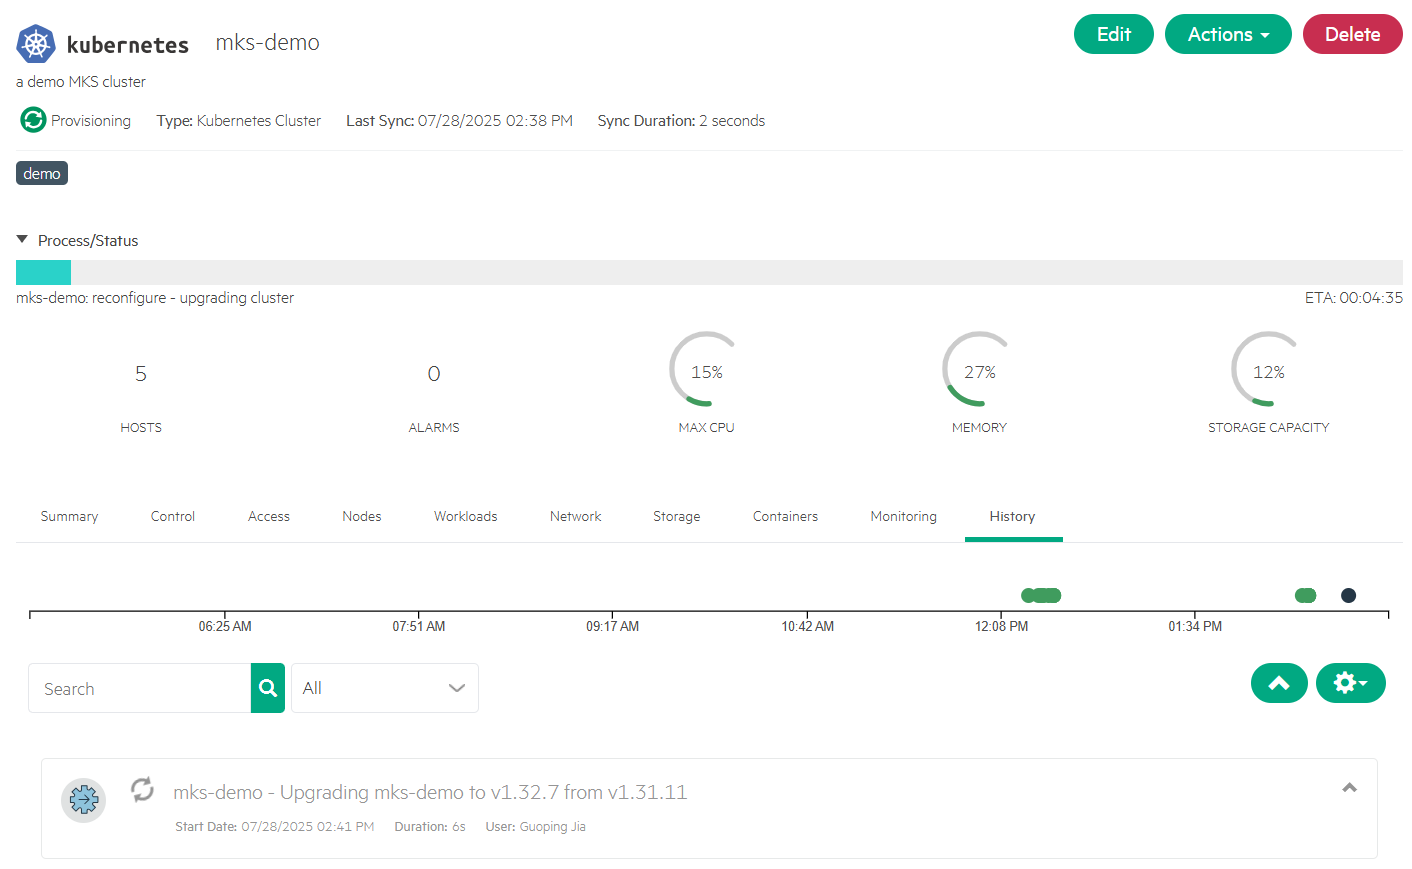
Approximately after a few minutes, the cluster status updates to Ok and displays its cluster layout as 'MKS Kubernetes 1.32 Cluster on Ubuntu 22.04'.
Deploy applications
After downloading the kubeconfig file as outlined earlier, you can easily deploy applications to the MKS cluster using the kubectl CLI or Helm. This section includes steps to deploy applications using the built-in features available from the provisioned MKS cluster in the Service Console.
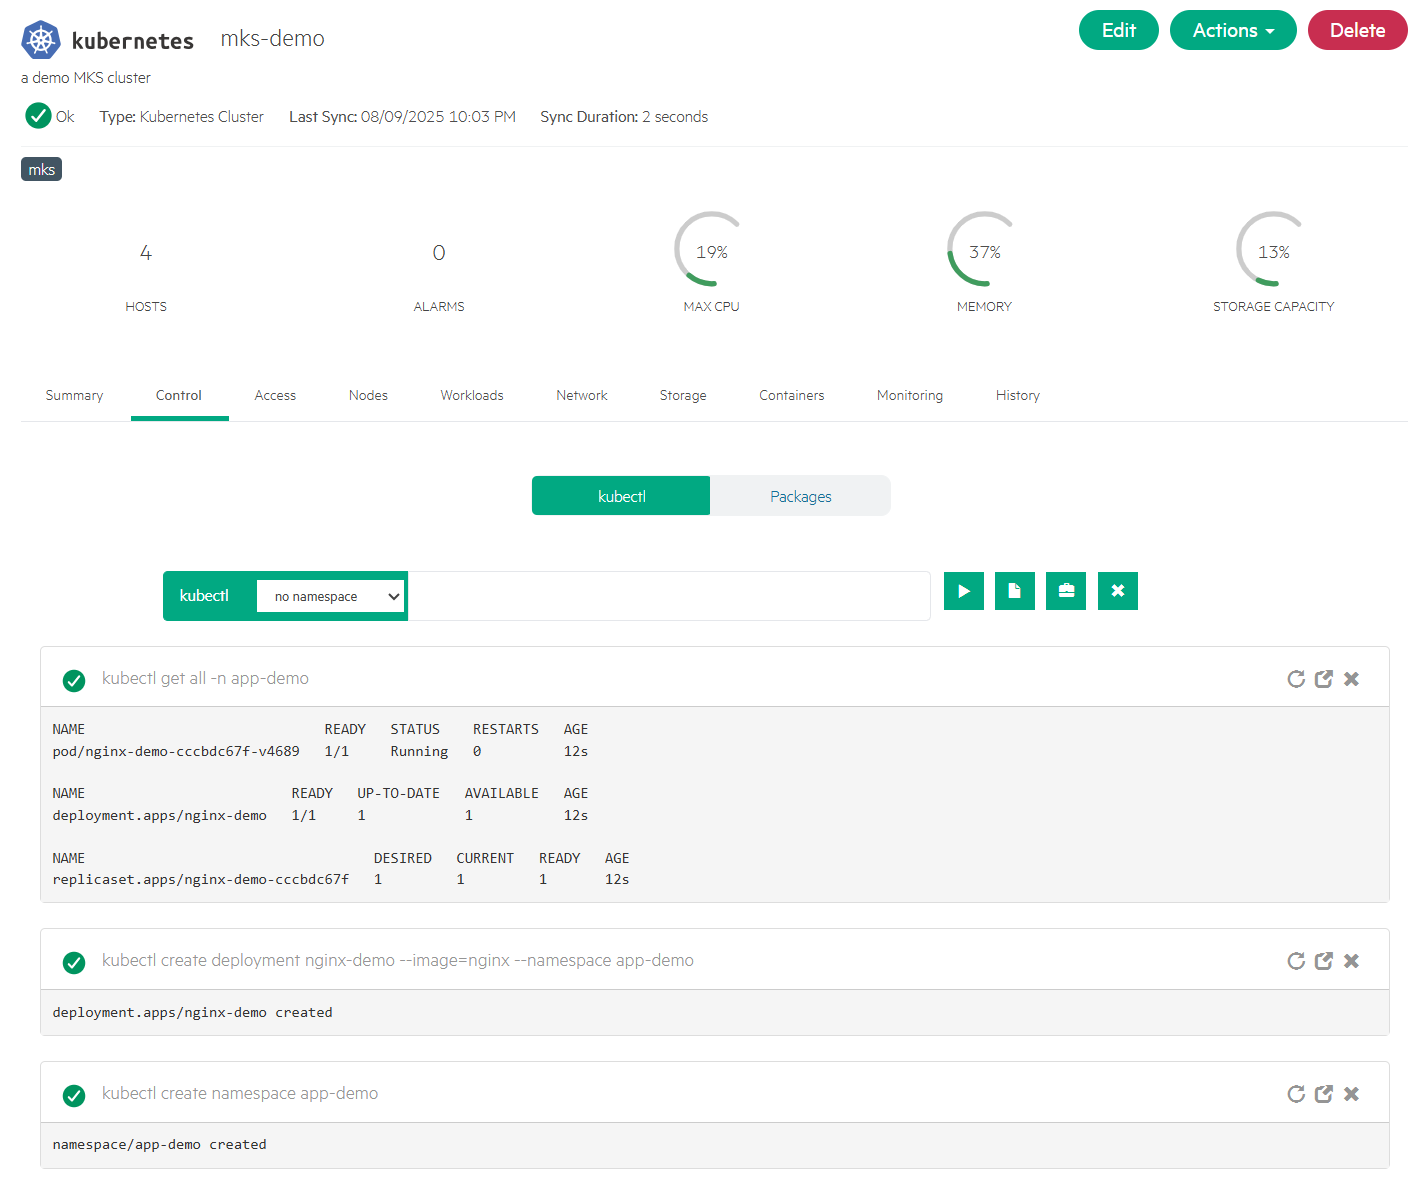
- Deploy applications from the cluster's Control tab
Under Control tab of the 'mks-demo' cluster, deploy a sample application 'nginx-demo' to the namespace 'app-demo' by running the commands 'kubectl create namespace app-demo' and 'kubectl create deployment nginx-demo --image=nginx --namespace app-demo'.
- Deploy applications from the cluster's Actions menu
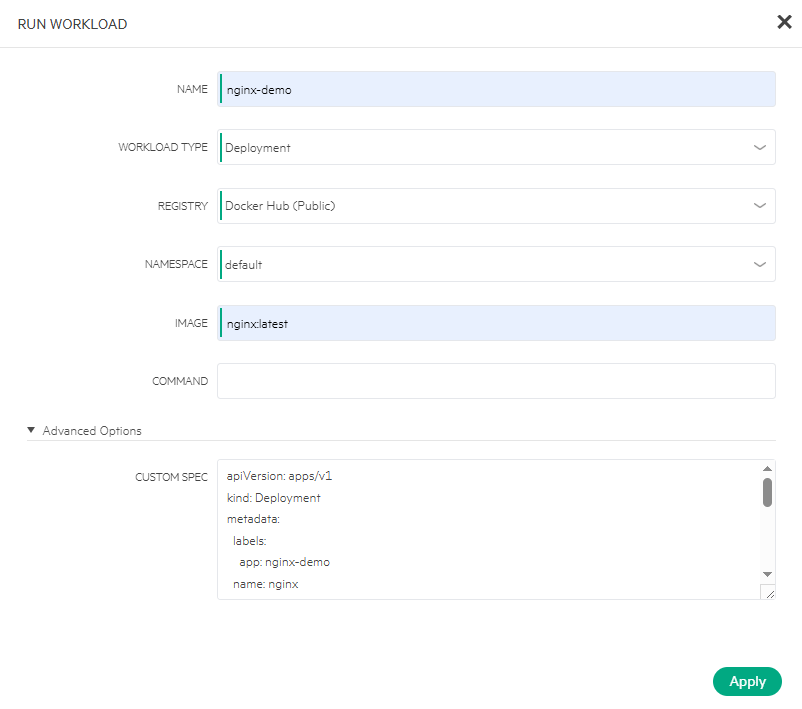
From the 'mks-demo' cluster screen, select Actions > Run Workload.
Define the following Deployment YAML in CUSTOM SPEC and click Apply. It will deploy the 'nginx-demo' application to the 'default' namespace.
apiVersion: apps/v1
kind: Deployment
metadata:
  labels:
    app: nginx
  name: nginx-demo
spec:
  replicas: 1
  selector:
    matchLabels:
      app: nginx
  template:
    metadata:
      labels:
        app: nginx
    spec:
      containers:
      - image: nginx
        name: nginx
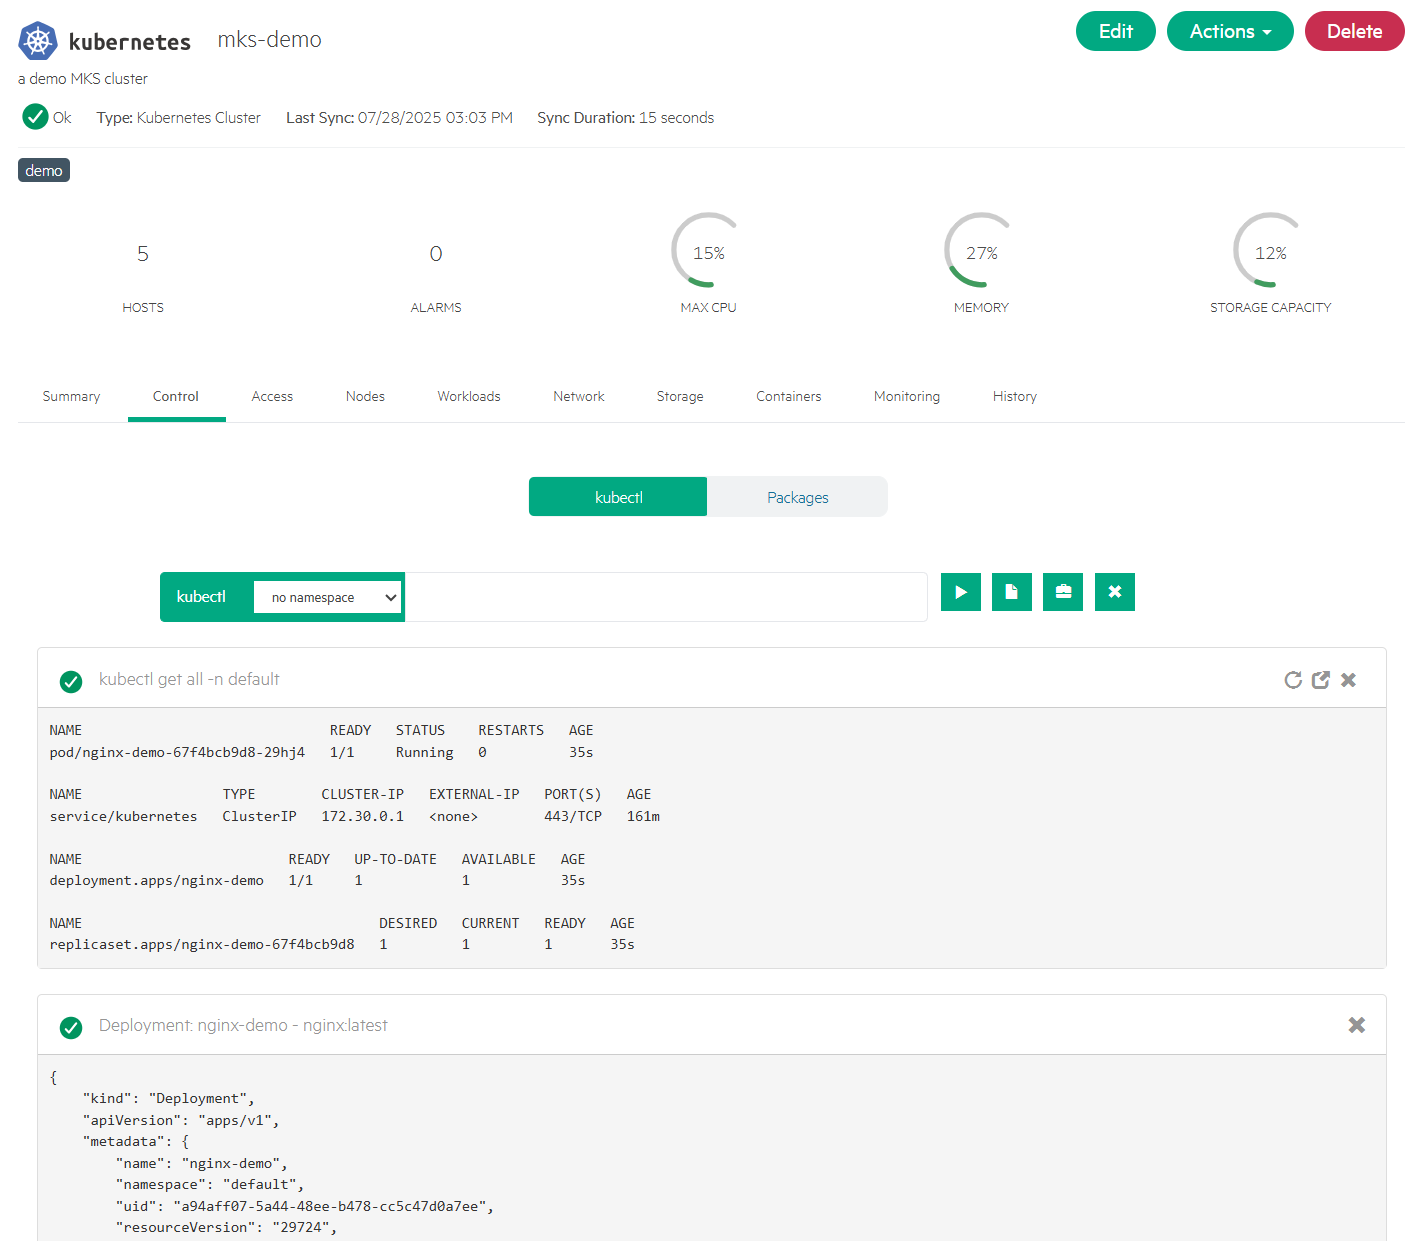
Run the following command from the cluster's Control tab to confirm the 'nginx-demo' has been deployed successfully to the default namespace.
kubectl get all -n default
Conclusion
This blog post provided a step-by-step guide to provisioning an MKS cluster using the MKS Beta feature within the HPE Private Cloud Enterprise environment. By selecting from a list of preconfigured MKS cluster layouts, you can quickly deploy an MKS cluster with your preferred cluster type and K8s version. Once provisioned, adding more workers is as simple as clicking the button from the cluster's Actions menu. Cluster upgrading to a newer K8s version follows the same streamlined process. This makes cluster administration more efficient, consistent, and user-friendly.
Please keep coming back to the HPE Developer Community blog to learn more about HPE Private Cloud Enterprise and get more ideas on how you can use it in your everyday operations.
Tags
Related
A guide to enabling a managed Istio service mesh in a Kubernetes cluster on HPE GreenLake for Private Cloud Enterprise
Feb 16, 2023
Bare metal provisioning on HPE GreenLake using Terraform
Mar 20, 2023Configuring Azure Active Directory with long-lived tokens for user provisioning
Jul 16, 2024Create a General-Purpose Kubeconfig File in HPE GreenLake for Private Cloud Enterprise
May 20, 2022Curate and Expose Service Catalog Items using HPE GreenLake for Private Cloud Enterprise
Feb 16, 2022Deploy stateful MongoDB applications on Kubernetes clusters in HPE GreenLake for Private Cloud Enterprise
Aug 16, 2022A guide to deploying MongoDB applications using HPE GreenLake for Private Cloud Enterprise
Dec 1, 2022