
Generating self-signed certificates using cert-manager for Kubernetes in HPE GreenLake for Private Cloud Enterprise
March 11, 2024This blog post describes the details steps on how to generate a self-signed certificate using cert-manager for Kubernetes (K8s) in HPE GreenLake for Private Cloud Enterprise. The generated self-signed certificates can be used by DevOps teams and developers to configure Transport Layer Security (TLS) termination and expose applications deployed in the K8s cluster securely via HTTPS.
Overview
HPE GreenLake for Private Cloud Enterprise: Containers, one of the HPE GreenLake cloud services available on the HPE GreenLake for Private Cloud Enterprise, allows customers to create a K8s cluster, view details about existing clusters, and deploy containerized applications to the cluster. It provides an enterprise-grade container management service using open source K8s.
Once applications are deployed in a cluster, a common requirement is to expose the applications so that they can be securely accessed over HTTPS. This requires getting a valid SSL/TLS certificate in K8s. Generating and managing SSL/TLS certificates in K8s is not always easy. There is a list of popular tools and utilities, e.g, . OpenSSL, CloudFlare’s CFSSL, OpenVPN’s Easy-RSA, etc, that you can use for generating certificates.
However, you still need to follow up that with creating the root certificate authorities, generating certificate signing requests (CSRs), and signing the certificates. The process to generate those items is not very intuitive. Most often than not, it requires the help of a DevOps engineer as well as assistance from different teams who are involved in installing and configuring the certificate chain.
This blog post describes the detailed steps involved in the process of generating a self-signed certificate using cert-manager for K8s in HPE GreenLake for Private Cloud Enterprise. Cert-manager integrates seamlessly with K8s for automated handling of certificates. It aligns well with the K8s resource model. This makes cert-manager a native and powerful solution for creating and managing certificates within K8s clusters.
Prerequisites
Before starting, make sure you have the following:
- A K8s cluster, being provisioned in HPE GreenLake for Private Cloud Enterprise
- The kubectl CLI tool, together with the kubeconfig file for accessing the K8s cluster
- The optional openssl CLI tool, for validating the generated certificate
Cert-manager
Cert-manager, a popular open source certificate management add-on designed to work with K8s, streamlines the process of acquiring, renewing, and utilizing SSL/TLS certificates within a K8s cluster. When deployed in a K8s cluster, cert-manager introduces two custom resource definitions (CRDs): Issuer and Certificate. These CRDs automate the generation and renewal of certificates for various scenarios in K8s. Cert-manager can obtain certificates from a variety of certificate authorities (CAs), including Let’s Encrypt, HashiCorp Vault, and private PKIs. It can also be configured to generate self-signed certificates if needed. When cert-manager creates a certificate, it makes it available to the entire cluster by storing the certificate as a K8s Secret object, which can be mounted by application Pods or used by an Ingress controller. This makes the certificate accessible across all namespaces within the K8s cluster.
Generate a self-signed certificate
Install cert-manager
As shown on the cert-manager installation page, cert-manager can be installed by typing the following kubectl apply command:
$ kubectl apply -f https://github.com/cert-manager/cert-manager/releases/download/v1.14.3/cert-manager.yaml
namespace/cert-manager created
customresourcedefinition.apiextensions.k8s.io/certificaterequests.cert-manager.io created
customresourcedefinition.apiextensions.k8s.io/certificates.cert-manager.io created
customresourcedefinition.apiextensions.k8s.io/challenges.acme.cert-manager.io created
customresourcedefinition.apiextensions.k8s.io/clusterissuers.cert-manager.io created
customresourcedefinition.apiextensions.k8s.io/issuers.cert-manager.io created
customresourcedefinition.apiextensions.k8s.io/orders.acme.cert-manager.io created
serviceaccount/cert-manager-cainjector created
serviceaccount/cert-manager created
serviceaccount/cert-manager-webhook created
configmap/cert-manager created
configmap/cert-manager-webhook created
clusterrole.rbac.authorization.k8s.io/cert-manager-cainjector created
clusterrole.rbac.authorization.k8s.io/cert-manager-controller-issuers created
clusterrole.rbac.authorization.k8s.io/cert-manager-controller-clusterissuers created
clusterrole.rbac.authorization.k8s.io/cert-manager-controller-certificates created
clusterrole.rbac.authorization.k8s.io/cert-manager-controller-orders created
clusterrole.rbac.authorization.k8s.io/cert-manager-controller-challenges created
clusterrole.rbac.authorization.k8s.io/cert-manager-controller-ingress-shim created
clusterrole.rbac.authorization.k8s.io/cert-manager-cluster-view created
clusterrole.rbac.authorization.k8s.io/cert-manager-view created
clusterrole.rbac.authorization.k8s.io/cert-manager-edit created
clusterrole.rbac.authorization.k8s.io/cert-manager-controller-approve:cert-manager-io created
clusterrole.rbac.authorization.k8s.io/cert-manager-controller-certificatesigningrequests created
clusterrole.rbac.authorization.k8s.io/cert-manager-webhook:subjectaccessreviews created
clusterrolebinding.rbac.authorization.k8s.io/cert-manager-cainjector created
clusterrolebinding.rbac.authorization.k8s.io/cert-manager-controller-issuers created
clusterrolebinding.rbac.authorization.k8s.io/cert-manager-controller-clusterissuers created
clusterrolebinding.rbac.authorization.k8s.io/cert-manager-controller-certificates created
clusterrolebinding.rbac.authorization.k8s.io/cert-manager-controller-orders created
clusterrolebinding.rbac.authorization.k8s.io/cert-manager-controller-challenges created
clusterrolebinding.rbac.authorization.k8s.io/cert-manager-controller-ingress-shim created
clusterrolebinding.rbac.authorization.k8s.io/cert-manager-controller-approve:cert-manager-io created
clusterrolebinding.rbac.authorization.k8s.io/cert-manager-controller-certificatesigningrequests created
clusterrolebinding.rbac.authorization.k8s.io/cert-manager-webhook:subjectaccessreviews created
role.rbac.authorization.k8s.io/cert-manager-cainjector:leaderelection created
role.rbac.authorization.k8s.io/cert-manager:leaderelection created
role.rbac.authorization.k8s.io/cert-manager-webhook:dynamic-serving created
rolebinding.rbac.authorization.k8s.io/cert-manager-cainjector:leaderelection created
rolebinding.rbac.authorization.k8s.io/cert-manager:leaderelection created
rolebinding.rbac.authorization.k8s.io/cert-manager-webhook:dynamic-serving created
service/cert-manager created
service/cert-manager-webhook created
deployment.apps/cert-manager-cainjector created
deployment.apps/cert-manager created
deployment.apps/cert-manager-webhook created
mutatingwebhookconfiguration.admissionregistration.k8s.io/cert-manager-webhook created
validatingwebhookconfiguration.admissionregistration.k8s.io/cert-manager-webhook created
The latest cert-manager v1.14.3 will be installed to the namespace cert-manager. Type the following command to check that all the Pods are showing a Running status:
$ kubectl get all -n cert-manager
NAME                                           READY   STATUS    RESTARTS   AGE
pod/cert-manager-6bcdd5f7c-f7lfw               1/1     Running   0          3m36s
pod/cert-manager-cainjector-5d4577b4d9-jmpsp   1/1     Running   0          3m36s
pod/cert-manager-webhook-bf957dc77-s9r2g       1/1     Running   0          3m36s

NAME                           TYPE        CLUSTER-IP      EXTERNAL-IP   PORT(S)    AGE
service/cert-manager           ClusterIP   10.109.28.203   <none>        9402/TCP   3m39s
service/cert-manager-webhook   ClusterIP   10.100.82.119   <none>        443/TCP    3m38s

NAME                                      READY   UP-TO-DATE   AVAILABLE   AGE
deployment.apps/cert-manager              1/1     1            1           3m37s
deployment.apps/cert-manager-cainjector   1/1     1            1           3m38s
deployment.apps/cert-manager-webhook      1/1     1            1           3m37s

NAME                                                 DESIRED   CURRENT   READY   AGE
replicaset.apps/cert-manager-6bcdd5f7c               1         1         1       3m38s
replicaset.apps/cert-manager-cainjector-5d4577b4d9   1         1         1       3m39s
replicaset.apps/cert-manager-webhook-bf957dc77       1         1         1       3m38s
As part of cert-manager installation, a list of cert-manager related CRDs has been added to the cluster:
$ kubectl get crds | grep cert-manager
certificaterequests.cert-manager.io                                 2024-02-02T15:42:53Z
certificates.cert-manager.io                                        2024-02-02T15:42:53Z
challenges.acme.cert-manager.io                                     2024-02-02T15:42:54Z
clusterissuers.cert-manager.io                                      2024-02-02T15:42:55Z
issuers.cert-manager.io                                             2024-02-02T15:42:55Z
orders.acme.cert-manager.io                                         2024-02-02T15:42:56Z
Create an Issuer
An Issuer in cert-manager is a K8s CRD resource that represents a certificate authority (CA) that's able to generate a signed certificate by honoring certificate signing request (CSR). All cert-manager certificates require a referenced issuer that is in a ready condition to attempt to honor the request.
Here is a self-signed issuer YAML manifest file issuer-selfsigned.yaml:
$ cat issuer-selfsigned.yaml
apiVersion: cert-manager.io/v1
kind: Issuer
metadata:
 name: cfe-selfsigned-issuer
spec:
 selfSigned: {}
Type the following commands to create a namespace in which you want to generate certificates and deploy the CRD Issuer resource to this namespace. Replace the sample namespace cfe-apps in the commands with your own namespace.
$ kubectl create ns cfe-apps
namespace/cfe-apps created

$ kubectl apply -f issuer-selfsigned.yaml -n cfe-apps
issuer.cert-manager.io/cfe-selfsigned-issuer created
Type the following command to check the deployed issuer in the namespace. The issuer should show READY as True.
$ kubectl get issuer -n cfe-apps
NAME                    READY   AGE

cfe-selfsigned-issuer   True    7s
If you want to be able to request certificates from any namespace in a cluster, use the CRD resource called ClusterIssuer.
Here is a sample ClusterIssuer YAM manifest file clusterissuer.yaml:
$ cat clusterissuer.yaml
apiVersion: cert-manager.io/v1
kind: ClusterIssuer
metadata:
  name: selfsigned-cluster-issuer
spec:
  selfSigned: {}
Generate a certificate
You can use the CRD resource Certificate to generate a self-signed certificate.
Here is a sample Certificate YAML manifest file certificate.yaml :
$ cat certificate.yaml
apiVersion: cert-manager.io/v1
kind: Certificate
metadata:
 name: cfe-selfsigned-tls
spec:
 secretName: cfe-tls-key-pair
 isCA: true
 issuerRef:
   name: cfe-selfsigned-issuer
   kind: Issuer
 commonName: "example.com"
 dnsNames:
 - nginx.example.com
 - example.com
In this YAML file, the commonName is set to a sample domain 'example.com'. The dnsNames includes 'example.com' and its subdomain 'nginx.example.com'.
Cert-manager supports the generation of wildcard certificates, e.g., using '*.example.com', which allows one to secure multiple subdomains under a single certificate. Wildcard certificates cover all subdomains under the specified domain. You need to be cautious when using them, as they grant access to any subdomain matching the pattern.
Type the following command to generate the certificate in the namespace cfe-apps:
$ kubectl apply -f certificate.yaml -n cfe-apps
certificate.cert-manager.io/cfe-selfsigned-tls created
Check the generated certificate in the namespace cfe-apps by typing the following command:
$ kubectl get certificate -n cfe-apps
NAME                 READY   SECRET             AGE
cfe-selfsigned-tls   True    cfe-tls-key-pair   23s
The K8s secret cfe-tls-key-pair will be created automatically in the same namespace as part of certificate deployment. Type the command shown below to check it:
$ kubectl get secrets -n cfe-apps cfe-tls-key-pair
NAME               TYPE                DATA   AGE
cfe-tls-key-pair   kubernetes.io/tls   3      52s
The secret cfe-tls-key-pair contains 3 keys, ca.crt, tls.crt and tls.key, which can be checked using the option -o yaml in the above get secrets command.
Test the certificate
Type the following openssl command to check the generated certificate:
$ openssl x509 -in <(kubectl get secret -n cfe-apps cfe-tls-key-pair -o jsonpath='{.data.tls\.crt}' | base64 -d)
-text -noout
Certificate:
    Data:
        Version: 3 (0x2)
        Serial Number:
            2a:2a:5d:0f:d1:e2:6f:60:3e:8a:93:4f:f4:e8:52:1e
        Signature Algorithm: sha256WithRSAEncryption
        Issuer: CN = example.com
        Validity
            Not Before: Feb 21 14:17:18 2024 GMT
            Not After : May 21 14:17:18 2024 GMT
        Subject: CN = example.com
        Subject Public Key Info:
            Public Key Algorithm: rsaEncryption
                RSA Public-Key: (2048 bit)
                Modulus:
                    00:b7:7d:95:7f:55:a7:32:fd:66:b2:78:c0:2b:1f:
                    1f:69:c6:de:1f:85:eb:fb:2b:69:f3:60:23:df:9d:
                    3e:3d:41:df:c9:6b:b0:92:80:fe:6a:6f:19:4d:61:
                    20:3e:fc:19:af:f1:1d:5e:f6:b6:4f:17:5d:76:99:
                    3f:f4:d3:4a:70:15:f8:d5:3e:02:5c:c4:29:32:75:
                    cd:e3:5a:07:7d:ea:47:71:37:3b:3d:36:89:36:e5:
                    8f:0e:03:57:ab:99:b3:6d:47:67:8a:6b:3b:2b:61:
                    b0:08:96:a6:a2:5d:46:ed:ee:f3:5a:e3:6b:1d:05:
                    08:f1:ab:1b:ea:49:a3:2f:0d:82:37:80:76:00:18:
                    77:99:39:08:2e:06:54:28:24:e2:c8:9f:48:9c:ec:
                    75:0e:5e:a6:7b:ce:0b:68:96:d1:1a:4e:56:e1:ca:
                    42:ab:8e:11:a8:37:e1:70:ae:25:e3:2f:26:f1:7c:
                    95:fa:da:48:57:1f:a3:d7:47:84:86:9d:76:b3:99:
                    a5:ef:10:98:96:31:ee:32:31:05:bc:5a:c0:94:bd:
                    25:ba:d6:86:32:d1:a6:3e:8c:21:99:a8:96:d6:5d:
                    69:35:01:8e:4f:d8:e9:90:78:17:ce:ac:4a:f8:13:
                    59:9b:e3:a8:9b:59:cc:c6:5f:5b:ca:6c:73:5e:e6:
                    88:f9
                Exponent: 65537 (0x10001)
        X509v3 extensions:
            X509v3 Key Usage: critical
                Digital Signature, Key Encipherment, Certificate Sign
            X509v3 Basic Constraints: critical
                CA:TRUE
            X509v3 Subject Key Identifier:
                53:55:6D:56:AA:75:E2:87:9E:BB:C2:C7:45:32:2F:E3:1C:FF:17:62
            X509v3 Subject Alternative Name:
                DNS:nginx.example.com, DNS:example.com
    Signature Algorithm: sha256WithRSAEncryption
         69:e4:ae:bb:15:c1:d7:1a:54:49:10:6b:04:f9:1b:ed:bf:64:
         0f:da:5e:b8:c2:e7:e2:d9:45:9e:66:92:0f:ce:f5:c9:5f:aa:
         b3:28:36:cd:16:da:6a:60:7f:eb:1d:85:fe:3a:38:65:71:0f:
         eb:da:e8:9e:1b:dc:f5:b7:14:4f:70:00:fd:bf:44:ed:37:35:
         bc:67:c7:4f:68:bc:5e:3b:bd:64:aa:5c:cd:1a:4f:11:90:c4:
         6f:6a:d2:4b:90:4c:25:e7:ab:83:12:d7:38:b1:bf:70:8c:d5:
         cc:cb:70:70:b6:de:dc:8f:66:21:42:88:d5:7e:59:5f:6e:83:
         73:81:e4:63:57:d1:c6:63:c0:9a:49:09:44:b5:d0:33:6b:3b:
         fd:3e:e4:c7:b7:d4:e4:72:0d:36:cf:a8:31:26:e3:ce:55:9f:
         46:b8:fd:ab:7c:cc:2a:4b:e2:a6:a5:cd:2f:0c:3a:b1:2d:84:
         1a:51:8b:e8:73:0f:cb:49:2e:a2:a6:ed:d5:e2:e8:cf:79:44:
         b9:2b:00:03:86:1a:a6:33:d4:20:33:9c:04:71:43:2d:9c:66:
         3b:13:9b:6f:9f:f6:5f:f2:e0:e4:4a:04:64:c3:e6:bd:78:18:
         19:22:d9:98:b5:47:85:0d:bd:b6:56:44:e6:89:34:30:90:20:
         36:63:4f:1e
The line X509v3 Subject Alternative Name contains the dnsNames specified in the YAML file certificate.yaml during the certificate generation.
Integrate certificate with applications
There are several ways to integrate the generated certificates into applications deployed in the K8s cluster and configure applications to be accessed securely over HTTPS.
The simplest way is to create the K8s Deployment resource with TLS block and containerPort configuration.
Here is one sample Nginx Deployment YAML manifest file nginx-deployment.yaml that integrates the generated certificate:
$ cat nginx-deployment.yaml
apiVersion: apps/v1
kind: Deployment
metadata:
  name: nginx-app
spec:
  replicas: 1
  template:
    spec:
      containers:
      - image: nginx
        name: nginx
        ports:
        - containerPort: 443
      tls:
      - secretName: cfe-tls-key-pair
By specifying the containerPort as 443 and referring the secretName to the generated K8s secret cfe-tls-key-pair under tls section, it enables TLS termination for the Nginx application.
There is another way to integrate the certificate and configure it using the K8s Ingress resource with TLS parameters. This configuration requires a working Ingress controller setup in the cluster. There is a list of Ingress controllers, like: Traefik, HAProxy, Nginx Ingress controller, you can deploy in the cluster.
Here is one such sample Ingress YAML manifest file ingress-nginx-selfsigned.yaml:
$ cat ingress-nginx-selfsigned.yaml
apiVersion: networking.k8s.io/v1
kind: Ingress
metadata:
  name: nginx-ingress-selfsigned
  annotations:
    ingress.kubernetes.io/ssl-redirect: "true"
    cert-manager.io/issuer: "cfe-selfsinged-issuer"
spec:
  ingressClassName: nginx
  tls:
  - hosts:
    - nginx.example.com
    secretName: cfe-tls-key-pair
  rules:
  - host: nginx.example.com
    http:
      paths:
      - path: /
        pathType: Prefix
        backend:
          service:
            name: nginx-app
            port:
              number: 80
It assumes the Nginx Ingress controller is deployed in the cluster. It configures the TLS block with the hostname 'nginx.example.com' and the generated K8s secret.
One benefit of this approach is that the sample Nginx application can be deployed in the cluster with the default service type ClusterIP, which provides internal connectivity and can solely be accessed from within the cluster. The Ingress controller will provide external access and handle SSL by accessing the certificate in the cluster and route the traffic to the deployed Nginx application in the backend.
Type the following command to deploy the Ingress resource to the namespace cfe-apps:
$ kubectl apply -f ingress-nginx-selfsigned.yaml -n cfe-apps
ingress.networking.k8s.io/nginx-ingress-selfsigned created
After deploying the Ingress using the above command, together with Nginx application deployment, to the namespace cfe-apps, you can validate the Ingress TLS using the browser.
Start the browser and type the URL nginx.example.com, it will be rediected over HTTPS with the warning message 'Your connection is not private':
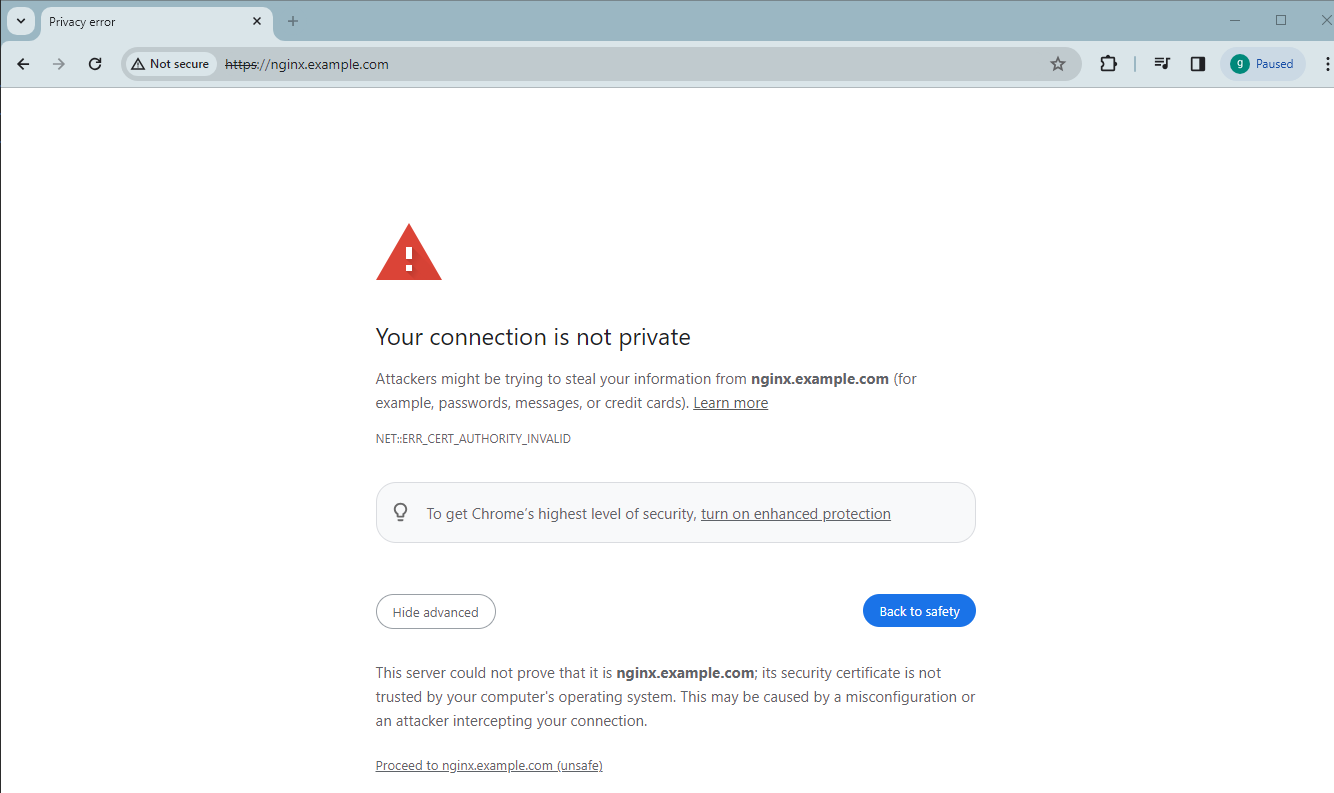
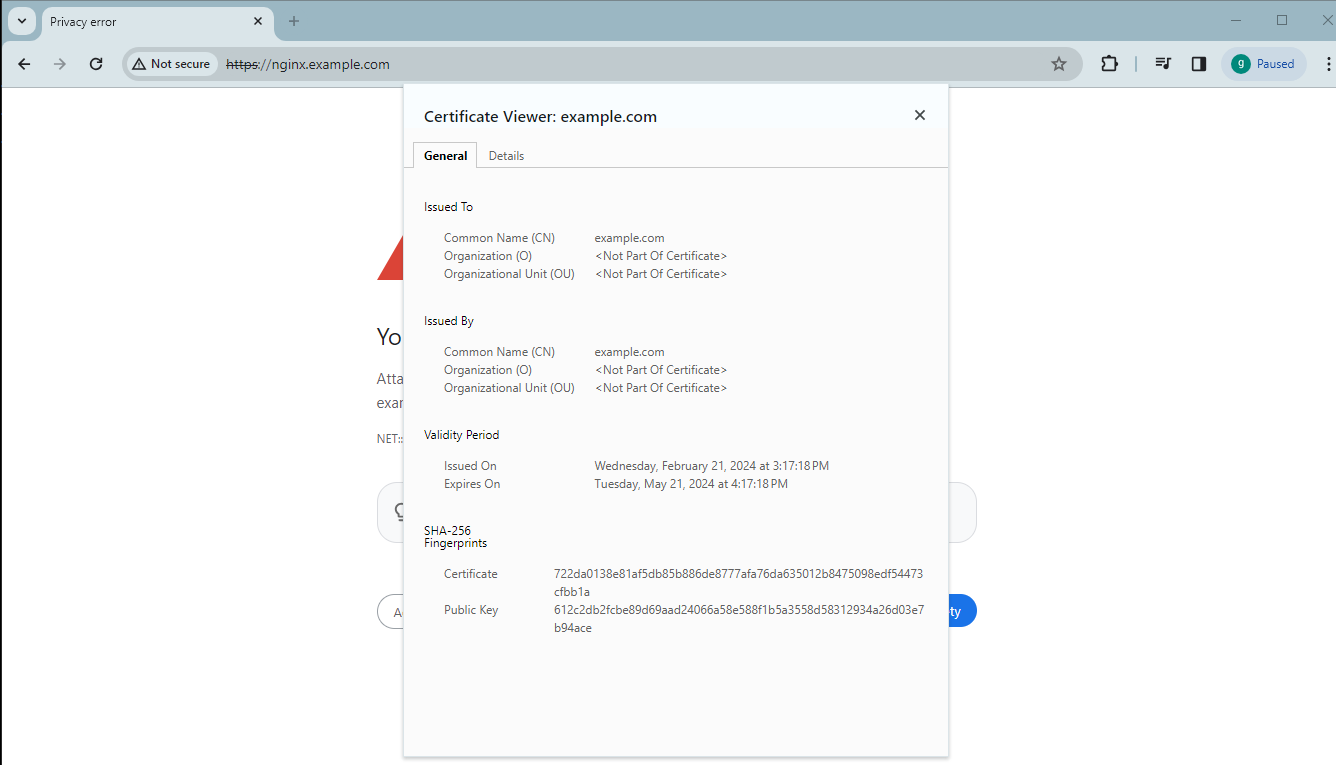
You can click Not secure and start the Certificate Viewer to check the TLS certificate before clicking Proceed to nginx.example.com (unsafe) to go to the Nginx page:
Conclusion
This blog post described the steps to generate a self-signed certificate using cert-manager for K8s in HPE GreenLake for Private Cloud Enterprise. Self-signed certificates provide an easy way to prove your own identity for the applications deployed in K8s cluster. This is a good option for development and testing environments. However, because self-signed certificates are not trusted certificates, they should not be used for production applications. For production use cases, you can try out cert-manager with Lets Encrypt. You can refer to cert-manager documentation on how to use it with the type of Let’s Encrypt challenges, as well as other sources than Let’s Encrypt.
Please keep coming back to the HPE Developer Community blog to learn more about HPE GreenLake for Private Cloud Enterprise.
Tags
Related

Accessing HPE Ezmeral Data Fabric Object Storage from Spring Boot S3 Micro Service deployed in K3s cluster
Sep 13, 2021
Deep Learning Model Training – A First-Time User’s Experience with Determined - Part 1
Apr 14, 2022Deep Learning Model Training – A First-Time User’s Experience with Determined – Part 2
May 3, 2022Provisioning Kubernetes clusters using app blueprint with Ansible integration in HPE Private Cloud Enterprise
Oct 3, 2025Exposing applications using Ingress and TLS termination on Kubernetes in HPE GreenLake for Private Cloud Enterprise
Mar 20, 2024Exposing Grafana service using Tailscale for MKS monitoring in HPE Private Cloud Enterprise
Oct 3, 2025Getting started with volume snapshots on a Kubernetes cluster in HPE GreenLake for Private Cloud Enterprise
Jan 23, 2024