Introduction
The HPE GreenLake for Private Cloud Enterprise: Bare Metal service offering enables you to create dedicated compute instances deployed on a physical IT infrastructure, facilitating on-demand scalability, convenience, and agility as a cloud service.
Using bare metal service, you can create compute-instances provisioned with specific operating systems, network connections, one or more public SSH keys, and optional network-attached storage volumes. The service can be accessed via GUI as well as via public APIs, enabling developers to use an Infrastructure-as-Code tool to build, change, and manage infrastructure in a consistent and repeatable way.
The HPE GreenLake Terraform provider hpegl by HPE GreenLake provides Infrastructure-as-Code support for HPE GreenLake Cloud Services. Using the hpegl Terraform provider, you can automate the management of your infrastructure. You can provision OS on bare metal, spin up virtual machines and bring up a Kubernetes cluster; starting right from bare metal all the way up the stack to your desired configurations and applications.
In this blog post, I will walk you through the steps required to use the HPE GreenLake Terraform Provider to deploy and further manage bare metal compute instances.
Preparing an Infrastructure-as-Code implementation
Setting up an API client for access
You need an API client to authenticate against HPE GreenLake.
Follow the below steps for an API client creation:
- From the HPE GreenLake platform, launch the HPE GreenLake Central console for the appropriate tenant. Under the settings icon on the tenant Dashboard page, select the User Management option.

- Under the API Clients tab, click on Create API Client.

- Enter a Name (mandatory field) and Description (optional) for the API client, and click on Create button.

- Ensure you make a note of the Issuer, Client ID, and Client Secret before clicking on the Close button. These details will be exported as environment variables in the next section.

In the API Clients page, select the newly created client, and click on Create Assignment button.
Assign the roles BMAAS Access Viewer and BMAAS Access Project Contributor on the Space: Default.

The API client is now ready to be used to run the Terraform resources.
Select the Compute group ID
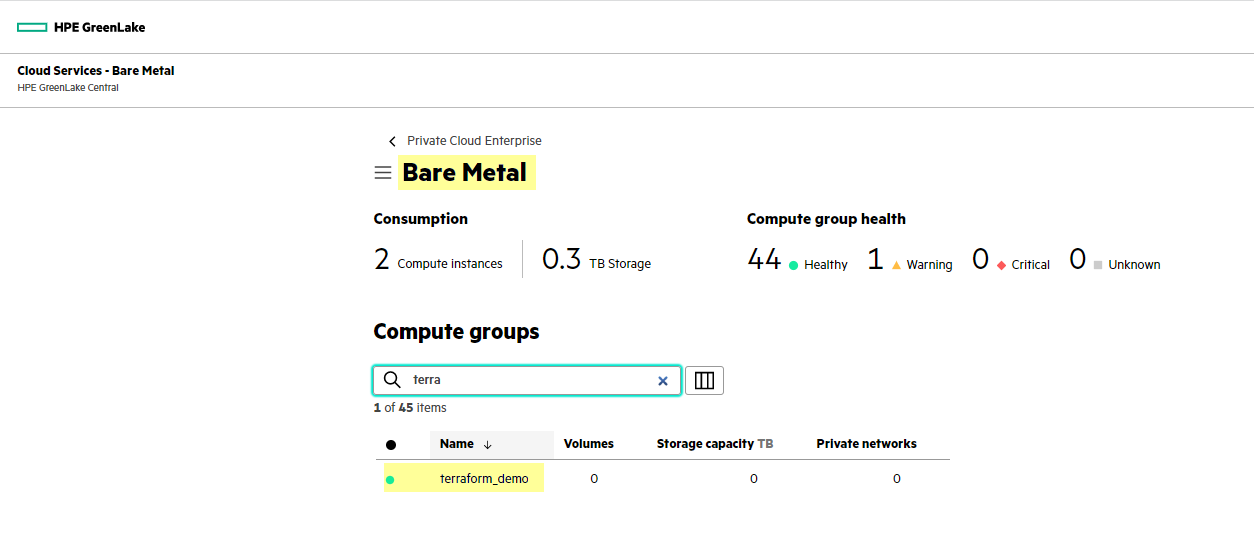
A compute group is a logical grouping of bare metal resources (compute instances, networks, SSH keys, etc.) that a team of cloud consumers can consume. You must specify the compute group ID to interact with the bare metal service resources. You can create a new compute group or select the existing one from the HPE GreenLake console. Make a note of the compute group ID because you need it to set a variable.
Note: Compute group is an AKA Project.
- Navigate to HPE GreenLake for Private Cloud Services card -> Bare Metal -> Compute Groups.

- Click on the desired compute group and then extract the ID from the browser URL seen at that time.
This will be exported in the environment variable HPE_METAL_PROJECT_ID in the later section.

Install Terraform
Next, get your system ready to run Terraform. In case this has not been done yet:
Download and install Terraform, version v0.13 or later.
For more information, see https://learn.hashicorp.com/tutorials/terraform/install-cli.Verify the installation with terraform -help.
At this point, you are ready to start building your infrastructure description file.
Deploy Compute Instance
Select Terraform provider with bare metal service configurations
Export the following environment variables on your setup.
Export the Tenant ID:
export HPEGL_TENANT_ID="<Tenant ID>Export the API Client credentials that you obtained when you created an API Client within HPE GreenLake Central:
export HPEGL_USER_ID="<API Client ID>"
export HPEGL_USER_SECRET="<API Client Secret>"
export HPEGL_IAM_SERVICE_URL="<Issuer URL>"
Export the Compute group ID:
Export bare metal service REST URL:# compute group/project ID export HPEGL_METAL_PROJECT_ID="<Compute group ID>"# Production Environment: https://client.greenlake.hpe.com/api/metal # Integration Environment: https://client.greenlake.hpe-gl-intg.com/api/metal # local development: http://localhost:3002 export HPEGL_METAL_REST_URL="<Metal Service REST Base URL>"Configure the Terraform provider.
Create an empty folder and put a file in it called main.tf with the following contents:
main.tf:
terraform {
  required_providers {
    hpegl = {
      source  = "HPE/hpegl"
      version = ">= 0.3.12"
    }
  }
}

provider "hpegl" {
  # metal block for configuring bare metal resources.
  metal {
  }
}
This tells Terraform that you are going to be using HPE/hpegl as your provider and you are using the bare metal service.
Write resource configuration for compute instance creation
To deploy compute instance, you need to use the hpegl_metal_host terraform resource.
Note:
- compute instance is AKA host.
- compute instance type is AKA machine size.
The hpegl_metal_host resource supports many different arguments, but these are the required ones:
- networks – List of networks. The list must always include any networks marked as 'required' for that location.
- machine_size – Compute instance type.
- ssh – List of SSH keys to push to the host.
- location – The data center location of where the compute instance will be provisioned.
- Image – OS image in the form flavor@version.
You can also check the documentation here to see all the required and optional fields.
Your next step with the TF file is to query the HPE GreenLake provider to collect the above-required information for creating a host. For this, you will use the Terraform data statements.
Querying for available OS images
In order to list the available OS images for OS, add the below data statements in your Terraform file main.tf:
The OS image list can be fetched using the following statements in **main.tf**:data "hpegl_metal_available_images" "ubuntu" { # select anything that looks like ubuntu:20.04 filter { name = "flavor" values = ["(?i)ubuntu"] } filter { name = "version" values = ["20.04*"] } }
locals {
  ubuntu_image = format("%s@%s", data.hpegl_metal_available_images.ubuntu.images[0].flavor,
                          data.hpegl_metal_available_images.ubuntu.images[0].version)
}
Querying for other available resources
For this, you should use hpegl_metal_available_resources data resource. For example, the following statements show how to retrieve and store the available SSH keys in a local variable.
Append to main.tf:
# query available resources.
data "hpegl_metal_available_resources" "available" {
}

# using one of the available SSH keys.
locals  {
  ssh_keys = data.hpegl_metal_available_resources.available.ssh_keys[0].name
}
Using a similar technique, you can retrieve the rest of the data you need - networks, machine size, etc.
Append to main.tf:
# choosing a location that has at least one machine available.
locals {
  location = ([for msize in data.hpegl_metal_available_resources.available.machine_sizes : msize.location
                    if msize.quantity > 0])[0]
}

# Listing required networks for this location.
locals {
  networks = ([for net in data.hpegl_metal_available_resources.available.networks : net.name
                  if net.host_use == "Required"  && net.location == local.location])
}

# choosing machine size/Compute Instance Type to deploy OS.
locals {
  machine_size = ([for msize in data.hpegl_metal_available_resources.available.machine_sizes : msize.name
                    if msize.location == local.location])
}
Here you can get information about each of the bare metal data statements supported by the hpegl provider.
Create Compute instance
The last step is for you to define a hpegl_metal_host terraform resource in the file to request a new compute instance (host):
resource "hpegl_metal_host" "demo_host" {
  name          = "demo-host-1"
  image         = local.ubuntu_image
  machine_size  = local.machine_size[0]
  ssh           = [ local.ssh_keys ]
  networks      = local.networks
  location      = local.location
  description   = "Simple Host Deployment Demo"
}
Initialize Terraform
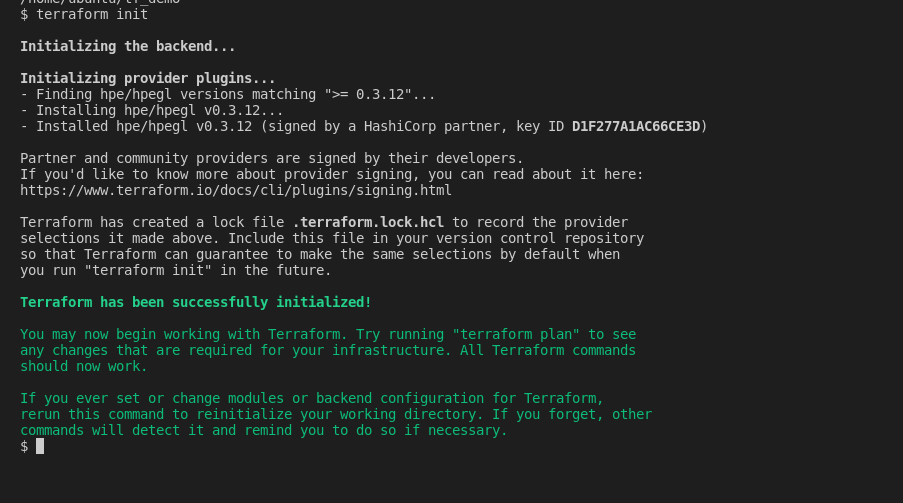
Before you can use Terraform, you will have to initialize it from the configuration file we have created. In the same directory as the main.tf file you created, run the command: terraform init.

Validate and View the Terraform Execution Plan
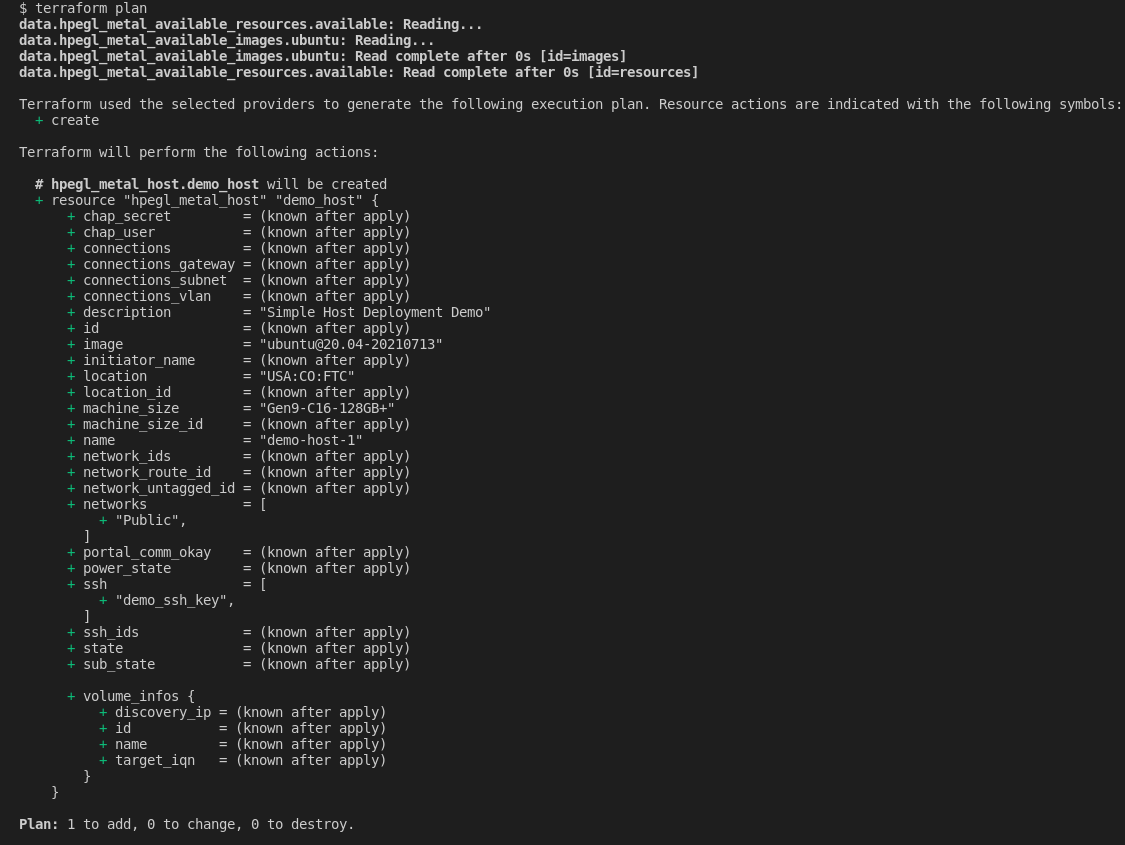
Terraform plan is a dry run that lets you preview the changes that Terraform plans to make to your infrastructure based on the data you provide in your Terraform file. To see this, run the command: terraform plan.

Apply the Terraform Execution Plan
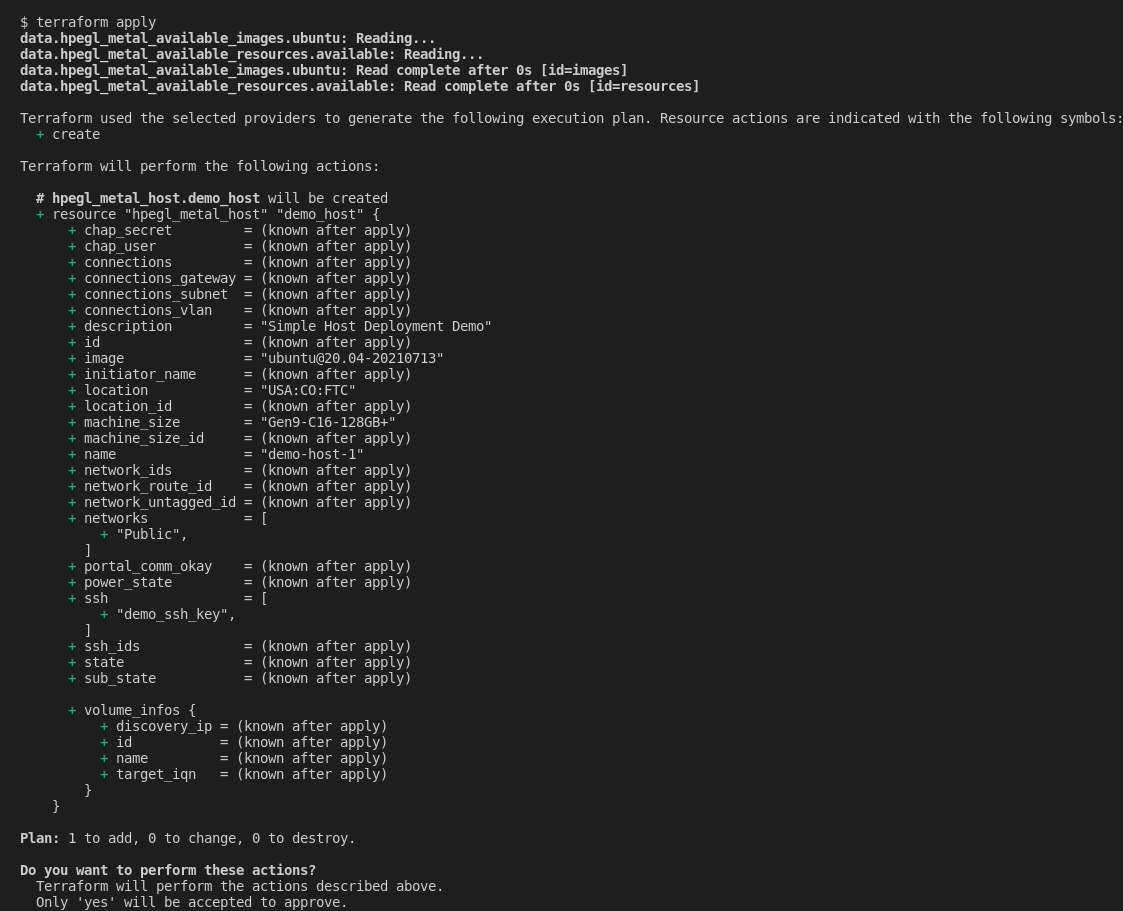
The command you need to use is now: terraform apply. This will rerun the plan command, then prompt you to confirm before it starts applying what’s in the plan:


Advanced Example
The above example shows how to deploy a compute instance from pre-existing resources. Below is another code sample demonstrating compute instance deployment using dynamic resources and additional optional configurations with hpegl_metal_host.
terraform {
  required_providers {
    hpegl = {
      source  = "HPE/hpegl"
      version = ">= 0.3.12"
    }
  }
}

provider "hpegl" {
  # metal block for configuring bare metal resources.
  metal {
  }
}

locals {
  location = "USA:CO:FTC"
}

resource "hpegl_metal_ssh_key" "newssh_1" {
  name       = "newssh_1"
  public_key = "ssh-rsa AAAAB3NzaC1yc2EAAAADAQABAAACAQCv03o//GEQ9/6eI1qZleyBbSndg0n5AkcKVnf5D4fEjwkWrtSIJEnROqJddEAn2XYALAk9x1AcB4Nue3q4tDG17VeK3ODo0+9Dx0LYqUTawnFWmo4X80QKr658Jmt7Enmnk5x2IrUDcNwAzALVellkBbwq7QbYUu1swSycNlNhSfGizqo/lQCNIHXyeRQ8oJxOuZkbiturXHZL389blIrTeUo53xmwE1TolVS8QzZRN8ve1GjFvpC5dl6orzi6LXDcrDcbZaxlrW+YQqyaipFRAw1DyTalrfpqxtq/Y9+Elz5xgCnUaepHN6ha/k81wtI2rySHga6pMOcJKlxaRS5OfzdrWh7oi2tEAaiq2y3pTr9hROQ2OGcMNU5gxbVU2ymeXdHVsAHMCmyKvQe0g0/fJzmNA/excogFCWDN7Spy9s2V39IbEKttyXjD/dpave7re9eFzYHA1CBEnNjMuvJj0H4tnpAETdQ6UbnjbE4JYn5eKGvnJ2w1JTfSdMK8nMcxqo4HfHWuLFuntCV9GAlWIVIvJn1pYisY8kEOtN5w6QrLTfsei96/TfssAsfhrDrVtgcgNU3EvZlC6Uaaly7D0ISFeufsxkPswu+jGNUJvGEqDiqvt05lSEZWS5viR/TOROTlicaGN9dhez/fqHcj5cnuoK1pmibK5GT7/Yf1Gw== user1@quattronetworks.com"
}

resource "hpegl_metal_network" "newpnet_1" {
  name        = "newpnet_1"
  description = "New private network 1 description"
  location    = local.location
  ip_pool {
    name          = "npool"
    description   = "New IP pool description"
    ip_ver        = "IPv4"
    base_ip       = "10.0.0.0"
    netmask       = "/24"
    default_route = "10.0.0.1"
    sources {
      base_ip = "10.0.0.3"
      count   = 10
    }
    dns      = ["10.0.0.50"]
    proxy    = "https://10.0.0.60"
    no_proxy = "10.0.0.5"
    ntp      = ["10.0.0.80"]
  }
}


resource "hpegl_metal_host" "demo_advance" {
  count = 0
  name             = "demo-advance-1"
  image            = "ubuntu@20.04-20210713"
  machine_size     = "G2i"
  ssh              = [hpegl_metal_ssh_key.newssh_1.id]
  networks         = ["Public", hpegl_metal_network.newpnet_1.name]
  network_route    = "Public"
  network_untagged = hpegl_metal_network.newpnet_1.name
  location         = local.location
  description      = "Hello from Terraform"
  # Attaching tags
  labels           = { "purpose" = "devops" }
}
Cleaning up resources
When you no longer need the resources created via Terraform, destroy the resources using the terraform destroy command. This will automatically use the HPE GreenLake provider to clean the infrastructure in HPE GreenLake.

Summary
In this blog, I covered how to provision a compute instance with Terraform provider for HPE GreenLake using bare metal resources. I also showed you advanced usage of hpegl resource statements to deploy a compute instance with dynamic resources.
I hope you found this information interesting and helpful in helping you get started with the HPE GreenLake Terraform provider. You can also go through the below links to understand more about the HPE GreenLake Terraform provider.
Tags
Related
A guide to enabling a managed Istio service mesh in a Kubernetes cluster on HPE GreenLake for Private Cloud Enterprise
Feb 16, 2023Using HPE GreenLake Console's API Gateway for Data Services Cloud Console
Nov 30, 2021Automate ITOps: announcing foundational APIs for the HPE GreenLake edge-to-cloud platform
Dec 1, 2023
Bulk onboarding of users in HPE GreenLake edge-to-cloud platform
Apr 24, 2024
Configuring Azure AD as the SAML IDP with HPE Greenlake Cloud Platform and Aruba Central
Jul 11, 2022How to implement a single sign-on solution to authenticate users onto the HPE GreenLake edge-to-cloud platform
Nov 29, 2023
Converting HPE GreenLake API specifications in OAS 3.1 using OpenAPI tools
May 27, 2024