

Getting started
The process of managing and provisioning computer data centers through machine-readable definition files, also known as Infrastructure-as-Code (IaC), offers many significant benefits, like:
- Increased operational agility
- Simplified management
- Reduced errors
- Saved cost
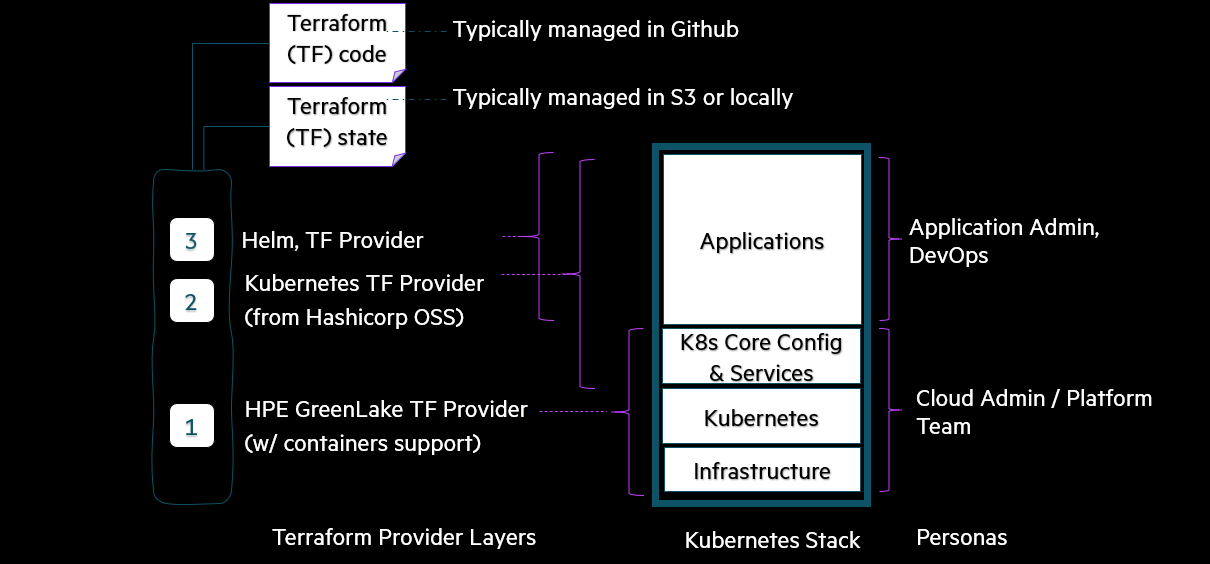
Using the HPE GreenLake Terraform provider, you can bring up a Kubernetes cluster starting right from the infrastructure layer and way up in the stack to set up desired configurations and applications. In the diagram below, 2 and 3 are community providers that are available and can be used in combination with HPE GreenLake TF provider to deploy applications on the Kubernetes cluster. In this blog post, I will illustrate how this can be implemented using Terraform.
Using similar Terraform files as shown in this blog post, customers can deploy any application of their choice on the Kubernetes cluster by consuming the appropriate community providers available. With this capability, customers can customize the Kubernetes clusters based on their needs.
Let's recap
In my first blog post, I covered the usage of the HPE GreenLake Terraform provider to create and destroy a Kubernetes cluster and discussed how to use community providers, in combination with HPE GreenLake TF provider, to create a namespace in the Kubernetes cluster.
In this blog post, I will focus on managing application deployments using IaC. Here, I will be deploying a Prometheus application on an existing/pre-created Kubernetes cluster. Hence, the pre-requisite to proceed would be to have a Kubernetes cluster and a namespace created. You could follow the steps mentioned in my first blog post to achieve this.
Application deployment on a Kubernetes cluster
Helm provider
Below is the code block for adding helm community provider. Please refer to my first blog post for details regarding hpegl_caas_cluster data source.
provider "helm" {
  kubernetes {
       host     = yamldecode(base64decode(data.hpegl_caas_cluster.tf-test-7.kubeconfig)).clusters[0].cluster.server
       token    = yamldecode(base64decode(data.hpegl_caas_cluster.tf-test-7.kubeconfig)).users[0].user.token
       insecure = true
  }
}
Helm-release Terraform resource for Prometheus stack deployment
In order to deploy Prometheus stack using the helm-release resource, the following values have to be filled in the prometheus-deploy.tf file:
- Cluster Name: Fill in the name of the pre-created cluster in hpegl_caas_cluster block. In the below example, name= "tf-test-7"
- Namespace: Fill in the appropriate namespace in the helm_release block. In the below example, namespace= "test-namespace"
prometheus-deploy.tf
Note: You can name this file according to your preference. We are using prometheus-deploy.tf here for easy reference.
terraform {
  required_providers {
    hpegl = {
      source  = "hpe/hpegl"
      version = ">= 0.2.2"
    }
  }
}

provider "hpegl" {
  caas {
  }
}

variable "HPEGL_SPACE" {
  type = string
}

data "hpegl_caas_cluster" "tf-test-7" {
  name     = "tf-test-7"
  space_id = var.HPEGL_SPACE
}

provider "helm" {
  kubernetes {
       host     = yamldecode(base64decode(data.hpegl_caas_cluster.tf-test-7.kubeconfig)).clusters[0].cluster.server
       token    = yamldecode(base64decode(data.hpegl_caas_cluster.tf-test-7.kubeconfig)).users[0].user.token
       insecure = true
  }
}

resource "helm_release" "prometheus-stack" {
   name = "prometheus-stack"
   repository = "https://prometheus-community.github.io/helm-charts"
   chart = "kube-prometheus-stack"
   version = "36.0.2"
   namespace = "test-namespace"

   set {
    name  = "grafana.service.type"
    value = "NodePort"
  }
}
Initializing workspace & synchronizing infrastructure components
Place the prometheus-deploy.tf file in your working directory and initialize the working directory using the command: terraform init
$ terraform init

Initializing the backend...

Initializing provider plugins...
- Reusing previous version of hashicorp/helm from the dependency lock file
- Reusing previous version of terraform.example.com/caas/hpegl from the dependency lock file
- Using previously-installed hashicorp/helm v2.5.1
- Using previously-installed terraform.example.com/caas/hpegl v0.0.1

Terraform has made some changes to the provider dependency selections recorded
in the .terraform.lock.hcl file. Review those changes and commit them to your
version control system if they represent changes you intended to make.

Terraform has been successfully initialized!

You may now begin working with Terraform. Try running "terraform plan" to see
any changes that are required for your infrastructure. All Terraform commands
should now work.

If you ever set or change modules or backend configuration for Terraform,
rerun this command to reinitialize your working directory. If you forget, other
commands will detect it and remind you to do so if necessary.
Terraform ready to plan
Terraform plan is a dry run that lets you preview the changes that Terraform plans to make to your infrastructure based on the data you provide in your Terraform file. To see this, run: terraform plan
$ terraform plan Terraform used the selected providers to generate the following execution plan. Resource actions are indicated with the following symbols: + create Terraform will perform the following actions: # helm_release.prometheus-stack will be created + resource "helm_release" "prometheus-stack" { + atomic = false + chart = "kube-prometheus-stack" + cleanup_on_fail = false + create_namespace = false + dependency_update = false + disable_crd_hooks = false + disable_openapi_validation = false + disable_webhooks = false + force_update = false + id = (known after apply) + lint = false + manifest = (known after apply) + max_history = 0 + metadata = (known after apply) + name = "prometheus-stack" + namespace = "test-namespace" + recreate_pods = false + render_subchart_notes = true + replace = false + repository = "https://prometheus-community.github.io/helm-charts" + reset_values = false + reuse_values = false + skip_crds = false + status = "deployed" + timeout = 300 + verify = false + version = "36.0.2" + wait = true + wait_for_jobs = false + set { + name = "grafana.service.type" + value = "NodePort" } } Plan: 1 to add, 0 to change, 0 to destroy. ───────────────────────────────────────────────────────────────────────────────────────────────────────────────────────────�───────────────────────────────── Note: You didn't use the -out option to save this plan, so Terraform can't guarantee to take exactly these actions if you run "terraform apply" now.
Terraform ready to apply
Terraform apply executes the actions proposed in the Terraform plan and deploys the resources. Run terraform apply and then type yes when asked to Enter a value.
$ terraform apply

Terraform used the selected providers to generate the following execution plan. Resource actions are indicated with the following symbols:
  + create

Terraform will perform the following actions:

  # helm_release.prometheus-stack will be created
  + resource "helm_release" "prometheus-stack" {
      + atomic                     = false
      + chart                      = "kube-prometheus-stack"
      + cleanup_on_fail            = false
      + create_namespace           = false
      + dependency_update          = false
      + disable_crd_hooks          = false
      + disable_openapi_validation = false
      + disable_webhooks           = false
      + force_update               = false
      + id                         = (known after apply)
      + lint                       = false
      + manifest                   = (known after apply)
      + max_history                = 0
      + metadata                   = (known after apply)
      + name                       = "prometheus-stack"
      + namespace                  = "test-namespace"
      + recreate_pods              = false
      + render_subchart_notes      = true
      + replace                    = false
      + repository                 = "https://prometheus-community.github.io/helm-charts"
      + reset_values               = false
      + reuse_values               = false
      + skip_crds                  = false
      + status                     = "deployed"
      + timeout                    = 300
      + verify                     = false
      + version                    = "36.0.2"
      + wait                       = true
      + wait_for_jobs              = false

      + set {
          + name  = "grafana.service.type"
          + value = "NodePort"
        }
    }

Plan: 1 to add, 0 to change, 0 to destroy.

Do you want to perform these actions?
  Terraform will perform the actions described above.
  Only 'yes' will be accepted to approve.

  Enter a value: yes

helm_release.prometheus-stack: Creating...
helm_release.prometheus-stack: Still creating... [10s elapsed]
helm_release.prometheus-stack: Still creating... [20s elapsed]
helm_release.prometheus-stack: Still creating... [30s elapsed]
helm_release.prometheus-stack: Still creating... [40s elapsed]
helm_release.prometheus-stack: Still creating... [50s elapsed]
helm_release.prometheus-stack: Still creating... [1m0s elapsed]
helm_release.prometheus-stack: Still creating... [1m10s elapsed]
helm_release.prometheus-stack: Still creating... [1m20s elapsed]
helm_release.prometheus-stack: Still creating... [1m30s elapsed]
helm_release.prometheus-stack: Still creating... [1m40s elapsed]
helm_release.prometheus-stack: Still creating... [1m50s elapsed]
helm_release.prometheus-stack: Still creating... [2m0s elapsed]
helm_release.prometheus-stack: Creation complete after 2m2s [id=prometheus-stack]

Apply complete! Resources: 1 added, 0 changed, 0 destroyed.
After Terraform apply is complete, you can see the Prometheus pods deployed by running the command:
$ kubectl get po -n <namespace>

You can see the Prometheus services by running the command:
$ kubectl get svc-n <namespace>

You can fetch the node IP by running the command:
$ kubectl get nodes -o wide

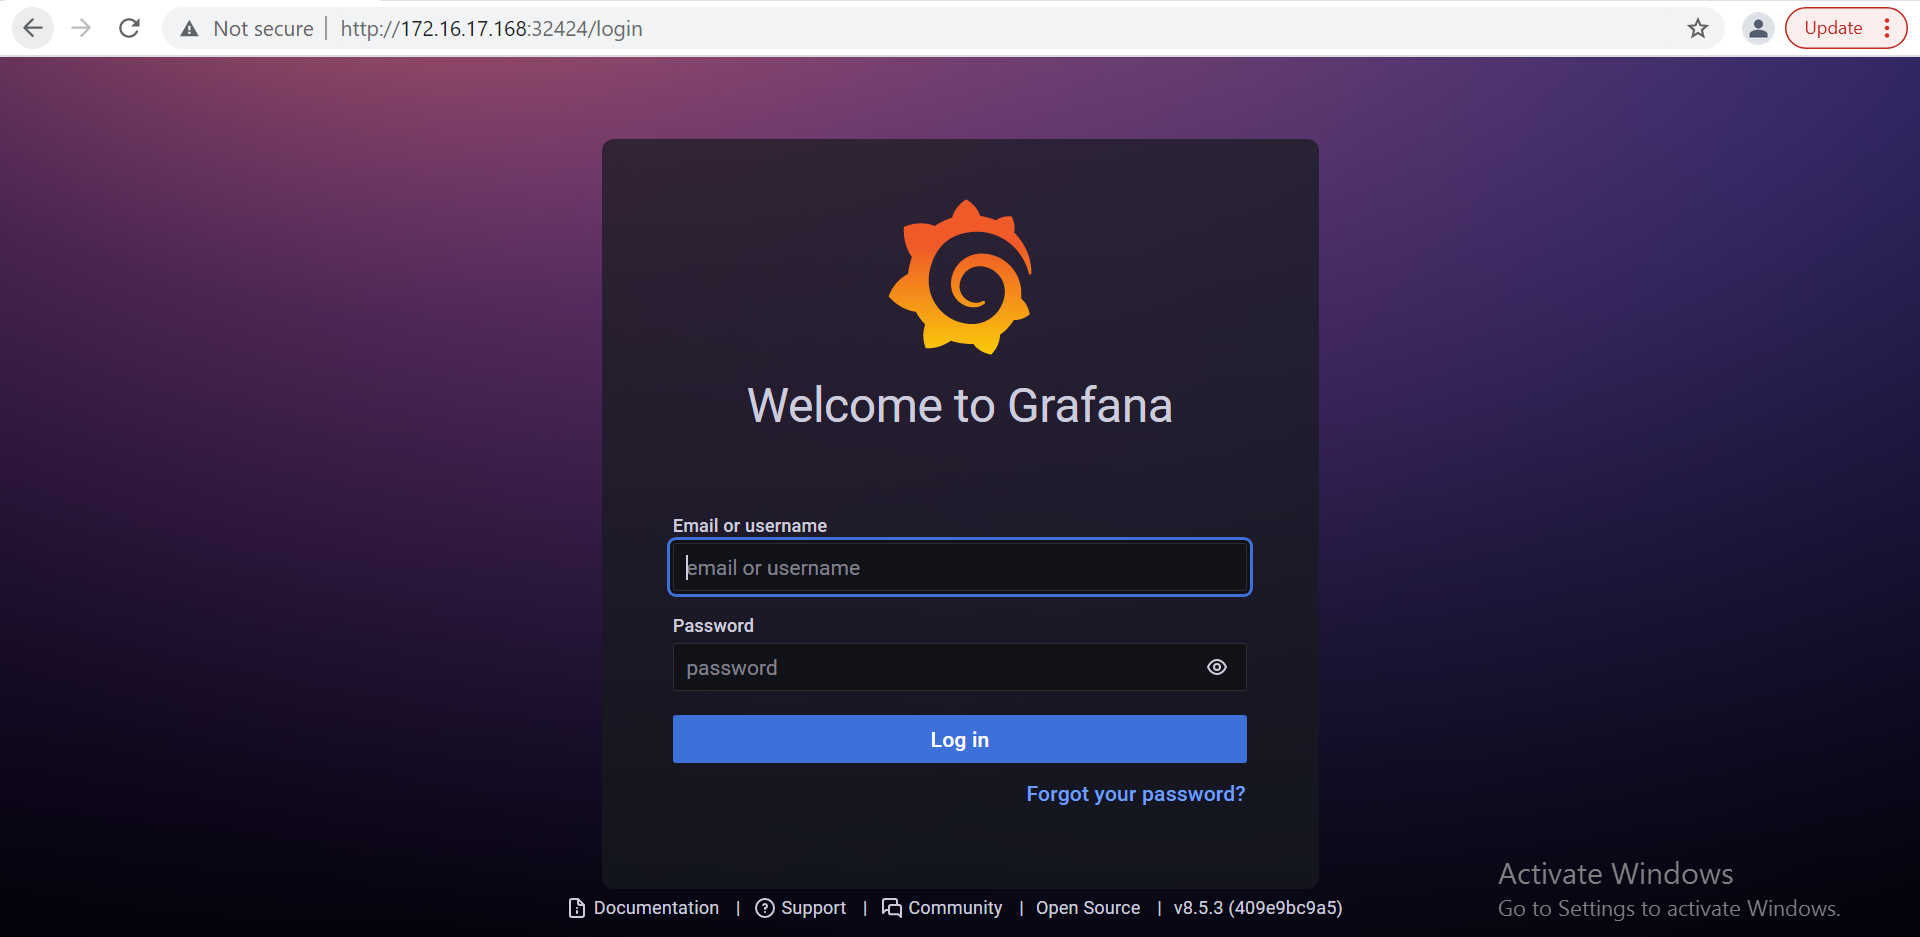
Since Grafana is exposed as a NodePort, this PORT: 32424 and the node's internal IP INTERNAL-IP: 172.16.17.168, can be used to access Grafana portal as follows:
https://<INTERNAL-IP>:<PORT>
For example, http://172.16.17.168:32424
Summary
In my first blog post, I covered how to get started with the Terraform provider for HPE GreenLake and explained how to create a Kubernetes cluster and bring up a namespace on the Kubernetes cluster using Kubernetes community provider. In this article, I showed you how to manage application deployments on a Kubernetes cluster using Terraform.
I hope you found this information interesting and useful in helping you get started with HPE GreenLake Terraform provider. You could also go through the below links to understand more about Terraform and HPE GreenLake Terraform Provider
- Learn more about HPE GreenLake
- Learn more about the HPE GreenLake Terraform provider
Don’t forget, you can always find other tutorials and articles on HPE GreenLake on the HPE Developer blog.
Tags
Related
A guide to enabling a managed Istio service mesh in a Kubernetes cluster on HPE GreenLake for Private Cloud Enterprise
Feb 16, 2023
Using HPE GreenLake Console's API Gateway for Data Services Cloud Console
Nov 30, 2021Automate ITOps: announcing foundational APIs for the HPE GreenLake edge-to-cloud platform
Dec 1, 2023
Bare metal provisioning on HPE GreenLake using Terraform
Mar 20, 2023
Bulk onboarding of users in HPE GreenLake edge-to-cloud platform
Apr 24, 2024
Configuring Azure AD as the SAML IDP with HPE Greenlake Cloud Platform and Aruba Central
Jul 11, 2022How to implement a single sign-on solution to authenticate users onto the HPE GreenLake edge-to-cloud platform
Nov 29, 2023