Introduction
We know you love servers by Hewlett Packard Enterprise (HPE) for their security and ease of management. With the release of HPE iLO 7 on Gen12 servers, HPE has taken security to the next level. Unlike previous generations where Production was the default security state, iLO 7 introduces the Secure Standard state by default, enhancing system security.
Another major change is in the default login method - Virtual NIC (VNIC) replaces the CHIF interface, which was used in iLO 6 and earlier versions.
In this article, I'll walk you through how to manage HPE iLO 7 using the iLOrest 6.0 tool via in-band access. We’ll start by installing iLOrest on different operating systems and then dive into logging into iLO 7. Since iLO 7 introduces a new application account login method, I’ll also cover how iLOrest 6.0 fully supports this feature.
Let’s get started! 🚀
Installation
Linux:
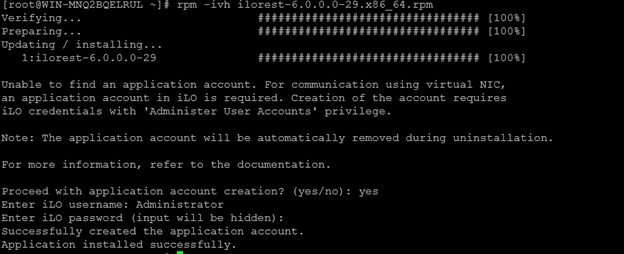
On Linux, iLOrest can be installed as an RPM package. If you already have a previous version installed, you can upgrade it using the -Uvh option. For a fresh installation, use:
rpm -ivh ilorest-6.0.x86_64.rpm
Here is a screenshot of a successful installation.
Application account creation during iLOrest installation
During the RPM installation of iLOrest 6.0, you might notice that the installer prompts for iLO credentials to create an Application account. While this step is optional, HPE strongly recommends creating the Application account during installation itself. Why?
The Application account provides an additional method for in-band authentication with iLO 7, enhancing security and flexibility.
Once created, the Application account allows you to log in without needing traditional credentials every time.
If you choose to skip this step, you can always create the Application account later using the following command:
ilorest appaccount create -u ilo-user -p password --self
By leveraging this new authentication method, managing iLO 7 becomes even more seamless!!!
Windows:
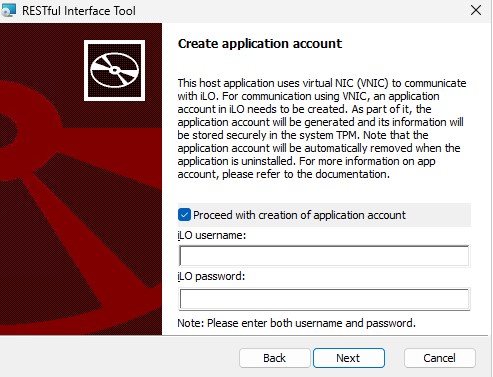
On Microsoft Windows, iLOrest is installed using an MSI package. During installation, a user interface will appear, prompting you to enter iLO credentials for the Application account creation. Just like on Linux, this step is optional but recommended by HPE, as the Application account allows for in-band authentication with iLO 7 without requiring traditional credentials. Here’s a screenshot of the Application account creation dialog box during installation:
All other OSes:
On operating systems like Ubuntu and the macOS, the iLOrest tool can be installed effortlessly via PyPI using the following command:
pip install ilorest
On VMware ESXi, it is installed using:
esxcli software component apply -d ilorest-component.zip
Creating an Application account
For these OSes, you can create an Application account using the following iLOrest command:
ilorest appaccount create -u ilo-user -p password --self
Logging into iLO 7
Once the Application account is created, you can perform an inband login with:
ilorest login
If you prefer to log in without using an Application account, you can opt for credential-based login instead:
ilorest login --no_app_account -u ilo-user -p password
Summary
In this guide, I have demonstrated how to install iLOrest 6.0 across different operating systems and leverage the new Application account login method introduced in iLO 7. Get started today! Download iLOrest, explore its exciting new features, and take full control of iLO 7 with ease.
For more information on HPE iLO, along with some tips and tricks in working with it, make sure you check out the HPE Developer blog regularly.
Related

Build your own iLO Redfish simulator
Jun 11, 2021
HPE iLOrest as a PyPI package
May 15, 2024
Setting Bios and Storage Controller Properties with Redfish
Jul 19, 2018Accessing iLO Redfish APIs and HPE OneView APIs on Ansible AWX
Feb 9, 2021Automate boot from SAN target configurations using Redfish
Jun 1, 2023Benefits of the Platform Level Data Model for Firmware Update Standard
Jun 7, 2022