HPE IoT Gateways enable organizations to rapidly acquire, analyze and take action on real-time data as it’s being collected for additional analysis at a later stage. Bringing computing and analytics close to the edge accelerates the speed of your decision-making and reduces the chance of lost opportunities or a missed red flag. In this post, I’ll be discussing the HPE GL20 IoT Gateway, a fun device for the edge. The HPE GL20 has an 8-bit digital input/output (DIO) capability designed specifically to address IoT needs. For detailed product information, check out the Quick Spec.
In this post, I would like to focus on the DIO capability and demonstrate how to develop using the digital input/output pin. After reading this tutorial, you will understand how to work with the DIO feature using Python. Two GitHub repositories shown below are highly related to this blog. Make sure you can access these:
• GitHub – helloezmeral/HPE-GL20-GPIO
• GitHub - helloezmeral/HPE-GL20-gRPC
The first repository contains information used for controlling input/output pins using Python directly, and the second repository is about wrapping the code into a gRPC service and preparing a docker image for developers to access DIO on the HPE GL20 easily.
Note: gRPC is a high-performance, open source universal RPC framework. This open source remote procedure call system was initially developed at Google in 2015.
Here we go. Let’s have some fun!
Potential use case
Digital input/output pins tend to be important for edge applications because they need to interact with microcontrollers, like IoT sensors or actuators, which may not have the ability to communicate wirelessly. It can be very handy to work with DIO. You can connect the output pin to LEDs for indication, relays, or even interrupt pins on microcontrollers to initiate an edge process.
For example, you can design an IoT device that sleeps all the time to reserve battery power and wake it up using output pins. Input pins on an HPE GL20 can be used to measure the environment or used as a hardware control button. A touch sensor that sends a signal high when touching the board, or a PIR sensor that sends a signal high when human passed by, can be easily integrated with HPE GL20. For example, if you want to design an edge device that detects any human that passes by and takes a photo of them and sends back to the cloud, HPE GL20 is a great device to use for achieving this target.
Demo
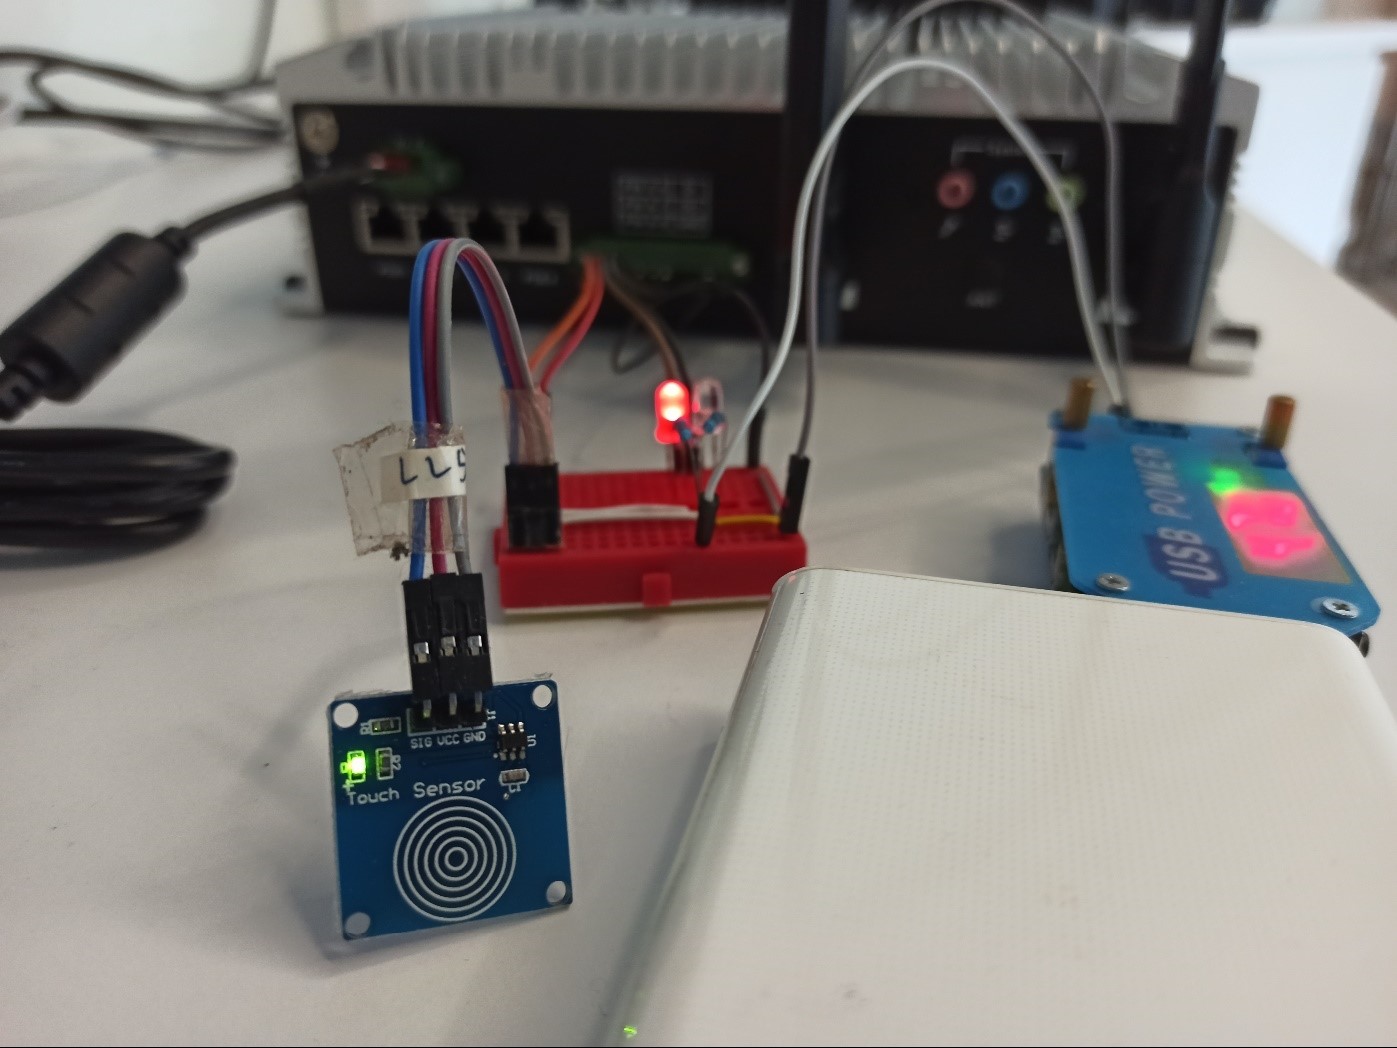
To illustrate how to use the DIO feature on an HPE GL20, I set up a touch sensor as the input to the HPE GL20 and two LEDs as the output. See the picture below:


DIO is enabled by an i2c device internally. Thus, we need to install an i2c environment before we can use it. In Bash, you may need to install with sudo apt install i2c-tools. In Python, you may need to install with sudo pip3 install smbus2. You'll need to determine which bus the i2c-gpio chip is connected to. Run sudo i2cdetect -l to obtain the bus number. After installing the complete package, you can start downloading the file pyGL20.py into the same folder as your Python script.
sudo apt install i2c-tools
sudo pip3 install smbus2
sudo i2cdetect -l
wget https://raw.githubusercontent.com/helloezmeral/HPE-GL20-GPIO/master/pyGL20.py
Before writing the script, we need to know how the circuit is routed internally. The setting of input pin is pull-up, which means that when nothing is connected to the pin, it will return a high signal. The output pin is configured as open collector, which means it controls the pins connect to the ground or not. In technical terms, this is referred to as output low or high-impedance. Now you can start writing your code. The syntax of writing GPIO code is highly similar to Arduino code. First, import the module with from pyGL20 import GPIO. Next, initiate the i2C bus communication channel. If your GPIO chip is connected to i2c-0, you should write IO = GPIO(0). Once this is done, you can control all pins with commands like IO.digitalWrite(IO.PIN6, True) to set pin6 output high, or IO.digitalRead(IO.PIN0) to read the level of pin0. In the Arduino world, you can see signature setup() and loop() functions. You can do the same thing here with the while(True): loop. Another useful feature in Arduino is delay(1000). This command creates a 1000ms delay of the processor. In Python, you can do a similar thing with importing the time module and calling time.sleep(1) for sleeping one second.
You can find more information about this in this repository:# blink.py from pyGL20 import GPIO import time """ Please run :: sudo i2cdetect -l :: to find the coresponding i2c-x bus of "SMBus I801 adapter at f040" replace the number x of the below variable. """ IO = GPIO(0) # This means i2c-0 while True: print(IO.digitalWrite(IO.PIN6, True)) time.sleep(0.1) print(IO.digitalWrite(IO.PIN(6), False)) # both work time.sleep(0.1)
https://github.com/helloezmeral/HPE-GL20-GPIO
Using gRPC service
To further assist you in writing a GPIO application, I have prepared a docker-compose file that you can use to deploy a gRPC server to control digital I/O pins within a second. gRPC is a modern open-source high performance RPC framework. With this service installed, you can control the GPIO of an HPE GL20 over the network. I have prepared all necessary files below in a Github release which includes a docker-compose yaml file and two gRPC code files. GL20_pb2.py contains generated request and response classes and GL20_pb2_grpc.py contains our generated client and server classes.
I have prepared all necessary files here in a GitHub release which includes a docker-compose yaml file and two gRPC code files.
First, set up the gRPC service on the HPE GL20. Download the file docker-compose.yaml and run it as docker-compose up/docker-compose up -d (i.e.: flag d represents detached mode). Hooray! You just deployed a gRPC service for controlling the HPE GL20 GPIO.
The next step prepares the required file for the client call. GL20_pb_2.py and GL20_pb2_grpc.py is required since it contains code used to define the calling procedure and information exchange. The syntax of controlling the GPIO pins is nearly the same as the first one. You can read the example code in gRPC folder of the repository shown below.
You can read the example code in gRPC folder of the GitHub repository here. This is the docker image for gRPC microservice for you to use the GPIO of the GL20.
Summary
In this tutorial, I have shown you two ways to write a simple Python script to access HPE GL20 DIO. The first way utilizes Bash utility named i2c-tools and Python module called smbus2 to access the DIO directly. This is suitable for those who want to take all control of your code. I have also prepared a second way for you with an easy-to-use gRPC service docker image exposing DIO over network. You can control DIO within the same device or in the cloud remotely.
I just wanted to note that using time.sleep(1) as a delay is not always a wise option when it comes to writing an embedded application. During delay, Python does nothing but wait one second, which causes inefficiency in your code. Concurrency in Python like threading or multiprocessing is recommended. However, this really isn't today's topic. If you want to learn more about this, you might want to check out these blog posts on Python Concurrency.
• HPE Developer | Understanding Concurrency in Python Part 1 – Threading
• HPE Developer | Understanding Concurrency in Python Part 2 – Multiprocessing
• HPE Developer | Understanding Concurrency in Python Part 3 – Asyncio
• concurrent.futures — Launching parallel tasks
Another quick note for you: sometimes you might require serial/USART communications with other devices. A Python module called PySerial is handy for dealing with serial communications.
There are numerous features on HPE GL20. I'll just stop here in my discussion of the digital input/output capability of HPE GL20. I hope you enjoyed my tutorial on how to use DIO with the HPE GL20 and find many great ways to apply this feature. If you have any questions regarding this blog post, you can drop a message to me. My email is: cenz@hpe.com . Or reach me via HPE DEV slack workspace: @hpe.cenz. Happy hacking.
Related