Deploying a Small Language Model in HPE Private Cloud AI using a Jupyter Notebook
February 20, 2025Deploying new language models for users to interact with can be challenging for beginners. HPE developed Private Cloud AI to help users set up and implement AI solutions quickly and easily.
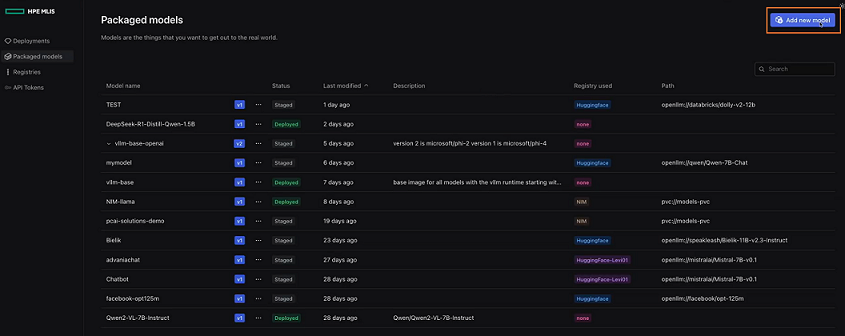
In this post, we will show how to use the HPE Machine Learning Inference Service (MLIS) as a part of HPE Private Cloud AI to add a new packaged model from a Hugging Face repository and create an endpoint to query the model. This is done using a Jupyter Notebook.
Prerequisites
This tutorial uses the HPE Private Cloud AI (PCAI) platform. A PCAI system is required for these steps to work. It is assumed that the PCAI system is physically installed, patched and running with user accounts provisioned.
Steps to deploy
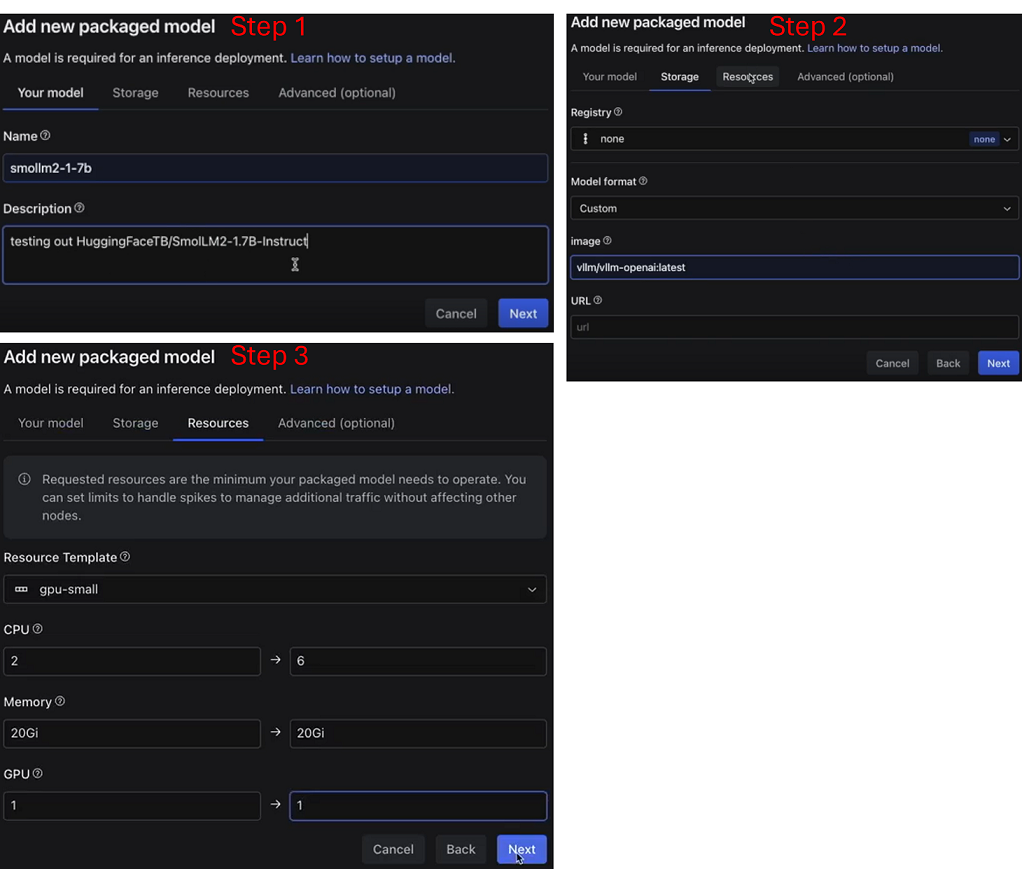
First, you will need to choose a model to deploy. In this case, we've chosen a model hosted on Hugging Face called SmolLM2 1.7B. This is a compact model that can solve a wide range of problems even though it is relatively diminutive at 1.7B parameters.
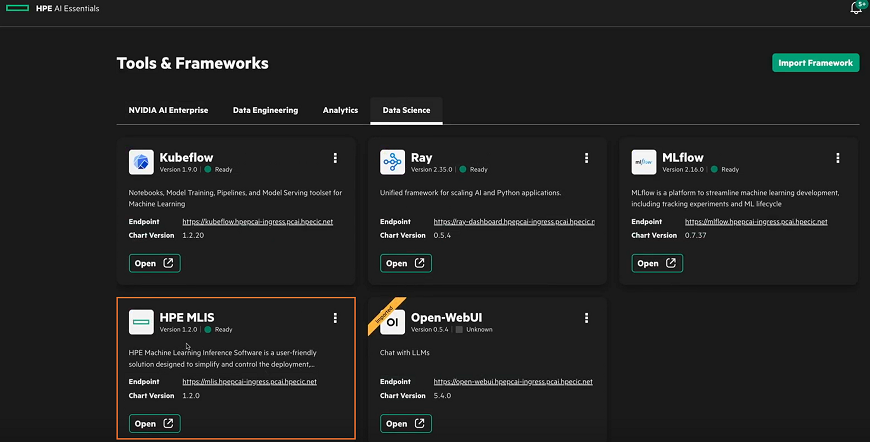
Launching the interface
Next select "Add new model".
This brings up the "Add new packaged model" dialog box. Fill in the the name of the model, storage requirements, and resources. We have reduced the default resources, given that this is a small model.
Once the package is set up, you will receive a confirmation.

With the new packaged model complete, you will need to deploy it for use. Select "create new deployment" from the HPE MLIS "Deployments" tab. Select submit when all tabs are filled out as shown below.
This will create an endpoint for use in the notebook and provide an API token.
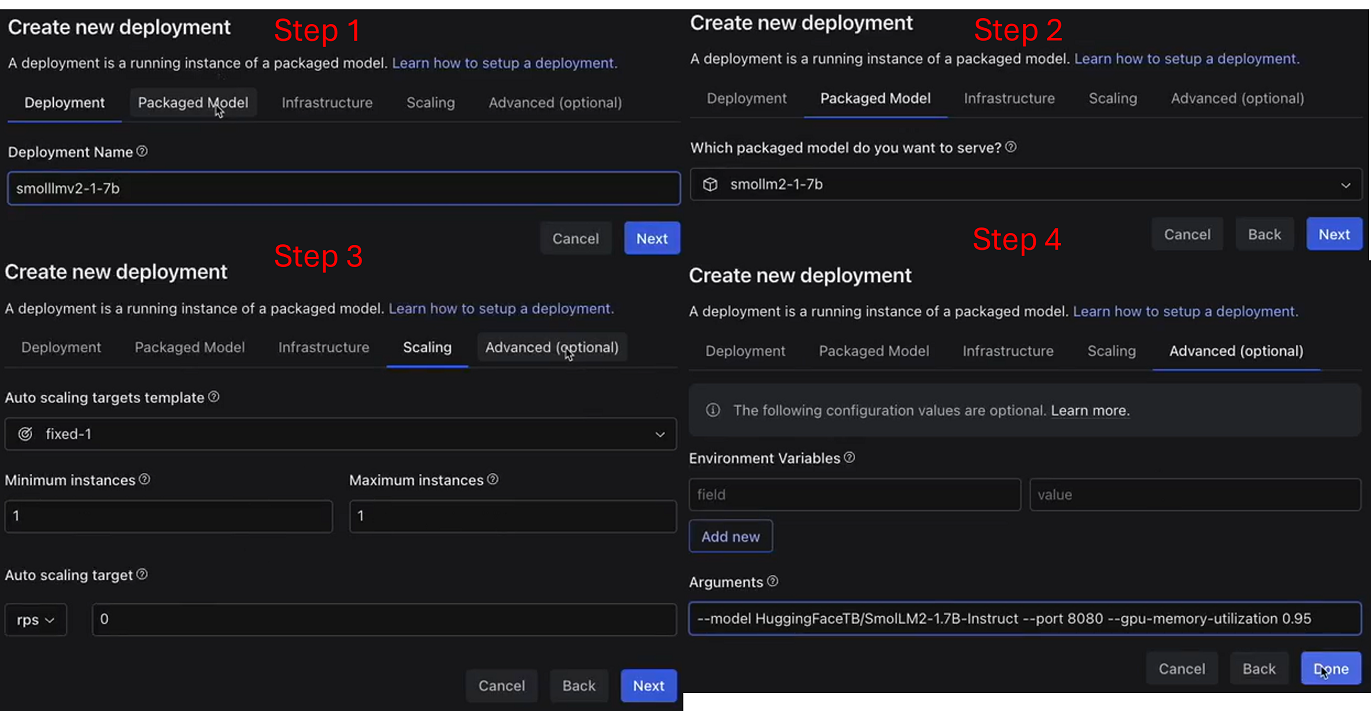
When the process is complete, an endpoint will be provided.

Next up, let's take the now deployed model that's ready for inference and connect to it and interact with it from a Jupyter Notebook.
Building the Jupyter Notebook
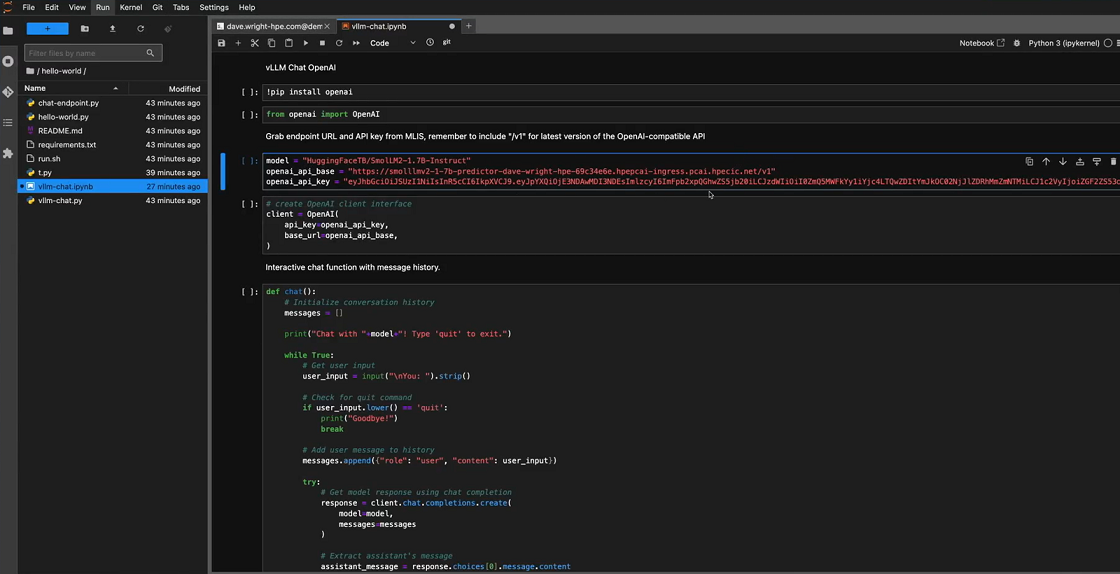
First, install openai if you do not already have it and import.
# vLLM Chat OpenAI
# !pip intall openai
from openai import OpenAI
Then, using the endpoint and key generated by HPE MLIS, enter them into your Jupyter Notebook. Be sure to append /v1 to the URL.
# Grab endpoint URL and API key from MLIS, remember to include "/v1" for latest version of the OpenAI-compatible API
model = "HuggingFaceTB/SmolLM2-1.7B-Instruct"
openai_api_base = "https://smollm2-1-7b-vllm-predictor-dave-wright-hpe-1073f7cd.hpepcai-ingress.pcai.hpecic.net/v1"
openai_api_key = "eyJhbGciOiJSUzI1NiIsInR5cCI6IkpXVCJ9.eyJpYXQiOjE3Mzk5MzgzMzAsImlzcyI6ImFpb2xpQGhwZS5jb20iLCJzdWIiOiI5MjNhM2JhOC1mMGU4LTQxOTQtODNkMS05ZWY4NzNjZGYxOWYiLCJ1c2VyIjoiZGF2ZS53cmlnaHQtaHBlLmNvbSJ9.YwH9gGPxTWxy4RSdjnQA9-U3_u7P0OIcarqw25DV8bOiftU1L4IvvyERHspj2lMGtZWbff1F3uh84wjAePHaHDcDTLoGtq6gJYwo_qRU03xV8Q2lwBetCCLUE4OHqS608gjJ-j1SLyqwxFxlXkqMOtnBY5_nswlAwCzHV28P8u8XxxfWuXFmoJpSA1egCWVVfEoTuK8CTz9kUJJ5opSp6m8qdqJmC2qxH0igcpKmL2H_MZ-62UHfEf240VRtc0DRNlOjeCoDM79aVPs3SjCtGeVkeEHimJwJbfGFIcu3LibX3QjbABUzWb5BPPZjzyEYUVM5ak12_sJ8j1mUW-r0sA"
You will now need to create an OpenAI client interface.
# create OpenAI client interface
client = OpenAI(
    api_key=openai_api_key,
    base_url=openai_api_base,
)
In order to interact with the model, you will need to create a chat function. For the purposes of our example, let's give it a history feature as well as basic chat.
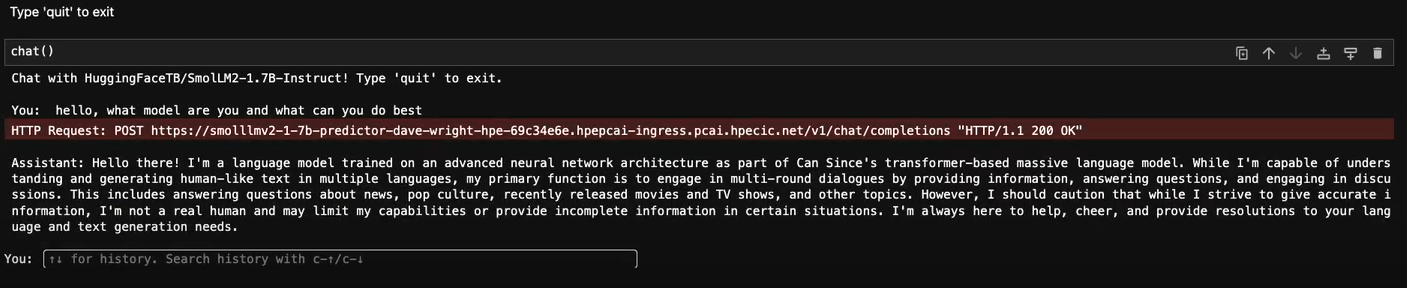
# Interactive chat function with message history.
def chat():
    # Initialize conversation history
    messages = []

    print("Chat with "+model+"! Type 'quit' to exit.")

    while True:
        # Get user input
        user_input = input("\nYou: ").strip()

        # Check for quit command
        if user_input.lower() == 'quit':
            print("Goodbye!")
            break

        # Add user message to history
        messages.append({"role": "user", "content": user_input})

        try:
            # Get model response using chat completion
            response = client.chat.completions.create(
                model=model,
                messages=messages
            )

            # Extract assistant's message
            assistant_message = response.choices[0].message.content

            # Add assistant's response to history
            messages.append({"role": "assistant", "content": assistant_message})

            # Print the response
            print("\nAssistant:", assistant_message)

        except Exception as e:
            print(f"\nError: {str(e)}")
Once this is done, you can interact with the model through a simple chat.
You can access this link to see a recorded demonstration that shows this process in real time.
Summary
With HPE Private Cloud AI, loading new models into the system and providing endpoints is just a few simple clicks and easily integrates with popular tools like Jupyter Notebooks. To learn more about HPE Private Cloud AI, please visit: https://www.hpe.com/us/en/private-cloud-ai.html
Related
Artificial Intelligence and Machine Learning: What Are They and Why Are They Important?
Nov 12, 2020Bringing AI assistants to GreenLake with MCP Servers
Dec 3, 2025Closing the gap between High-Performance Computing (HPC) and artificial intelligence (AI)
Sep 15, 2023Demystifying AI, Machine Learning and Deep Learning
Nov 25, 2020Distributed Tuning in Chapel with a Hyperparameter Optimization Example
Oct 9, 2024End-to-End Machine Learning Using Containerization
Feb 5, 2021
Experimenting with the Model Context Protocol and Chapel
Aug 28, 2025