A guide to enabling a managed Istio service mesh in a Kubernetes cluster on HPE GreenLake for Private Cloud Enterprise
February 16, 2023Introduction
In this blog post, we demonstrate how an end user can deploy a containerized application or a managed service on a Kubernetes-based container stack using the cluster add-on feature provided by HPE GreenLake for Private Cloud Enterprise: Containers and then access it over an external network or internet. The containers service evaluates the user’s environment and makes add-ons available to the user so that they can add the containerized application or managed service to the cluster as required.
For those of you who may be unfamiliar with the term, a Service mesh is a network of microservices that consist of distributed applications and communications between those applications. It is a dedicated infrastructure layer that facilitates service-to-service communications routed through the proxy, ensuring secure communication.
Istio is an open-source service mesh that provides a platform for distributed applications that includes API integrations with logging, telemetry, or policy systems. It provides a uniform and more efficient way to secure, connect, and monitor services. Istio automatically manages load balancing for HTTP, gRPC, WebSocket, and TCP traffic. For details, see The Istio service mesh.
Enabling Istio service mesh add-on from a cluster
Step-1: Create a Kubernetes cluster from the containers page
To create a cluster, you must have been assigned the roles of Private Cloud Cluster Owner and Private Cloud Widget Viewer.
- From the Containers main page, under the Clusters tab, click Create Cluster.
- In the Create Cluster form, provide the cluster name 'hpe', and select the standard cluster blueprint. The new cluster appears in the list of clusters.
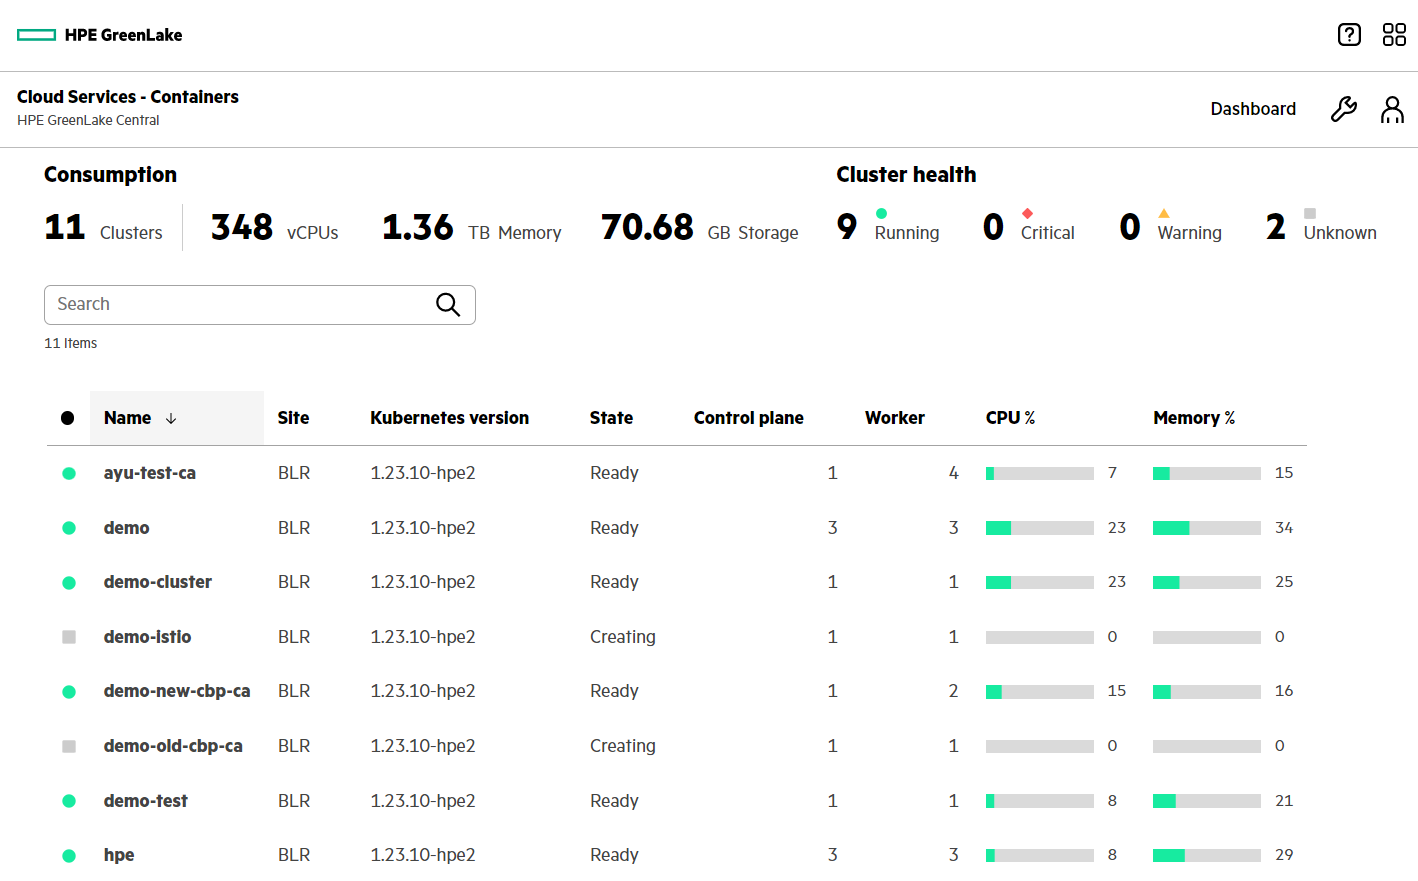
As indicated above, there are multiple clusters deployed in parallel for multiple purposes. For the Istio service mesh add-on enablement/deployment in our example, we are using a cluster created with the name "hpe".
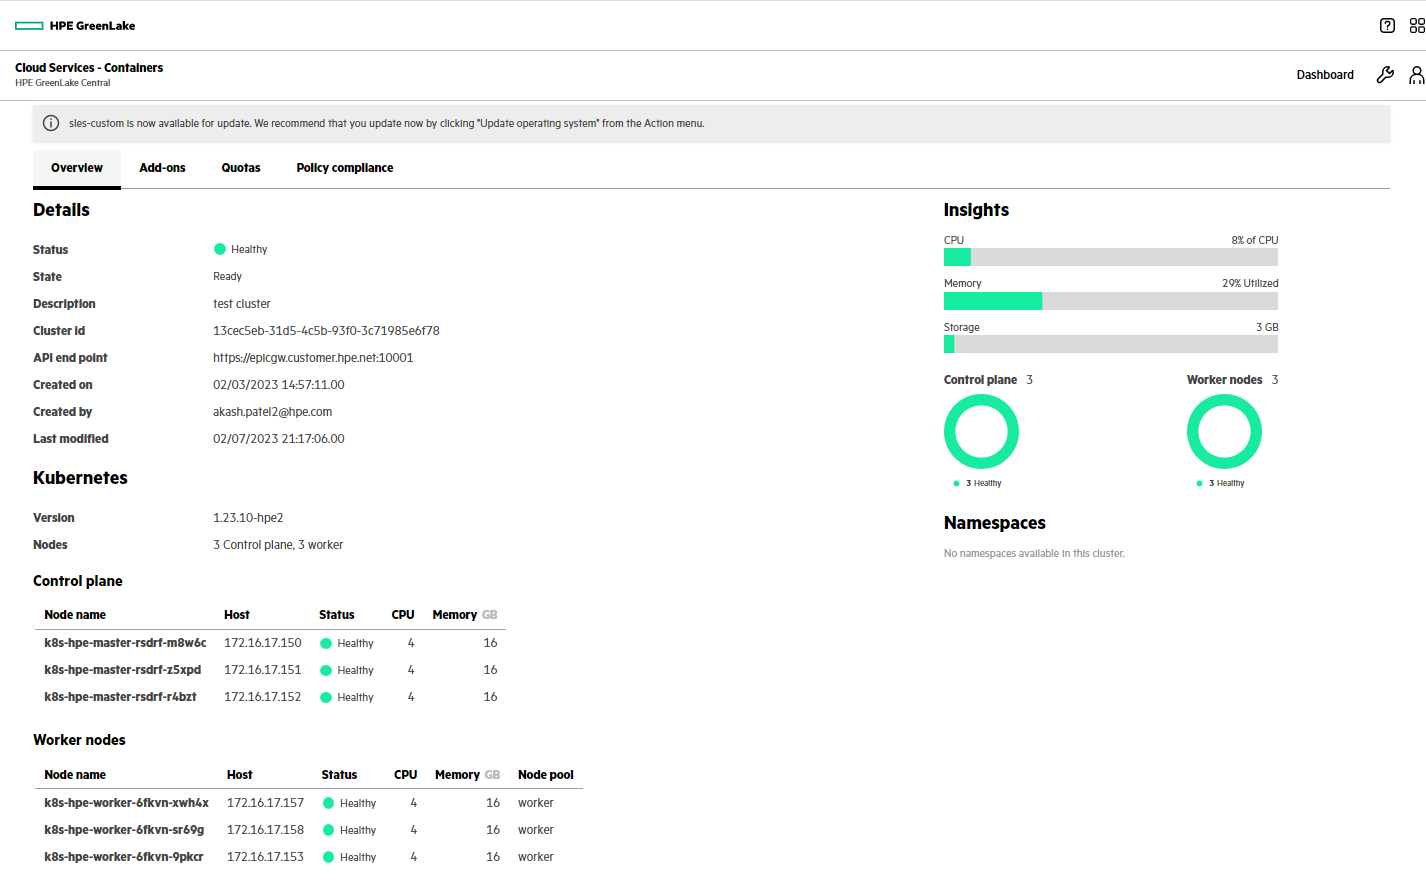
Step-2: Enabling an add-on from a cluster
- On the Containers main page, click a cluster row to open the cluster details screen.
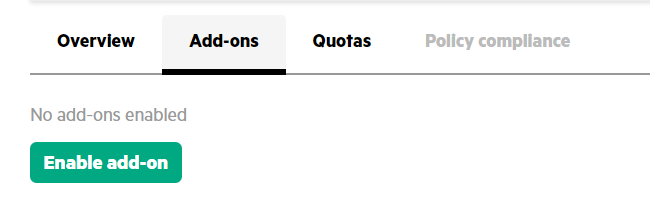
- On the cluster details screen, click the Add-ons tab.
- Click Enable add-on if no add-ons are enabled or click Enable another add-on.
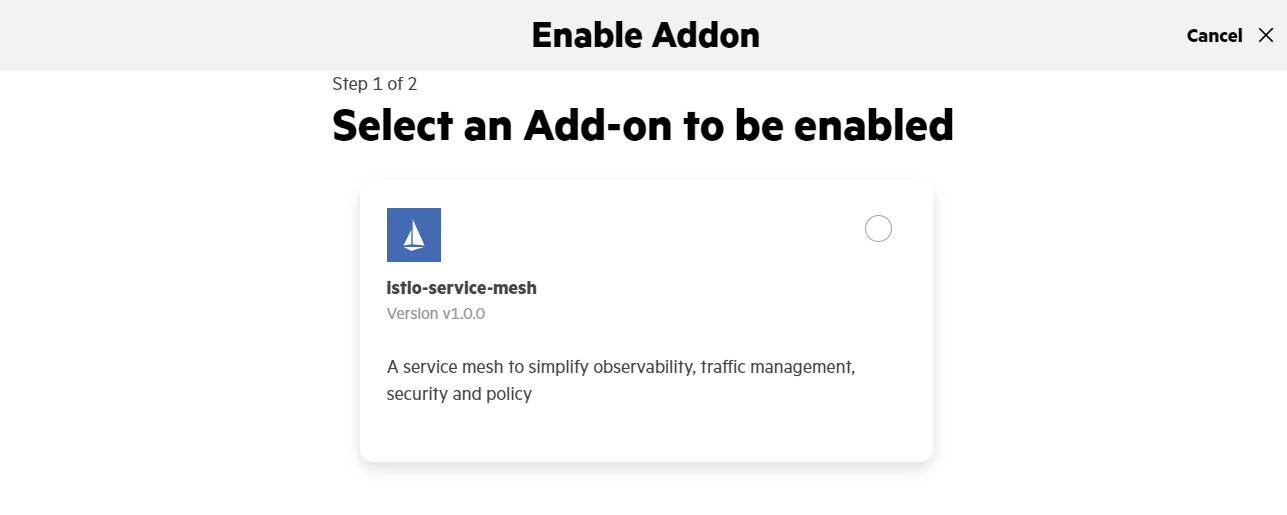
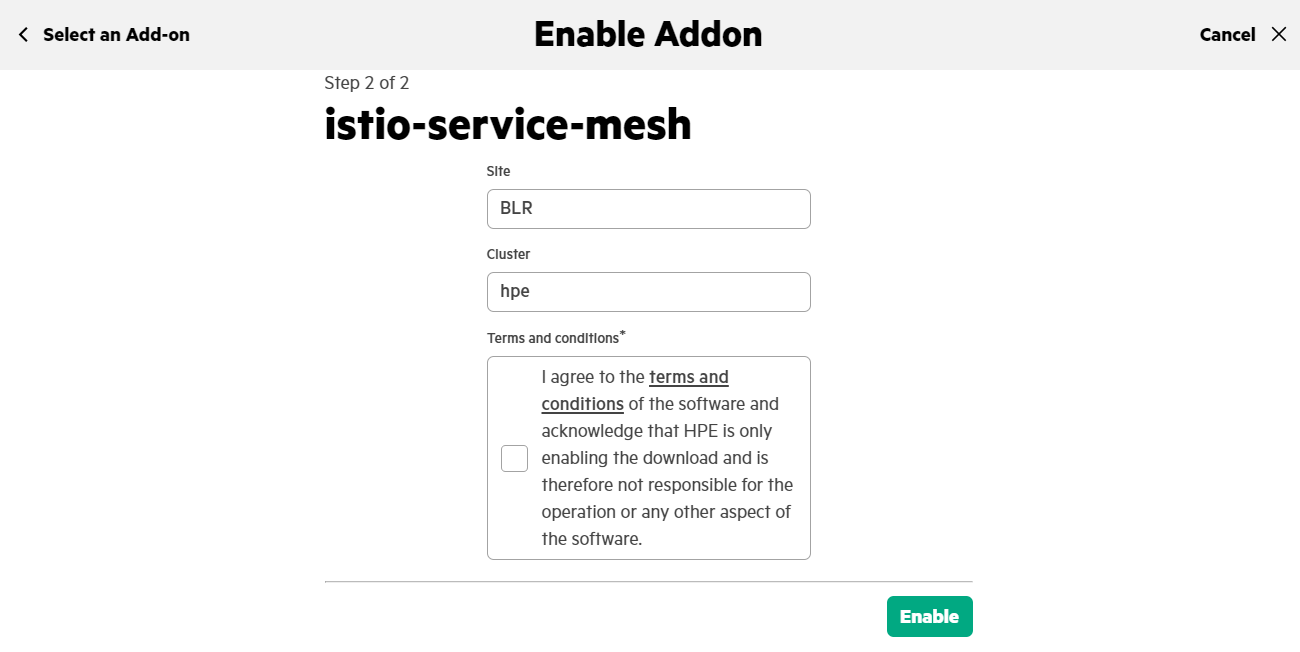
- In the Enable Addon wizard, select the Istio-service-mesh add-on and click Next.
- Provide the values for the fields that appear for the selected add-on, read and accept the license agreement, and click Enable.
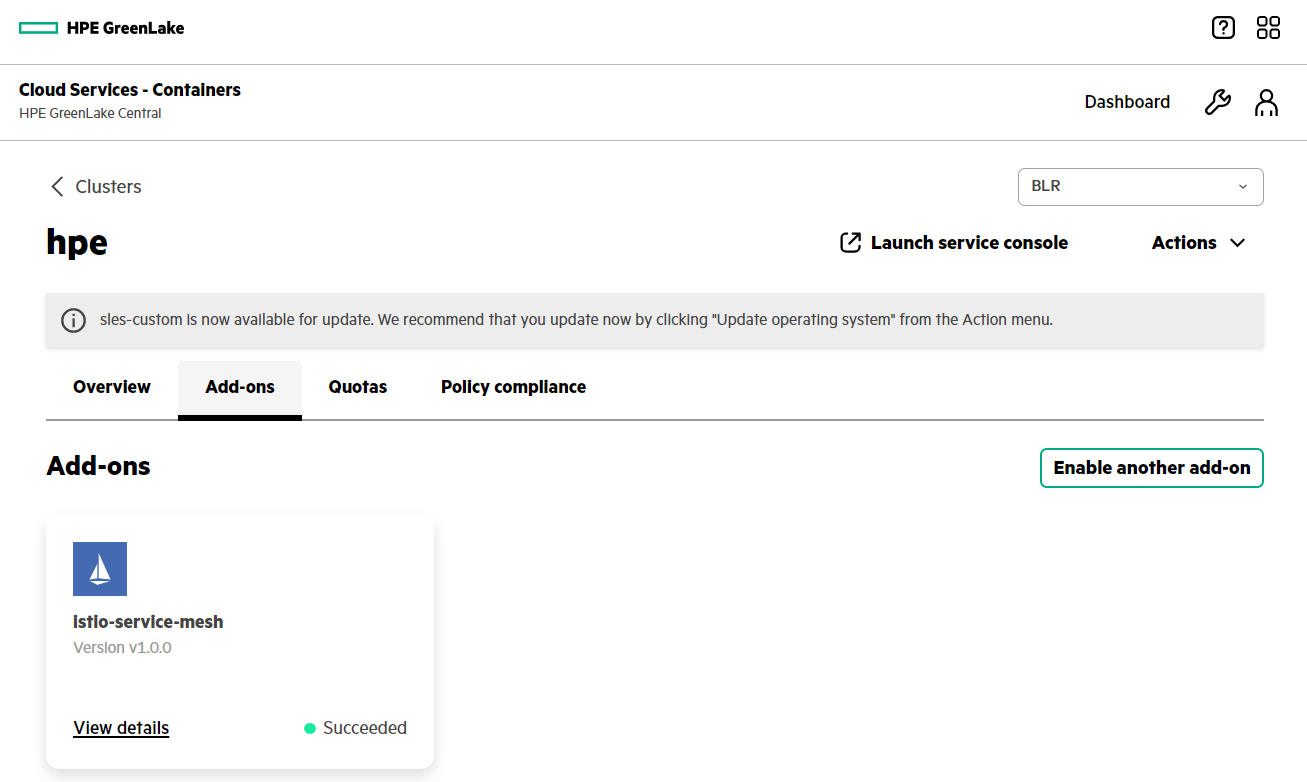
- After successful add-on enablement, add-on status will get updated to 'succeeded'.
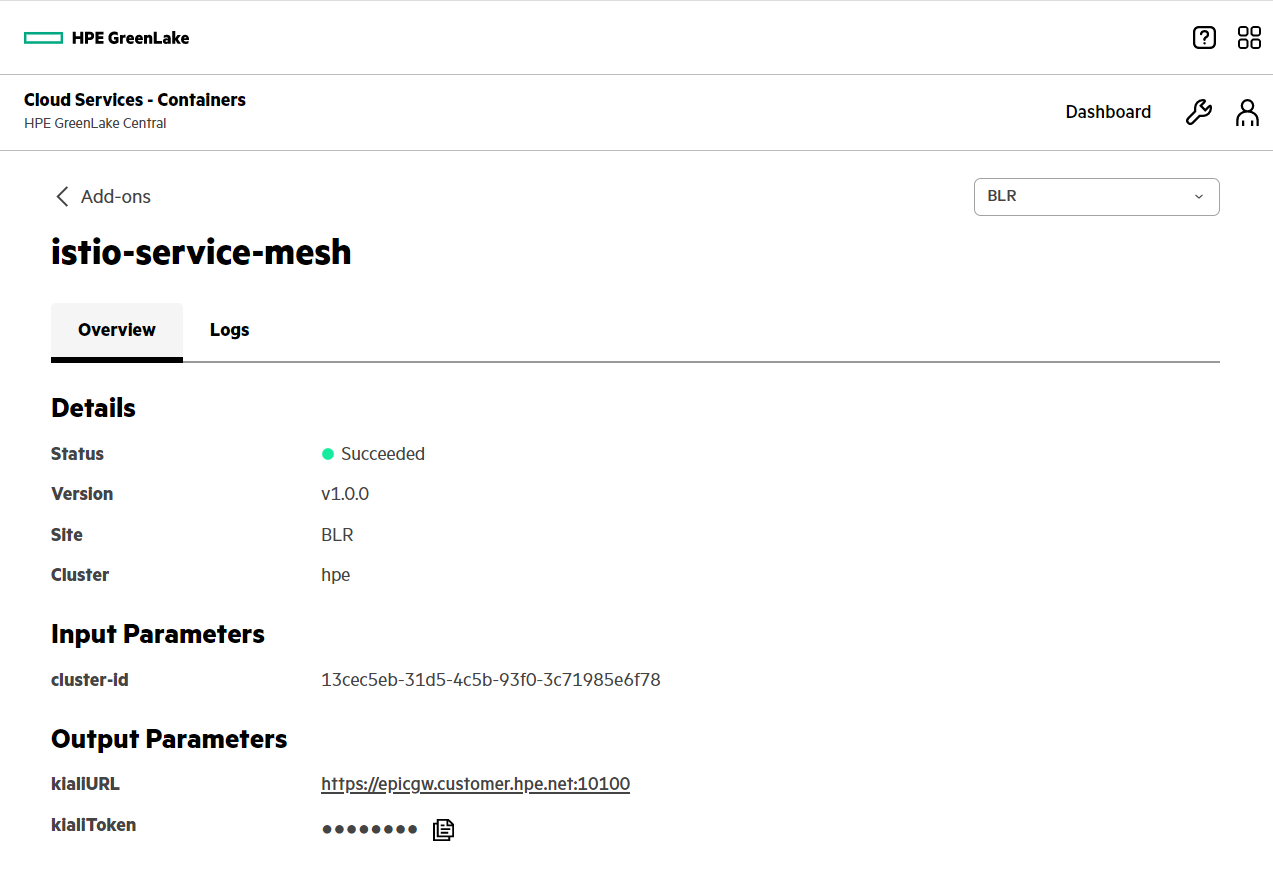
- View the details of the add-on that you just enabled.
Step-3: Launching the Kiali dashboard - the console for Istio service mesh
Kiali is an open-source project that provides observability for the Istio service mesh.
From the Overview tab, click the KialiURL link and use the Kiali token.
The Kiali dashboard launches in a new web page.
Note: The URL for the Kiali console might be different in your environment.
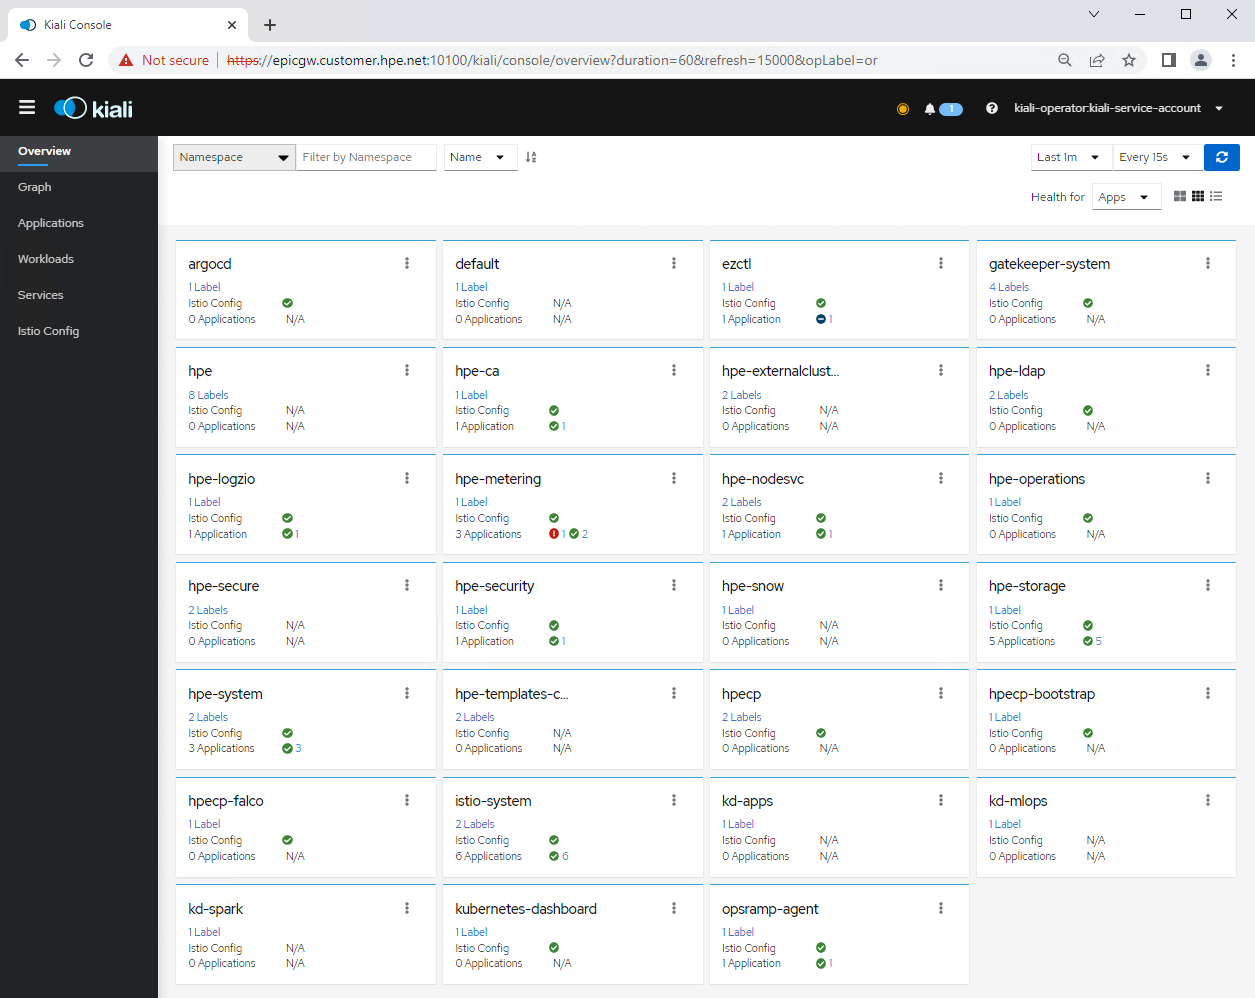
Note: To take advantage of the Istio features, pods in the mesh must be running an Istio sidecar proxy. Injection of the proxy can be done either on a per-pod basis or at namespace level. To enable side car injection, refer to the setup instructions. For information about using Kiali, see the Kiali documentation.
Step-4: Download scoped kubeconfig from the container platform page
- From the Clusters tab, select the 'hpe' Kubernetes cluster and click Launch Service Console. This will direct you to the container platform page.
- Click on Download kubeconfig.
Note: Launching the service console from HPE GreenLake Central is configured through SAML SSO and adds a session token to the kubeconfig file. You will need to download the kubeconfig file again if you want to continue to access the cluster when the session token expires after an hour.
Step-5: Deploying a sample Istio application: Bookinfo
This procedure follows the standard Istio documentation to deploy a sample application. To know more about Bookinfo Application, see the Istio documentation.
Use the following commands to create the namespace and label for Istio sidecar proxy injection to deploy the application in the bookinfo namespace.
$ kubectl create namespace bookinfo
namespace/bookinfo created

$ kubectl label namespace bookinfo istio-injection=enabled
namespace/bookinfo labeled

$ kubectl get namespace bookinfo --show-labels
NAME       STATUS   AGE    LABELS
bookinfo   Active   105s   gl.hpe.com/namespaceid=10d70074-0c2b-4221-804e-1437ed1842ca,hpe.com/cluster=stub,hpe.com/namespacetype=Tenant,hpe.com/tenant=bookinfo,hpe.com/version=6.2.0,hpecp.hpe.com/hpecptenant=hpecp-tenant-106,istio-injection=enabled,kubernetes.io/metadata.name=bookinfo,serving.kubeflow.org/inferenceservice=enabled
Deploy the Bookinfo application using the YAML manifest file i.e. services/istio/release-1.16/samples/bookinfo/bookinfo.yaml from the Github repository.
$ kubectl apply -f bookinfo.yaml -n bookinfo
service/details created
serviceaccount/bookinfo-details created
deployment.apps/details-v1 created
service/ratings created
serviceaccount/bookinfo-ratings created
deployment.apps/ratings-v1 created
service/reviews created
serviceaccount/bookinfo-reviews created
deployment.apps/reviews-v1 created
deployment.apps/reviews-v2 created
deployment.apps/reviews-v3 created
service/productpage created
serviceaccount/bookinfo-productpage created
deployment.apps/productpage-v1 created
Confirm all pods and services are deployed successfully.
$ kubectl get pods,services -n bookinfo
NAME                             READY   STATUS    RESTARTS   AGE
details-v1-698b5d8c98-qglhw      2/2     Running   0          6m17s
productpage-v1-bf4b489d8-bkpdm   2/2     Running   0          6m17s
ratings-v1-5967f59c58-28kc5      2/2     Running   0          6m17s
reviews-v1-9c6bb6658-mw2df       2/2     Running   0          6m17s
reviews-v2-8454bb78d8-p4h9d      2/2     Running   0          6m17s
reviews-v3-6dc9897554-g7xqh      2/2     Running   0          6m17s

NAME          TYPE        CLUSTER-IP       EXTERNAL-IP   PORT(S)    AGE
details       ClusterIP   10.98.141.15     <none>        9080/TCP   14m
productpage   ClusterIP   10.104.123.90    <none>        9080/TCP   6m45s
ratings       ClusterIP   10.108.60.57     <none>        9080/TCP   6m46s
reviews       ClusterIP   10.106.208.181   <none>        9080/TCP   14m
Configure the service to access the application outside of the cluster.
- Edit the deployed service productpage.
- Change service type from ClusterIP to NodePort.
- Add the label hpecp.hpe.com/hpecp-internal-gateway=true. The service will be automatically mapped/exposed to a Container platform gateway host with an assigned port.
$ kubectl describe svc productpage -n bookinfo
Name:                     productpage
Namespace:                bookinfo
Labels:                   app=productpage
                          hpecp.hpe.com/hpecp-internal-gateway=true
                          service=productpage
Annotations:              hpecp-internal-gateway/9080: epicgw.customer.hpe.net:10072
Selector:                 app=productpage
Type:                     NodePort
IP Family Policy:         SingleStack
IP Families:              IPv4
IP:                       10.104.123.90
IPs:                      10.104.123.90
Port:                     http  9080/TCP
TargetPort:               9080/TCP
NodePort:                 http  31766/TCP
Endpoints:                10.192.3.181:9080
Session Affinity:         None
External Traffic Policy:  Cluster
Events:
  Type    Reason  Age   From         Message
  ----    ------  ----  ----         -------
  Normal  HpeCp   21s   hpecp-agent  Created HPECP K8S service
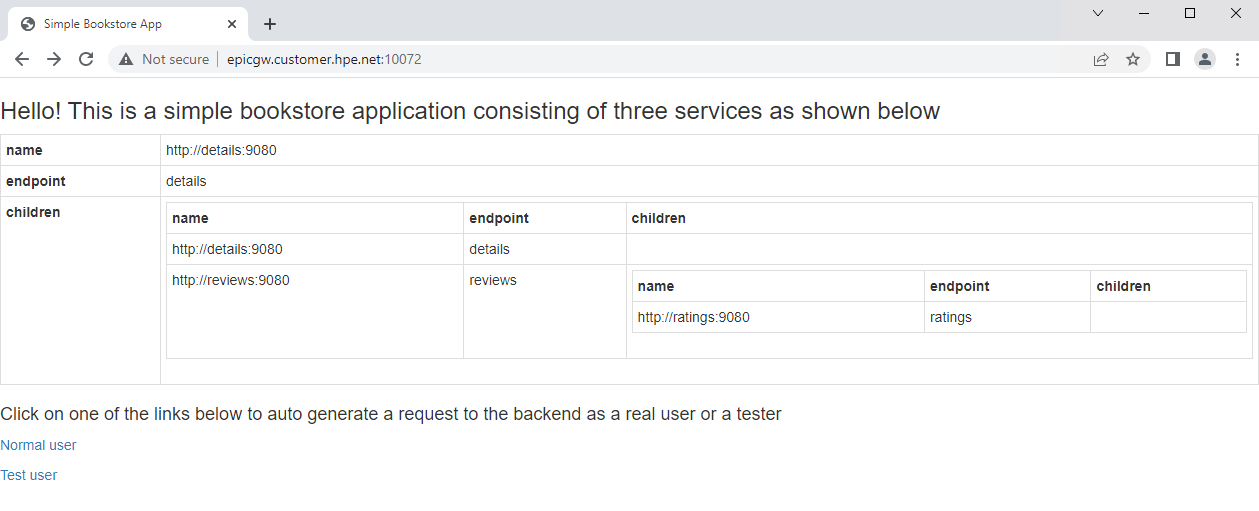
Confirm the application is accessible from outside the cluster.
The Bookinfo application productpage can be accessed in the browser by typing the URL http://epicgw.customer.hpe.net:10072
Note : The above URL might be different in your environment. You can form the URL by referencing annotations from the productpage service.

Monitor the sample application using the Kiali dashboard
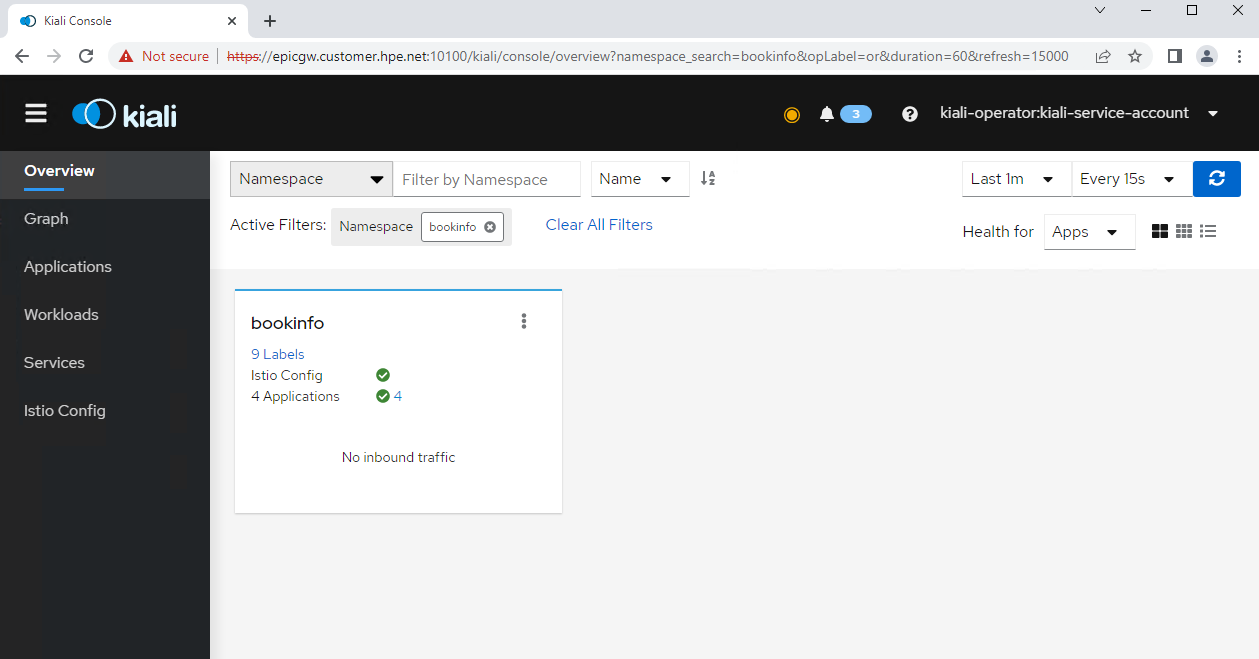
Enter bookinfo into the field Filter by Namespace. The Kiali overview screen displays the details about the namespace bookinfo. It shows that 4 applications are running in the namespace bookinfo with no inbound traffic.
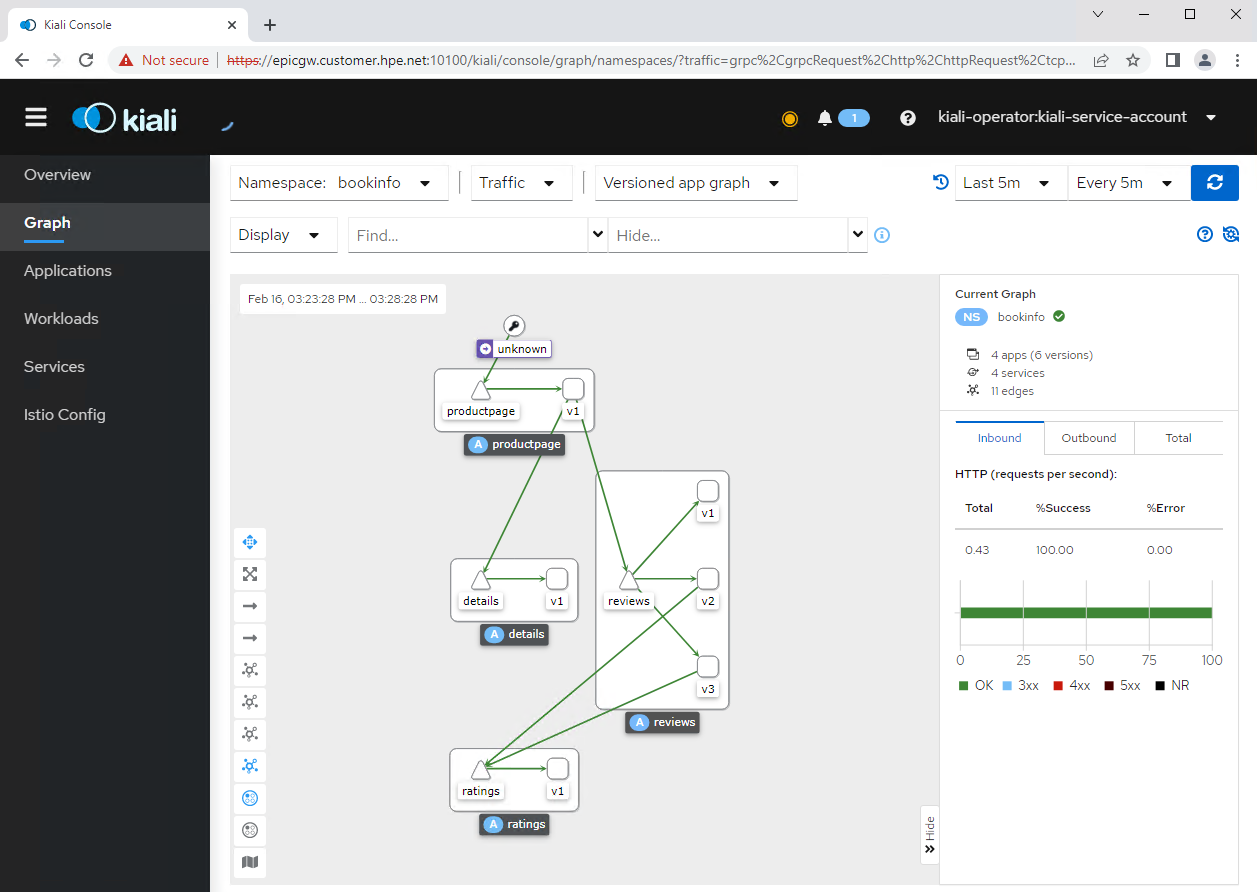
In the Graph tab from the left navigation menu, after selecting the namespace bookinfo, the screen shows an overview topology of the Bookinfo application.
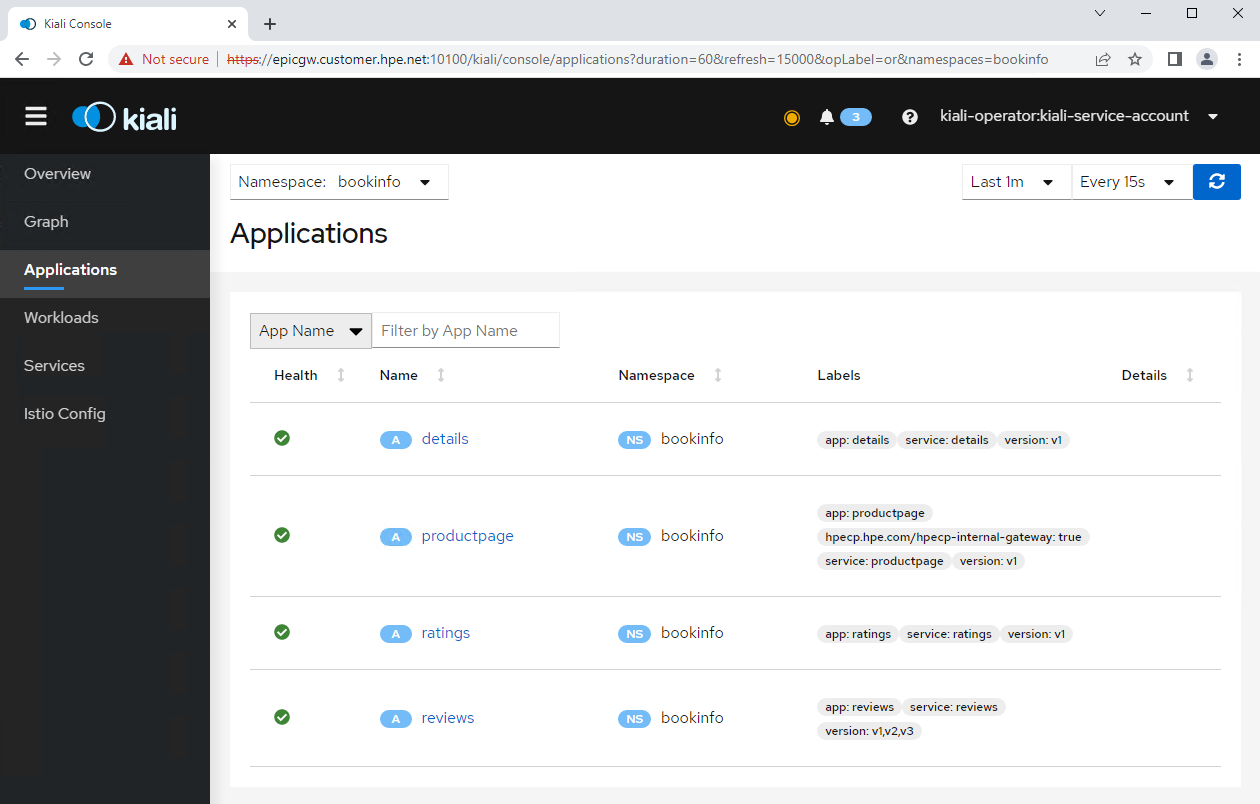
In the Applications tab from the left navigation menu, after selecting the namespace bookinfo, the screen shows application details of the Bookinfo application.
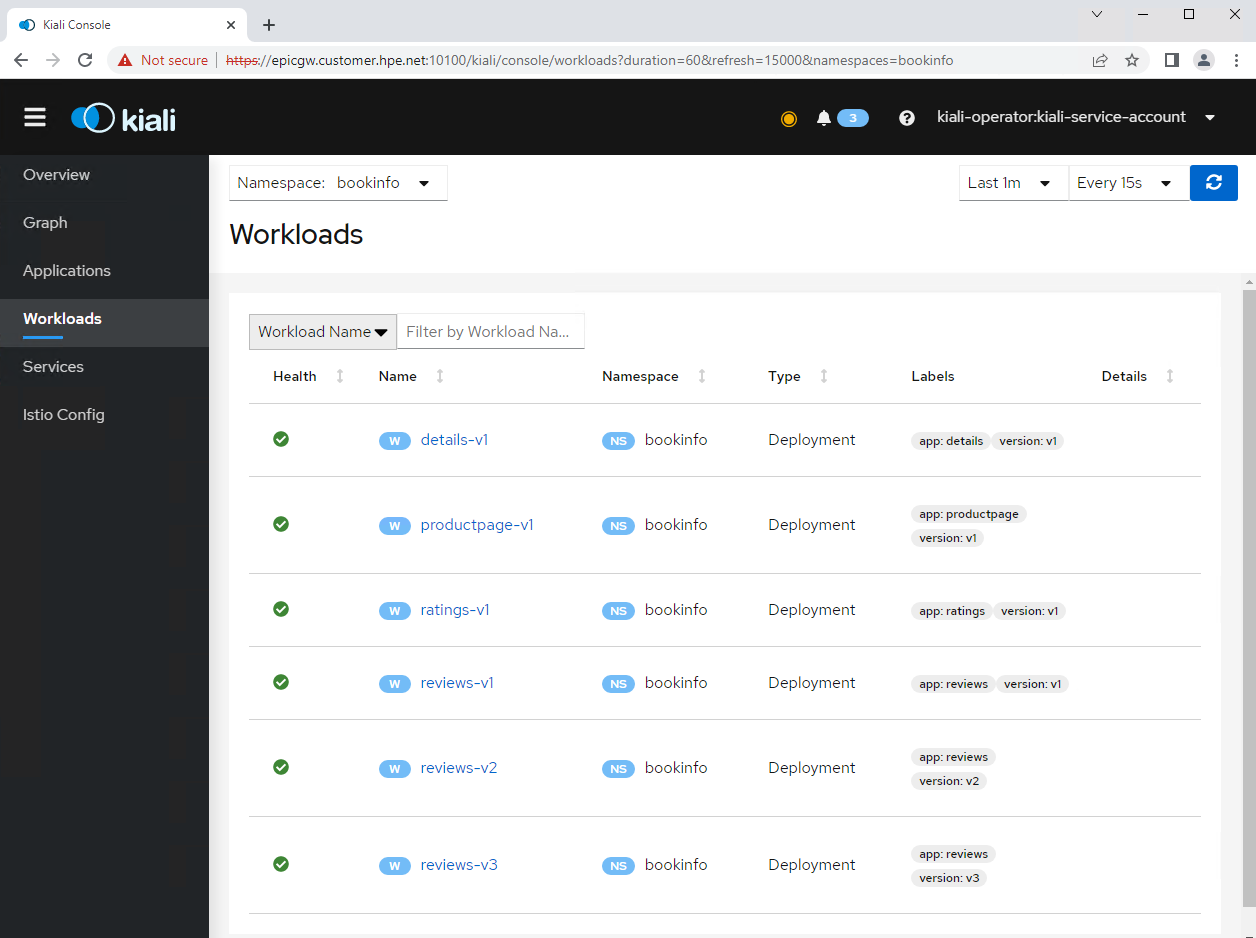
In the Workloads tab from the left navigation menu, after selecting the namespace bookinfo, the screen shows deployment details of the Bookinfo application.
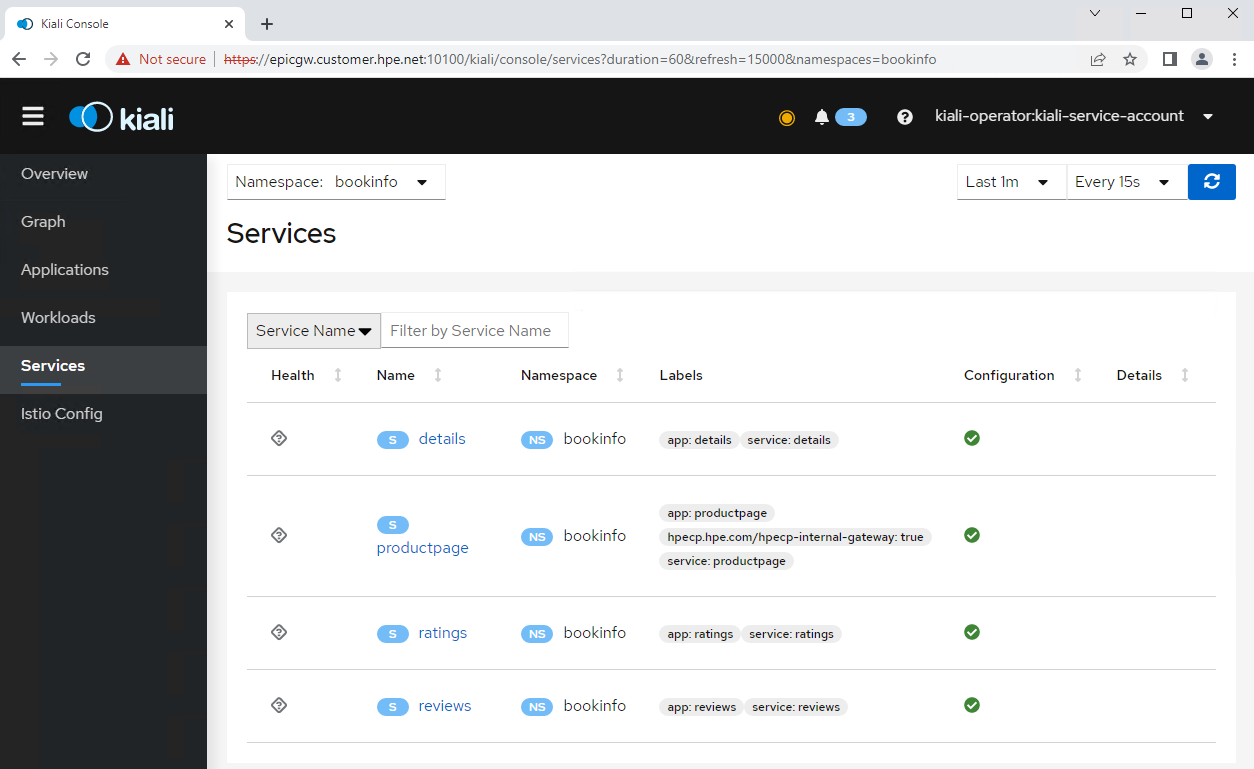
In the Services tab from the left navigation menu, after selecting the namespace bookinfo, you can check all the services details of the Bookinfo application.
Summary
You can find the GitHub repository that hosts demo code here.
We hope that this blog post has provided you with enough information for you to get started deploying containerized application or a managed service i.e. Istio service mesh on a Kubernetes-based container stack using the cluster add-on feature provided by HPE GreenLake for Private Cloud Enterprise: Containers.
To view more articles and tutorials on the use of the HPE GreenLake for Private Cloud Enterprise, refer to the HPE Developer Community blog.
Tags
Related
A guide to deploying MongoDB applications using HPE GreenLake for Private Cloud Enterprise
Dec 1, 2022Federating SPIRE on HPE GreenLake for Private Cloud Enterprise
May 15, 2023Using HPE GreenLake Console's API Gateway for Data Services Cloud Console
Nov 30, 2021Automate ITOps: announcing foundational APIs for the HPE GreenLake edge-to-cloud platform
Dec 1, 2023
Bare metal provisioning on HPE GreenLake using Terraform
Mar 20, 2023
Bulk onboarding of users in HPE GreenLake edge-to-cloud platform
Apr 24, 2024